Are you an engineer looking to make your work simpler?
Are you worried about how to make the process design simpler? All you might need is a PCB to help you out, helping you put the human element into the process and procedure.
In this guide, I will walk you through how you could download the Eagle PCB you need, go about the installation, and convert Eagle schematics to PCB.
Contents
- 1. Eagle PCB Download
- 1.1 Eagle PCB Design Software
- 1.2 Benefits of Eagle Solution from Autodesk
- 1.2.1 Supports Multiple Platform
- 1.2.2 Lightweight
- 1.2.3 Free License and Low Cost
- 1.2.4 Extensive Community Support
- 2. Download Eagle PCB/ Eagle PCB tutorial
- Download Eagle PCB
- 2.1 System Requirements
- 2.1.1 Windows
- 2.1.2 Mac
- 2.1.3 Linux
- 2.1.4 Eagle PCB Download Process
- 2.1.5 Eagle Standard
- 2.1.6 Eagle Premium
- 3. Is Eagle PCB free?/ Eagle PCB Design Software Full Version Free Download Crack
- 3.1 Limitations of Free Version of Eagle
- 3.2 Eagle Full Version Crack
- 4. Eagle PCB Software Download
- Install Eagle Solution on Windows
- Install Eagle on Mac
- 5. How to make a PCB in Eagle?
- 9 Tips for Converting EAGLE Schematics To PCB
- 5.1 Select From Eagle Schematic to Switch to the Board Option
- 5.2 Move Eagle Schematic Components to Eagle PCB Legal Area
- 5.3 Adjust the Eagle PCB Outline According to Your Requirements
- 5.4 Place Components on Blank Eagle PCB
- 5.5 Check Signals for Routing and Load Design Rules in Eagle Board
- 5.6 Amend incorrect Eagle PCB package
- 5.7 Route Traces and Run Design Rule Check
- 5.8 Add Power and Ground Signals Using Polygons in Eagle Board
- 5.9 Send Your Eagle PCB Layout File to the PCB Manufacturers
- 6. Conclusion
1. Eagle PCB Download
1.1 Eagle PCB Design Software
Eagle from Autodesk is a PCB design software that you can use to create a schematic of your PCB. The name Eagle is a short form for Easily Applicable Graphical Layout Editor. Eagle is one of the most common and popular PCB design software used by engineers and designers.
You have to use your computer to create the PCB design, and then you can send the system to the manufacturer for making the PCB. The solution has a low learning curve and a user-friendly interface, making it easier and simpler to work with it.
1.2 Benefits of Eagle Solution from Autodesk
There are many reasons why Eagle with popular with designers.
Let's check a few of them-
1.2.1 Supports Multiple Platform
You can install Eagle on Windows, Mac, and Linux. Not many PCB design software supports all three operating systems out of the box.
1.2.2 Lightweight
You can run Eagle on different computer configurations and don't need to spend money to update your system. We will look at the minimum system requirements below, and you can see what kind of course you need.
The installer file is also small and is around 45 MB, which quickly gets downloaded. You also need only 650 MB of free space for the program to install. Other PCB design programs are much more substantial and require 10 GB of free storage on your computer.
1.2.3 Free License and Low Cost
You can work and design PCBs in Eagle without paying licensing fees. The free version contains adequate features and functions to create your PCBs.
However, if you want to profit from your design, you have to purchase a license. The tiers of license costs are also less compared to other solutions out in the market.
1.2.4 Extensive Community Support
The hobbyist community has been fast to take up Eagle PCB design software for all their needs. You will be getting comprehensive community support and readymade designs, as many enthusiasts have already created them before.
So whether you want to integrate a sensor in your PCB or use an Arduino board, the design is probably there already.
In the next chapter, we will see how you can download the software from the Autodesk website.

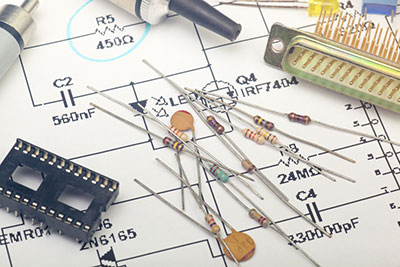
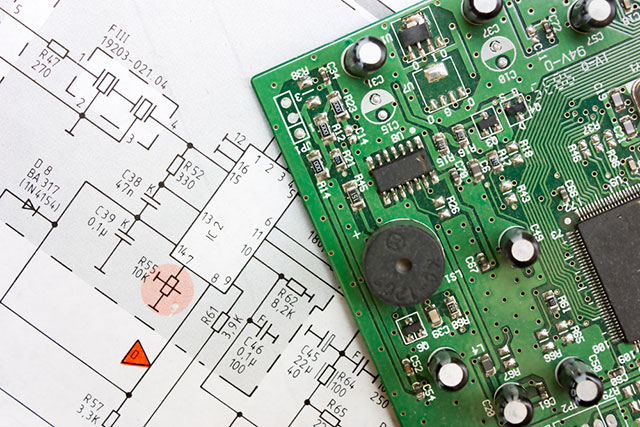
Image 1: Eagle PCB Download
Special Offer: Get $100 off your order!
Email [email protected] to get started!
2. Download Eagle PCB/ Eagle PCB tutorial

Download Eagle PCB
Before you download Eagle software, you have to ensure that you have the matching system requirements.
2.1 System Requirements
Let's go through the minimum system requirements that you will need to download Eagle PCB and run it. We will present the system requirements for Windows, Mac, and Linux.
The software supports a wide range of computer hardware configurations, and you don't need to build a supercomputer to run Eagle.
2.1.1 Windows
- Operating System Version: Windows 7, 8, and 10.
- CPU: 64-bit processor
- RAM: 3 to 4 GB
- Internet: Broadband high-speed internet connection
- Storage: Minimum 650 MB of free space
2.1.2 Mac
- Operating System Version: macOS® Sierra, El Capitan (10.11.x), and OS® X Yosemite
- CPU: 64-bit processor
- RAM: 3 to 4 GB
- Internet: High-speed broadband internet or DSL connection
- Storage: Minimum 650 MB of free space
2.1.3 Linux
- Operating System Version: Intel Computer-based Linux with 2.6 kernel
- CPU: Compatible with SSE
- Graphics: X11 with the color depth of at least eight bpp
- Libraries: libssl.so.1.0.0, libcrypto.so.1.0.0. You will need libc.so.6 and subversion GLIBC_2.14 or upwards for the 64-bit version of Eagle.
- Internet: High-Speed Internet Connection
- Storage: 650 MB of free space
2.1.4 Eagle PCB Download Process
You must be looking to download Eagle PCB design software so that you can start creating your designs. It is effortless to download the program, and all you have to do is head over to the Autodesk website to find the Eagle installer file.
You can choose the file according to your operating system. You will find the installation file for Windows, Mac, and Linux. The website also includes a different version of the Eagle solution-

This version is suitable for casual designers and hobbyists. You have the freedom to use two signal layers, two schematic sheets and will get a general area of 80 square centimeters.
2.1.5 Eagle Standard
You can use this version for your everyday engineering needs. You can use up to 4 signal layers, 99 schematic sheets, and 160 square centimeters of the PCB area.
It's the most professional PCB design software that you can get your hands on. It supports 16 signal layers and comes with 999 schematic sheets.
There are no limits on the size of the board area.
We will explore how you can use a full version of Eagle crack to make more possibilities with the free version of Eagle.
3. Is Eagle PCB free?/ Eagle PCB Design Software Full Version Free Download Crack

You can download and install Eagle solution without spending a single dime and even create designs of PCBs. However, you cannot use the free version to profit by selling your system and PCBs.
You have to purchase a license for the purpose, which doesn't even cost much. The free version works fine for hobbyists, but it may not be enough for professional users. There are some limitations in the unpaid version, which we will briefly discuss.
3.1 Limitations of Free Version of Eagle
- You cannot create a PCB with more than 3.94 x 3.15 inches (100 x 80mm) in size. You will get a total area of 12.4 square inches to work with, which is enough for creating a professional design. The maximum length is more than a large Arduino shield, so there is nothing to worry about.
- The free version accommodates only two signal layers. For adding more layers, you have to go for the Hobbyist or Standard license.
- You cannot use multiple sheets in the schematic editor.
- You will only be able to access the limited forum or email support.
- The free version is limited only to non-profit use. You have to purchase a separate license for profit-making ventures.
- You will be able to make most of the PCB designs using the non-paid version of Eagle. However, if you want to use the software's full features, you will need to buy a license that also costs less.
There is another way you can remove the limitations- by downloading a full version crack of the Eagle PCB design solution.
3.2 Eagle Full Version Crack
You can download the Eagle PCB design software crack, which removes the limitations of the freeware version. The trial will enable you to break the barriers of the minimum size and create bigger-sized PCBs.
The unpaid version also supports only two signal layers. After applying the crack, you will be able to create PCBs with multiple layers. You can get the freedom to remove and add items you have chosen and placed them on the clipboard.
You can also choose from numerous components to use on the design on which you are working.
The Eagle PCB design full version crack can be downloaded quickly and installed on your system. We will take you through the process so that you don't face any difficulties.
- Download the installer file of Eagle from the Autodesk website
- Install the program on your computer
- Head over to download the full version crack (make sure you have the active internet connection)
- Extract the crack from the RAR file and locate the .exe program
- Double click to run the program and install the crack
- Restart your computer so that the crack can make changes to your system
You can remove the limitations of a free version of Eagle using the crack. Now we will take a look at how you can install the software on different operating systems.
4. Eagle PCB Software Download
You will want to install Eagle CAD software on your computer after you have downloaded it. We will go through the detailed process of installing the solution for different operating systems.
How to Install Eagle PCB Design Software
You can install Eagle solution on your Mac, Windows, and Linux computers. It supports all three operating systems out of the box and doesn't need any customizations. Now we will check out how you can install Eagle for the three operating systems.
Install Eagle Solution on Windows
We will go through the process of installing Eagle on Windows 10. The process is similar to installing it on Windows 7 and eight, so you shouldn't face any problems. Let's begin setting up Eagle on Windows.
- We have already told you how to download Eagle from the Autodesk website. So go ahead and download the installer file using an internet browser.
- The download will be over in a short time, as the file size is not significant. After that, you should access the file named "Autodesk_EAGLE_8.0_English_Win_64bit.exe."
You may see a warning window on your computer asking whether to launch the program. Just click on the Run button to initiate the program.
- Now Windows will ask your permission so that Eagle Setup can make changes to your computer. You need to click "Yes" to continue.
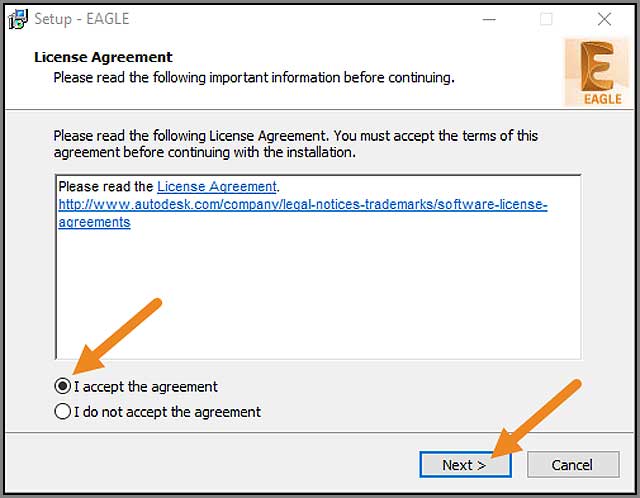
- The Eagle Setup Wizard interface will now appear on the screen. You have to click on the button beside "accept the license agreement" and then select Next on the lower right part of the interface.
Now the program will create a desktop shortcut and an installation folder in your system.
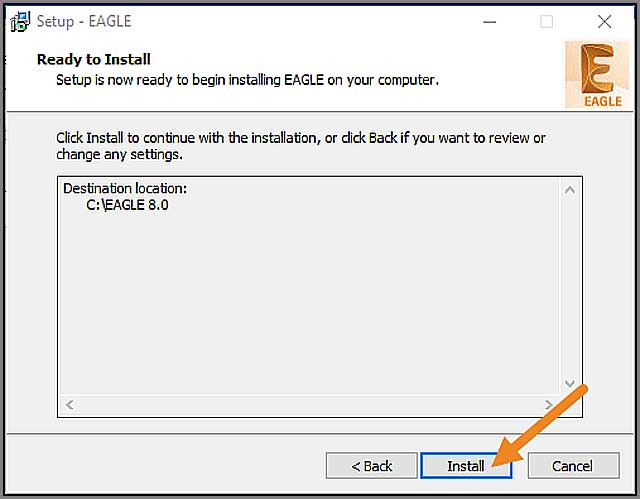
5. The following interface is the final step to install Eagle in your system. Now click on the Install button to begin the installation.
6. The installation should be over in a short time. Next, it would help if you launched the Eagle Autodesk file. You will need to create an account at Autodesk or use your credentials to sign in to an existing account.
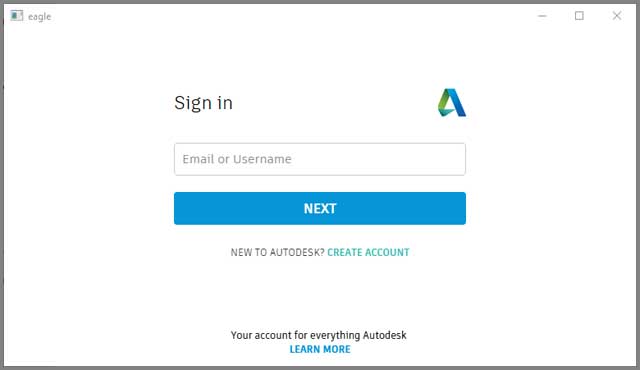
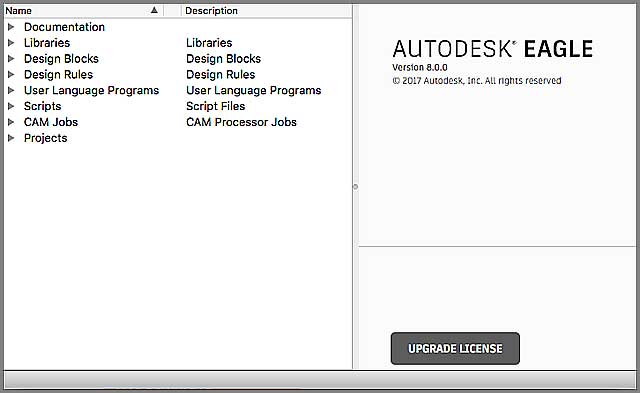
You will be able to see the Eagle Control Panel after you are over with sign-in.
The first time you use Eagle, you may see a warning that the "directory doesn't exist." You can click on Yes so that the software can create a directory to store all of your project files.
Install Eagle on Mac
Eagle has been recently released for Mac and has become popular with PCB designers who love the platform. You can easily install Eagle on your Mac by following the below-mentioned steps.
1. Download the Eagle Mac version on your computer from the website.
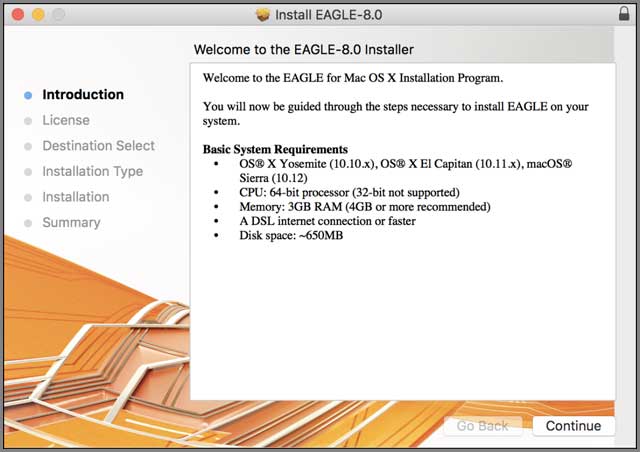
2. After the download finds and accesses the file called "Autodesk_EAGLE_8.0_English_Mac_64bit.pkg." It will launch the Setup Wizard.
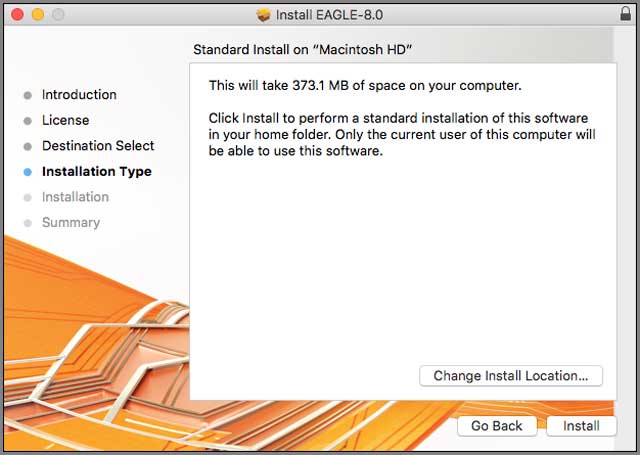
3. Click on the Continue button to begin the installation process. You have to accept the license agreement just like in Windows and select a location for the installation folder.
4. You will now have to select the Install button for the process to complete. Click on Close after the installation is over.
5. Now, go to your Launchpad and open the Eagle Autodesk program. You will have to create a new account at Autodesk or use your existing account to sign in.
After you have signed in, you will be presented with the Eagle Control Panel.

Linux offers complete control over every aspect of the operating system, making it popular with many designers. We will now go through the process of installing Eagle PCB design software on Linux.
For the article, we will be taking the example of 64 bit Ubuntu version 16.04.
1. First, access the Eagle PCB download file on the Autodesk website and download it.
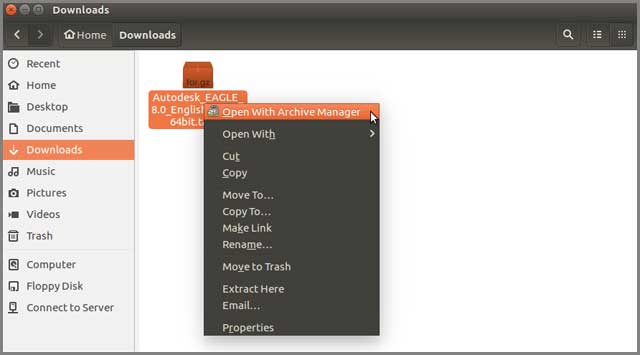
2.Now, you will have to extract the file
"Autodesk_EAGLE_8.0_English_Linux_64bit.tar.gz."
Go to your Downloads folder and right-click on the Eagle file. Then choose "Open with Archive Manager."
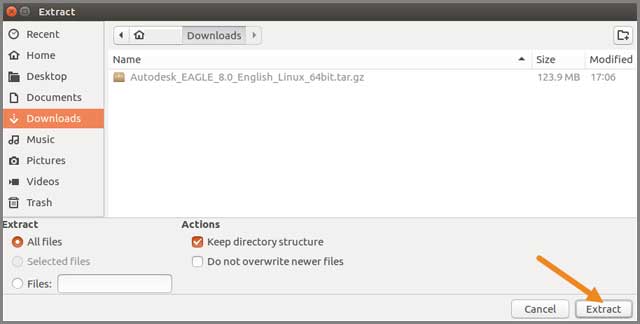
3. Click on the Extract button and set a destination folder for the files to extract.
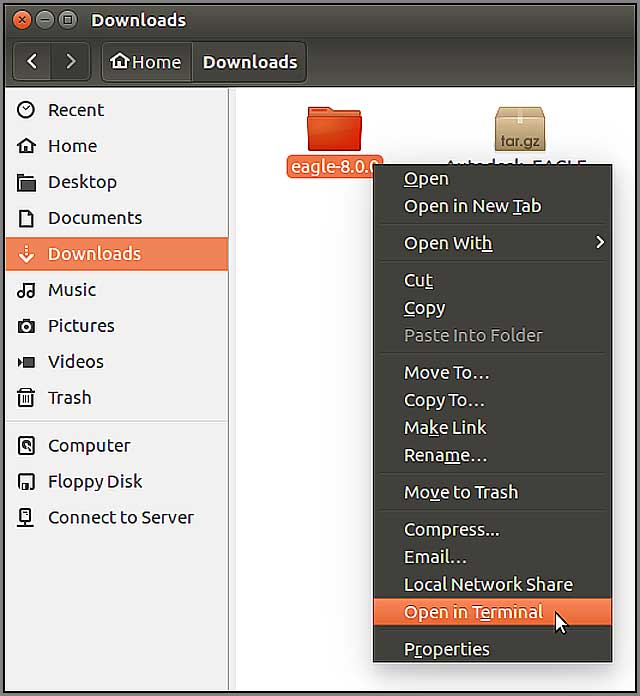
4. You will have to input "./eagle run" and then hit Enter. After a few seconds, the Eagle Login screen will appear on the screen.
5. You will need to sign in using your existing account on Autodesk or set up a new one. Then you can start working with the Eagle Control Panel.
If a warning window asks you to create a new directory, click on the Yes button.
You have now completed installing Eagle PCB software on your computer. Now you can get on to designing your PCBs right now!
5. How to make a PCB in Eagle?
9 Tips for Converting EAGLE Schematics To PCB
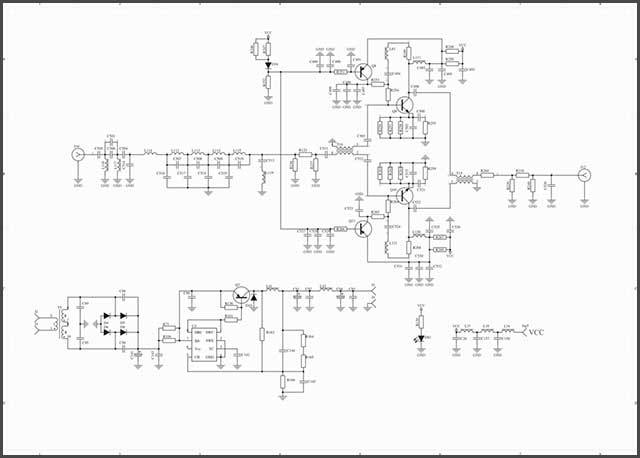
Eagle schematic to PCB - are you struggling with finding the correct way to do so? Many designers use Eagle software for designing their project circuit schematics. They may not know how to create an Eagle board file, routing, sizing, and corrections.
If there are errors in the final Eagle board files, the PCB manufacturers may not manufacture the PCB. This article is to addresses such problems.
We will discuss the nine steps to turn the Eagle schematic into a PCB file for presentation to PCB manufacturers. Further, we will also provide tips on keeping the Eagle PCB layout neat.
5.1 Select From Eagle Schematic to Switch to the Board Option
First of all, you need to ensure that all wires in your Eagle schematic are correctly connected and labeled. Then, carefully check that all equipment has been adequately modeled and placed on the Eagle schematic. Now, you are ready to convert your Eagle schematic to PCB.
You need to go to the switch to board or sch/ brd option in the file menu. It will ask you whether you want to make a new Eagle board from the schematic. Click on yes. Once you have done that, the Eagle board window will open. This window will have a blank PCB for you to start converting your Eagle schematic to PCB. The electronic components will be outside the Eagle board area, and you need to start placing them in the required positions.
5.2 Move Eagle Schematic Components to Eagle PCB Legal Area
Firstly, you need to transfer the electronic components placed by default in one corner into the Eagle board protected area. If your design is sophisticated and you have a large board area, it would be good to move the components section by section. However, if you have a lot of space in the Eagle board area, you can transfer all of them at once via the group-move option. It would be when you are trying to convert a simple Eagle schematic to PCB.
Click on the group icon and draw a rectangle that covers all the components. After that, you need to select the MOVE command and right-click to transfer the ingredients in a group. For a tighter view, you may click on the zoom button. This process can take time if your design has a lot of components.
5.3 Adjust the Eagle PCB Outline According to Your Requirements
The Eagle board generated by default is more significant than the actual need for the project. It forms the basis of correctly converting the Eagle schematic to PCB. So, you should shrink the board outline by utilizing the move command. Go to the top horizontal line and click on its center. It will select the complete range rather than just endpoints. After that, you can simply move it down.
Likewise, you may target the rightmost vertical line and click on its center to move towards the left. This is the trick, and if you move the line from the center, then the whole range will move; otherwise, only its vertices will move. At this point, you do not need to worry about perfection as we are just getting ready for the next steps.

5.4 Place Components on Blank Eagle PCB
The first thing is that you need to mentally sketch the location of components on the Eagle PCB board. Start moving the parts to the places you want them on the final PCB. Also, you may force them to realistic locations where the placement of traces may be effortless. The art of converting your Eagle schematic to PCB is that you manage to place the components in the right places.
Generally, you can start by placing them like placing them in Eagle schematics. However, this may be difficult if your chip has many gates. Or, there is a component that has a different pin arrangement than the original version. Still, this is a good practice, as the worst that can happen is that you will have a sensible layout, even if it turns out to be challenging to route it.

5.5 Check Signals for Routing and Load Design Rules in Eagle Board
You can get hints on components placement while converting the Eagle schematic to PCB. You need to study essential signals on the Eagle board. It is to check if they exhibit straight paths or follow zigzag directions all over the board. You will need to click on the red RATSNEST icon to allow Eagle to recompute the air wires for you. These air wires are the signals from components, which are converted into actual copper traces using routing.
You can also type show and in the command window to check the ground wires. They may be arranged or straight. If they are set in a diagonal direction, you can change the components so that the ground wires end up being in a straight path. You must have ground wires in a straight line while converting your Eagle schematic to PCB.
Now, as your Eagle board is looking right now, you can further move them manually. It would be to shrink the board size according to your needs simply. Finally, you are ready to select the design rule check icon and load the design rules.
5.6 Amend incorrect Eagle PCB package
You can now observe that loading the DRC altered the Eagle board. The pads will soon be round and more prominent. While converting your Eagle schematic to PCB, you also need to make sure that there are no incorrect packages in the design.
You need to go to the change->package tool and collect the incorrect part of the package. For that particular part, a list of all the standard packages will appear. If you are looking for a shortcut for entering the command line's change command, you can simply type something similar to the change package R-US/0207/2V. After that, you can simply click on every component.
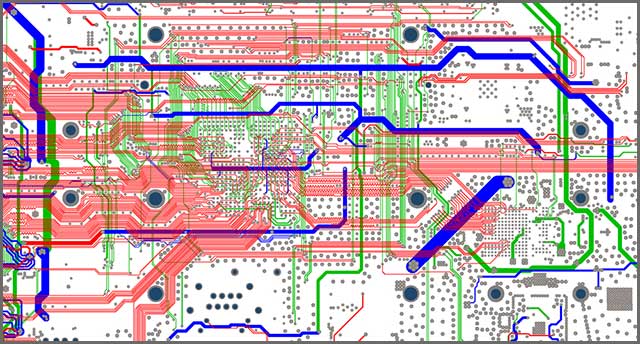
5.7 Route Traces and Run Design Rule Check
The next step in converting your Eagle schematic to PCB would be to start routing the copper traces. You need to select the route command and then go to the location to begin your routing. Only route copper traces from the places where air wires are already present.
You may also select the layers command to utilize different layers for multiple traces. Each layer has a specific color, and you can use the change command to change. This step is demanding and time-consuming in converting your Eagle schematic to PCB. While you are doing so, it is also crucial that you keep planning. You do not end up with any cross traces, and there is room for more hints.
Now, upon completion of wiring copper tracks, you should run the design rule check command. This command will identify any errors in your routing. If you place the circuit correctly, you will find a zero error message.
5.8 Add Power and Ground Signals Using Polygons in Eagle Board
We would like to give you one final tip on converting your Eagle schematic to PCB. In multilayer, PCBs usually use the entire layer for power and ground signals. In Eagle, you need to use the polygon command to draw such large-signal areas.
For example, if you want to create a polygon for ground signal, type "poly and." So, by typing the name of the message in the command window, the completed polygon will systematically connect to that signal.
5.9 Send Your Eagle PCB Layout File to the PCB Manufacturers
Finally, you have converted your Eagle schematic to PCB. Now you need to find a suitable PCB manufacturer. You may go to their website and read their rates and demands. You may check if they allow online ordering. After that, upload your Eagle board file onto their website and follow the next steps. If they need any other file type, you can export the Eagle board file into that version.

6. Conclusion
Eagle PCB design software is a user-friendly and straightforward way to create PCB designs. You can either use the free version or subscribe to a license for professional use. After you have completed the system, you can send it for manufacturing.
So, through the nine ways we talk about, you can convert your Eagle schematic to PCB. In a nutshell, you simply need to open the Eagle board window. After that, you need to start placing the components over the legal board area and begin routing. In the end, you may run the design rule checker to look for any errors. If you need PCB manufacturing services, you can contact us and provide technology, materials, and quality services.
Special Offer: Get $100 off your order!
Email [email protected] to get started!