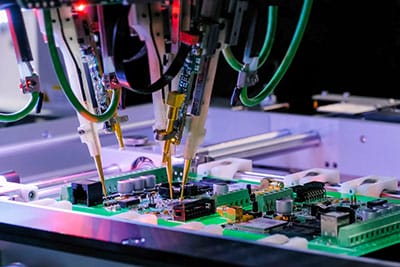
Choosing the best drone board that suits all your needs is a challenging task. There is a myriad of drone controller boards out there, and each has its strongholds and weaknesses.
With technological advancements, drone boards have evolved a lot in the past decade. Manufacturers are leveraging secure and effective micro-controllers to make reliable and powerful drones.
Technology has made some outstanding milestones since the era of the KK2 boards. The original KK2 boards and their successors were more significant than their modern counterparts, small in size with super processing capacity.
While there are several factors to weigh when buying a drone controller board, this guide will walk you through how to choose the best board controller that fits your needs.
Contents
- 1. What is a Drone Board/Drone Circuit Board?
- 2. Drone Board Features
- 2.1 Firmware
- 2.2 Processor
- 2.3 UART
- 2.4 Layout
- 2.5 BlackBox
- 3. Drone Circuit Board Types
- 3.1 Drone Power Distribution Board
- 3.2 Drone Controller Board
- 4.1 ArduPilot
- 4.2 PX4
- 4.3 BetaFlight
- 4.4 LibrePilot
- 5. Drone Circuit Board Price
- 6. Drone Circuit Board Diagram
- 7. How do You Make a Drone Circuit Board?
- Step 1
- Step 2
- Step 3
- Step 4
- Step 5
- Step 6
- Step 7
- Step 8
- Step 9
- Step 10
- Step 11
- Step 12
- Step 13
- 8. How to Program a Drone Flight Control Board
- 9. How to Choose the Best Drone Boards
- 9.1 Flying Style
- 9.2 Open-Source Board Controller
- 9.3 The Price Factor
- Conclusion
1. What is a Drone Board/Drone Circuit Board?
A drone board is a circuit board that controls the RPM of motors according to the input.
2. Drone Board Features
A drone board has several sensors for perceiving the motion of the device and the handler commands. With this information, it can regulate the speed of the engines and make the drone move appropriately. These are the main features of a drone board.
2.1 Firmware
You can fix various firmware on your drone boards to achieve different purposes and specializations. For instance, iNav is manufactured with GPS applications in mind, while KISS is suitable for racing. Section four of this guide contains a detailed discussion of the various drone board firmware for use.
2.2 Processor
The Drone board processor is also known as a microcontroller unit (MCU). It will help if you have it to keep your firmware codes and solve complicated calculations. There are five primary types of drone board processors based on the processing power and memory size: F1, F3, F4, F7, and H7.
2.3 UART
UART is an abbreviation for Universal Asynchronous Receiver/Transmitter. The hardware serial interface enables designers to link external parts, like a Telemetry, to the drone boards. It is advantageous to have more than one UART port, but your drone board's design dictates this.
2.4 Layout
The drone board layout houses the solder pads. Many people ignore the significance of the design, but the drone boards with pads positioned on the edges are more potent than those containing all the pillows at one point.
2.5 BlackBox
You need a BlackBox to tune and troubleshoot your drone.
3. Drone Circuit Board Types
3.1 Drone Power Distribution Board
A drone power distribution board (PDB) is simply a printed circuit board (PCB) used to supply power from the source to the various parts of a drone. Before the invention of PDBs, designers used to connect drone parts with a wire's help, resulting in heavyweights because of copper and solder joints in the cables.
There are multiple types of PDBs in the market, and most of them share features. At first, engineers made PDBs using thick copper PCB. As the demand for controlled voltages for different parts rose, engineers nowadays insert voltage controllers on PDB to distribute reliable and clean power. This is essential when users mount video devices highly sensitive to electrical sound caused by motors and ESCs.
When choosing a PDB, consider its size and layout, and voltage and current capacity.
3.2 Drone Controller Board
As mentioned earlier, a drone controller board is a circuit board that comes in different sizes. Its role is to control the RPM of motors per the input. The handler sends a flying command to the controller board, which then regulates the engines appropriately.
A flight controller functions by transmitting a signal from the remote control to the device, dictating what the drone should do. Messages are relayed by transmitters within the flight controller board and picked by a UAV's receiver.
Besides the drone power distribution board and the drone controller board, other drone circuit board types, such as mini drone circuit boards, drone motherboard with remote, and drone receiver board with remote.
4.1 ArduPilot
ArduPilot is the latest, full-featured, and reliable open-source drone flight controller software in the market. It can control any UAV system presumably, from aircraft, multi-rotors, and helicopters, to sea vessels, like submarines.
4.2 PX4
PX4 is another open-source software for drones and other crewless vehicles. It gives your drone the powers that experienced drone users love and allows you to concentrate on your device progress without keeping a complicated development environment.
4.3 BetaFlight
Beta Flight is a drone controller software commonly used in multi-rotor and fixed-wing drones. It is different from Baseflight and Cleanflight software in terms of drone performance, cutting-edge feature add-ons, and comprehensive customer support. The software has the STM32F3 Processor, and almost all drone controller boards can use it.
4.4 LibrePilot
You can use the LibrePilot software to control multi-copters and other UAVs. The software is deeply rooted in the Open Pilot UAV software project, and it strives to back the R&D of software and hardware for automobiles, drones, and robotic industries.
Special Offer: Get $100 off your order!
Email sales@ourpcb.net to get started!
5. Drone Circuit Board Price
You can order a quality drone circuit board from a reputable online store that ships globally. The prices differ from one manufacturer to the other, but if you find a circuit board that fits your needs, go for it. If you decide to buy an expensive drone circuit board, ensure the drone kit's quality is worth the price.

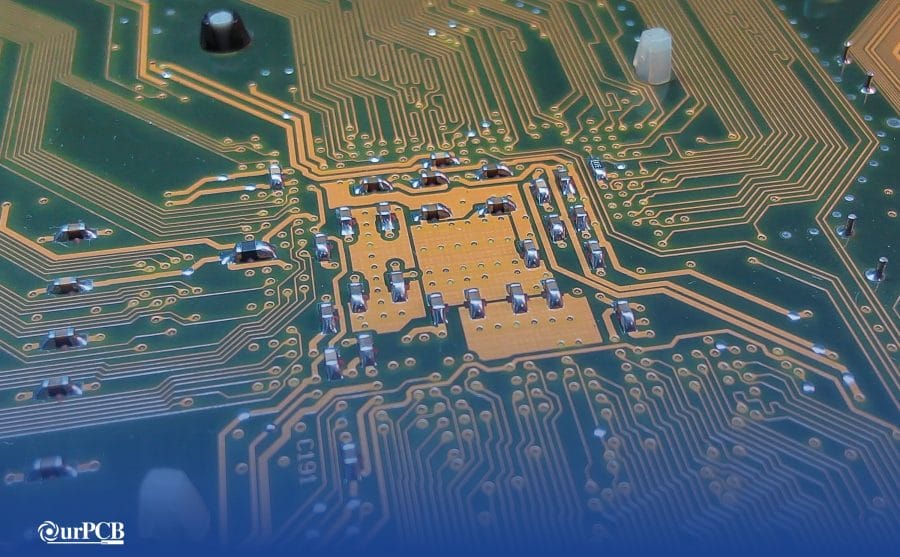
6. Drone Circuit Board Diagram
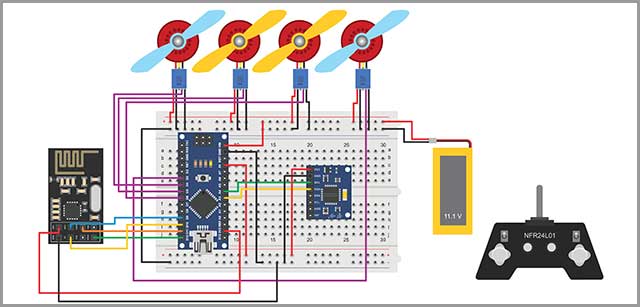
The above drone circuit board diagram illustrates how to connect the various parts of a drone to the PCB. We hope that it will make your drone building process more comfortable. The description contains every detail needed to teach you how to connect it with different parts of a drone.
We will analyze the basics of a quadcopter drone assembly using aluminum pipes and bolts in our discussion.
When you press a remote button of the circuit, it triggers a parallel relay of the quadcopter drone, making the target motor spin faster. The process makes the device assume the opposite direction to that of the motor.
For instance, raising the south motor's speed makes the drone take the northward direction while increasing the north engine makes the device move southwards. Likewise, raising the speed of the east motor causes it to turn westwards and vice versa.
Interestingly, raising the south/east motors' speed makes a quadcopter take the north/west direction in the diagonal mode.
7. How do You Make a Drone Circuit Board?
You require a film, a marker, and an UltraViolet Solder Mask.
Step 1
Chop the film into a piece that is slightly bigger than the circuit. Since we will require more transparency later, avoid making big sizes. Besides, do not chop it to the same size as the circuit because we will stick it to a board and require more space to include the tape.
Step 2
Put the cut piece on the PCB and sticky tape on it. Pull the work well to compress the space between it and the PCB.
Step 3
Mark the region where you do not require a solder mask- points where we should solder the board. The show is so sensitive to Ultra Violet rays as it hardens the paint. For points where we will use solder, the color should set to get rid of it quickly. However, this method is not sufficient since a permanent marker fails to adequately block the Ultra Violet rays.
Alternatively, you can design the paste points from the PCB and copy it to the chopped board using an inkjet machine.
Step 4
After marking all the points to solder, take away the board and chop another film of similar measurements.
Step 5
Paste some solder paste on the board using a stick. Place the cut film and mount it to the remaining frame board. Use a ruler to distribute the mask uniformly.
Step 6
Put the labeled piece on the upper side and pair up all plugs with those of the PCB.
Step 7
Take it outside, where there are plenty of Ultra Violet rays. You can either use sunlight a UV lamp as your source of Ultra Violet rays.
Leave it for around four to five minutes based on the depth of your paste. The deeper the paste, the more you should leave it to dry.
Step 8
Gently take away the transparent film to avoid damages.
Step 9
Use a soft paper or piece of cloth and alcohol to remove filth from the surfaces.
Step 10
Use a knife to scratch any hardened solder paste.
Step 11
Smear some flux on the pad to clean it. Note that this step is not compulsory since soldering wires have changed.
Step 12
Use a soldering iron to solder the edge and use it on the pads.
Step 13
Scrub it with sandpaper to smoothen the points and offer the mask a lustreless appearance.
Up to this point, your drone circuit board is ready for use. But before that, solder all the parts to prevent oxidation.
Follow this link for a visual illustration of how a drone flight controller works.
https://www.youtube.com/watch?v=FdiZfzD0xE0
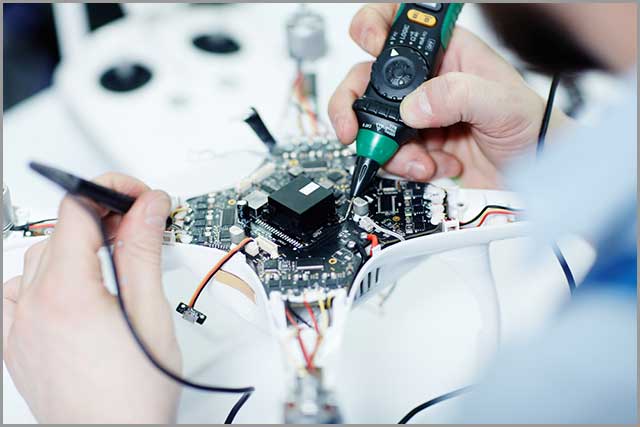
8. How to Program a Drone Flight Control Board
Follow these simple steps to program your drone flight control board:
The correct connection: Ensure that you have the proper receiver channels linked to the appropriate channels.
Software installation: Download your preferred controller software, and link the controller to your laptop using a micro USB plug. Run the software and switch on the power source for the receiver to connect with the transmitter.
Drone stabilization: Use the switches to program flight modes and other functions. Program the breaker used for stabilization mode to either of the 3-way switches. Although you can schedule in the transmitter menu, you can still view when the right settings are met on the transmitter screen.
Keeping it level: Some programs let users view their drones' alignment and distance and tune them appropriately to ensure stabilization programming is functioning well.
9. How to Choose the Best Drone Boards
Now, how do you choose the best drone controller board? How do you settle that this drone flight controller fits your demands? A drone board is the heart of a drone. To select the most suitable drone boards, consider the following points.
9.1 Flying Style
The flying style is a crucial feature to consider when choosing a drone board. Because manufacturers design every drone board for a particular flying purpose, you should select one that fits your needs. Drone boards have three flying styles:
- Cinema flying- Engineers design this style for taking smooth videos. It has a few flights that feature an open control stick rate.
- Autonomous flying- Most drone users like flying UAVs with few controls. The autonomous drone controllers perform most of the functions for you using their auto-programmed features, like auto-landing.
- Sports were flying- Drone racing is the most innovative style preferred by the experienced drone flyers.
9.2 Open-Source Board Controller
The second feature you should consider when choosing your drone flight controller is the open-source controller aspect. When the controller contains an open-source board, it is possible to modify it by adding or removing features.
9.3 The Price Factor
Another aspect you should consider when choosing a drone board is the price. However, prices vary based on the user's needs. If you want to fly for pleasure, you can go for a cost-effective drone circuit board. If you plan to use your drone for photography and videography, you should choose sturdy drone boards, which is often a bit expensive.
Generally, beginners should choose cost-effective drone flight boards, while experts should consider boards that meet their specific needs.
Conclusion
Are you in the process of building a drone that fits your purpose? A drone comprises many parts, and a controller board is one of a drone's essential components. We have discussed what drone boards are, drone boards feature, drone circuit board types, drone flight controller software, drone circuit board price, drone circuit board diagram, how to make a drone circuit board, how to program a drone flight control board, and how to choose the best drone board.
Generally, drone controller boards are needed for UAVs to facilitate safe and smooth flights, and choosing the best drone boards is based on your purpose.
Special Offer: Get $100 off your order!
Email sales@ourpcb.net to get started!