Contents
- BMP280 vs. BME280: What is BME280?
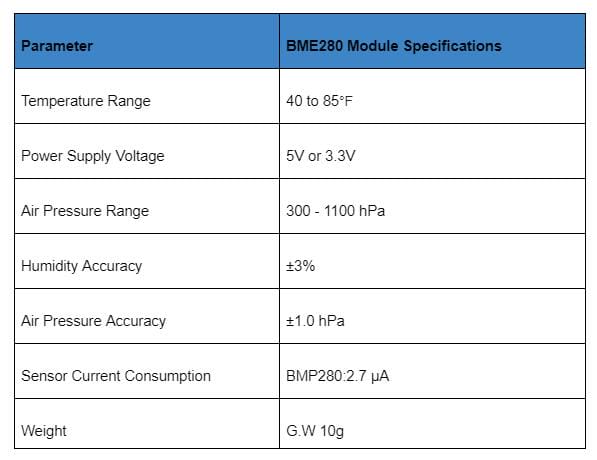
- BME280 Specifications
- Applications
- BMP280 vs. BME280: What is BMP280?
- BMP280 Specifications
- BMP280 vs. BME280 vs. BME680: What Are Their Differences?
- BME280 with Arduino
- Requirements
- Steps
- How the Code Works
- BME280 Raspberry Pi: Build Your Own Weather Station
- Requirements
- Software
- Additional Resources for weather stations
- Wiring Up the Humidity, Temperature, and Pressure Sensor
- Ground Temperature
- Summary
BMP280 vs. BME280: What is BME280?
BME280 is a precision environmental sensor that measures humidity, temperatures, and barometric pressures. The device syndicates high exactitude and linearity and is impeccably practical for high EMC sturdiness and long-term stability.
BME280 Specifications
Applications
BMP280 has several applications due to its competencies and substantial SPI and I2C compatibility features. Some of its applications are:
- Controlling home automation
- Monitoring fitness
- Enhancing GPS navigation
- Weather forecast
- outdoor/indoor navigation activities
- Used in any other task requiring correct analysis of atmospheric pressure
BMP280 vs. BME280: What is BMP280?
Electronic components to develop different projects
BMP280 is a barometric pressure sensor that measures air pressure and temperature. Unlike BME280, which measures air pressure, temperature, and humidity, BMP280 can only measure air pressures and temperature. The unit's low power consumption and small dimension allow battery-driven device implementation such as watches, GPS gadgets, and mobile phones. MBP280 also supports the communication of SPI and I2C and acts as a precise altimeter as well.
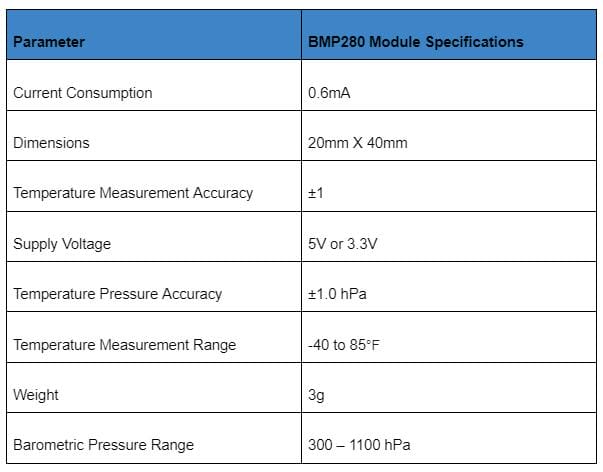
BMP280 Specifications
Sensors and devices indicating the parameters
Special Offer: Get $100 off your order!
Email [email protected] to get started!
BMP280 vs. BME280 vs. BME680: What Are Their Differences?
BME280 can measure air pressure, temperature, and humidity, while else; BMP280 can only measure air pressure and temperatures.
The BME280 unit is an upgrade to BMP280. Due to their almost similar features and parameter performance. However, BME280 is more expensive than BMP280. It's only the humidity measurement gauge that is added to the BME280.
Therefore, if you want to observe the environment expansively, BME280 is the best option. If you're going to get an accurate atmospheric pressure reading, you need to go for Adafruit BMP280.
Like BME280, BME680 can measure temperature, barometric pressure, and humidity with complete accuracy. However, BME680 also measures gas since it has an extra MOX sensor. Some gases that BME680 can detect are VOC (Volatile Organic Compounds) from paints, office equipment, cleaning supplies, alcohol, etc. It detects numerous types of gases to ensure there is quality air for the well-being of humans.
BME680 is more expensive than BME280 and BMP280 since it's a 4-in-1 function sensor.
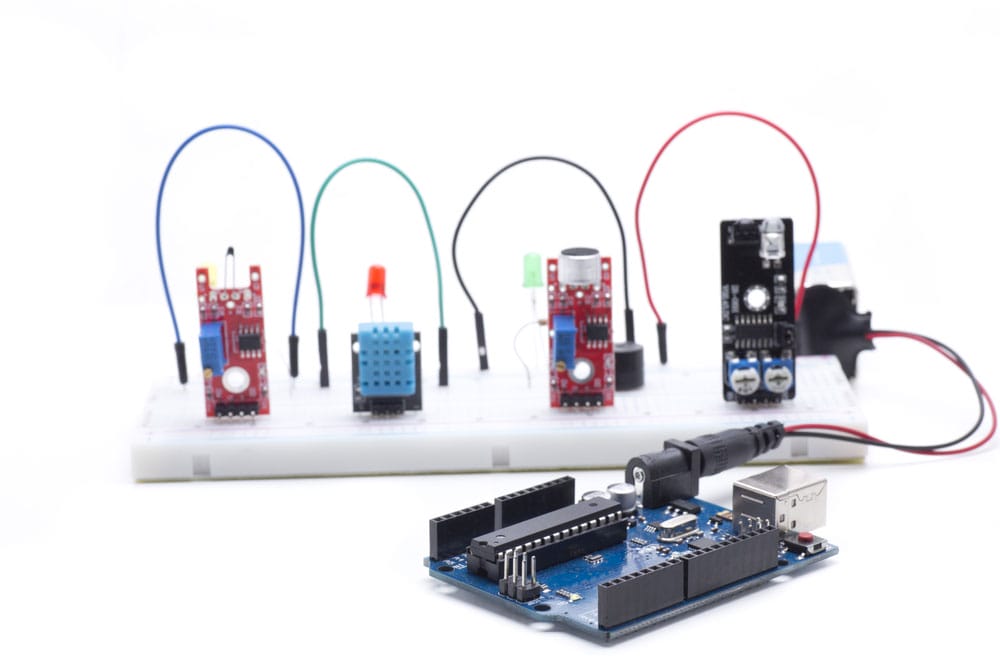
BME280 with Arduino
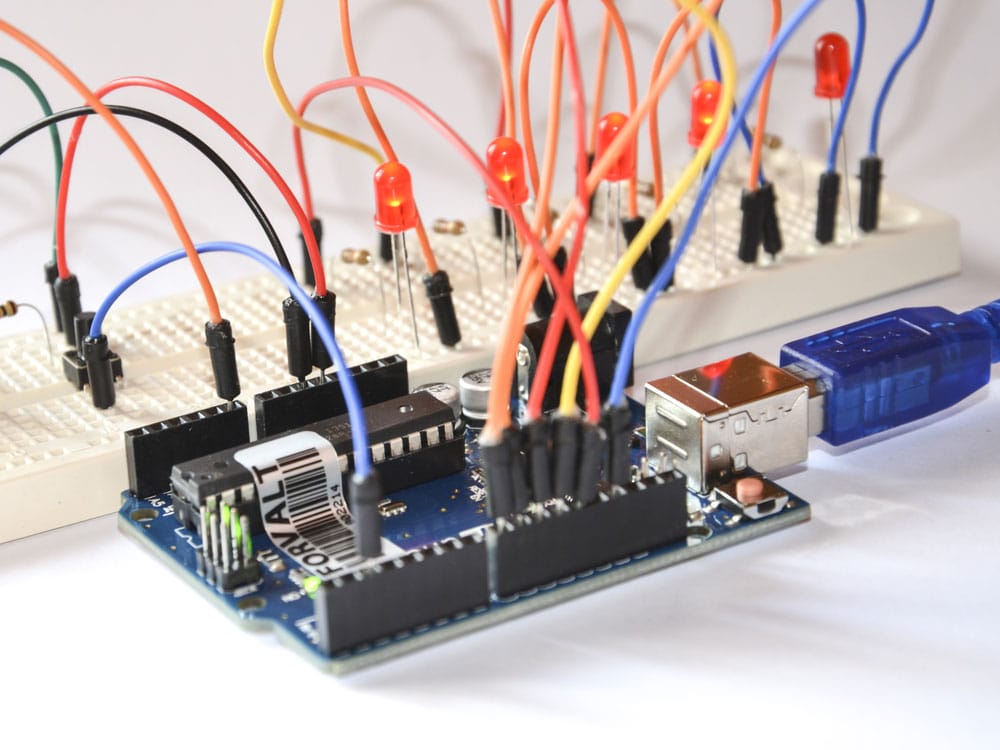
Arduino electronic platform
BME280 humidity sensor easily matches different microcontrollers such as SPI mode, Beaglebone, or Arduino. At this point, we will test how easily Arduino senses the world nearby with the BME280 environmental sensing unit. The sensors don't need extra components; they are pre-calibrated and relatively simple. Hence, you can begin measuring estimated altitude, atmospheric pressure, ambient temperature, and relative humidity within no time.
Working with a PCB prototype manufacturer helps streamline the integration of BME280 sensors into custom boards, ensuring efficient testing and optimal performance for Arduino-based projects.
Requirements
- Arduino (Seeeduino V4.2)
- Bosch BME280 sensor module
- Base Shield V2
- Jumper wires
- Breadboard
Steps
Step 1
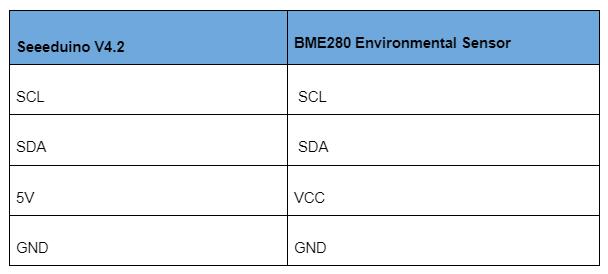
Begin by connecting the Groove BME280 sensor on the Groove Base Shield V2 I2C mode and plugging it into the Seeeduino.
You can also connect this module to the Seeeduino directly if you don't have a Grove Base Shield as follows:
Step 2
Using the USB cable, plug in the Seeeduino to the PC.
Step 3
In our third tutorial part, we will need software.
Go to Github, and download the example code and Library.
Step 4
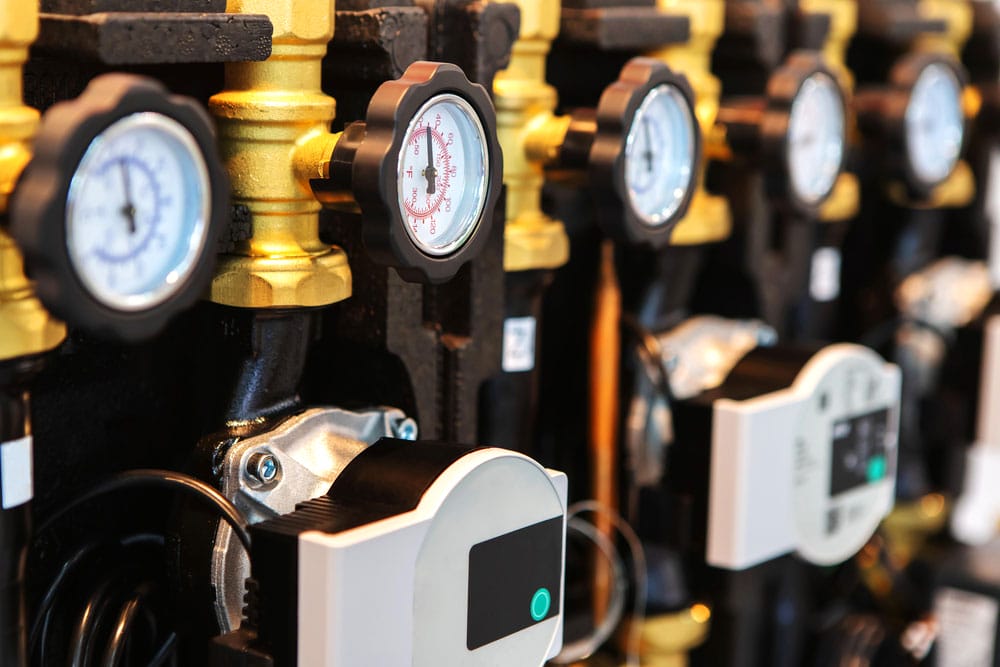
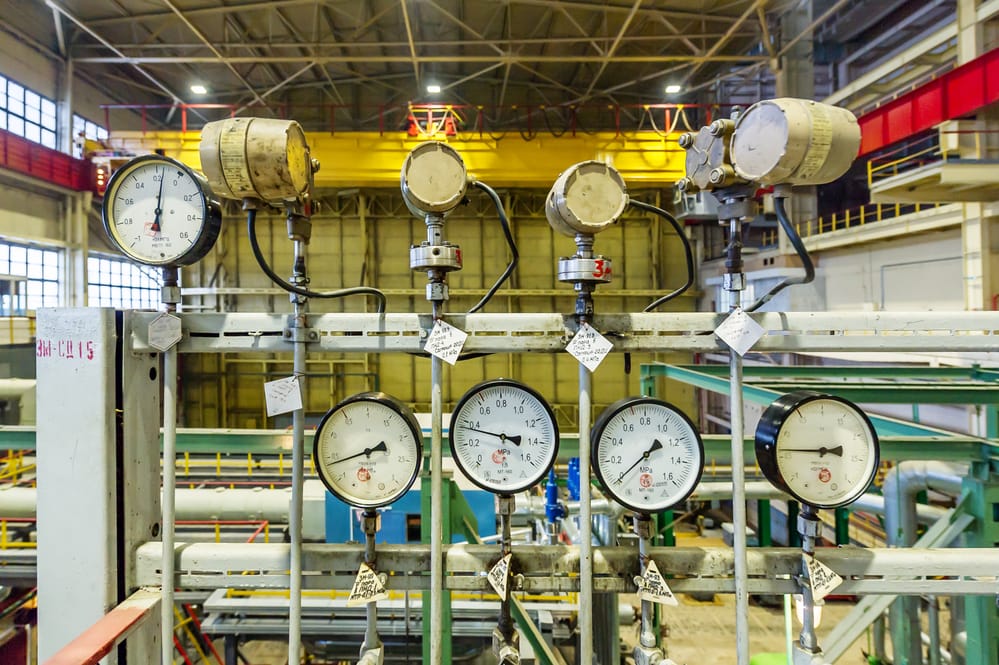
Pressure and temperature sensors in the home heating system
Begin by creating a new Arduino draft and pasting the codes. Another route is opening the code directly through the following path:
- File ->Example->Barometer ->Sensor
Upload the code to the Arduino.

Step 5
You should receive the data from the sensor, including the humidity, altitude, barometric pressure value, and temperature, by opening the serial monitor.
With only those five steps, you will finalize running the Grove BME280 biometric sensor with Seeeduino.
How the Code Works

Electrical panel for setting up equipment
Libraries
The code begins by integrating the required collections: the Adafruit_BME280, Adafruit_sensor, and The Wire (using I2C) libraries to compute with the BME280 device.

Sea Level Pressure
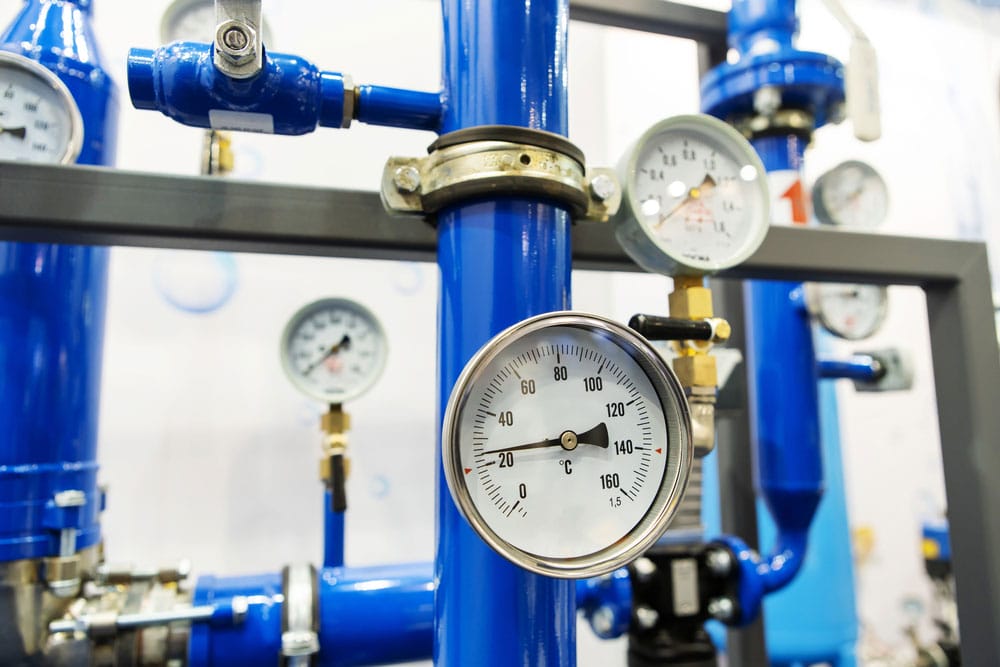
Temperature and pressure sensors with many pipes and valves
Next, we define the SEALEVELPRESSURE_HPA variable that creates the Adafruit_BME280 library object needed to calculate the altitude and access-related functions.

SPI Communication
The begin (I2C_ADDR) function initializes the i2C interface and checks whether the chip ID is correct with the given I2C address. This function accepts the I2C address of the unit parameter. Using waits & soft-reset, it rearranges the chip for the sensor to calibrate after wake-up.

I2C
By default, we used the I2c address communication protocol in our example. However, when using SPI, you will have to remark the earlier line and restate on one of the subsequent lines.
Craft Adafruit_BME280 entity known as bme.

Printing Values
Within the BME280, the point values ( ) read the values in the loop ( ) and print the readings in the Serial Monitor.

Setup ()
The sensor resets once the setup () begins communication.


The readings will appear as follows on the bme object when reading the estimated altitude, humidity, temperature, and pressure.
- bme. readAltitude( SEALEVELPRESSURE_HPA) – estimated length per the seal level pressure in meters.
- Bme. Read humidity ( ) – stating definite humidity
- bme . Read temperature ( ) – saying temperature readings in Celsius
- bme. read pressure ( ) – stating in hPa
BME280 Raspberry Pi: Build Your Own Weather Station
When creating your weather station, consider several factors when choosing specific components and digital temperature sensors. They include ease of use, cost, Linux/Python support, absolute accuracy, reliability, and availability. Nevertheless, this project's chosen components aren't the easiest to use, accurate or economical, somewhat balanced of all the factors.
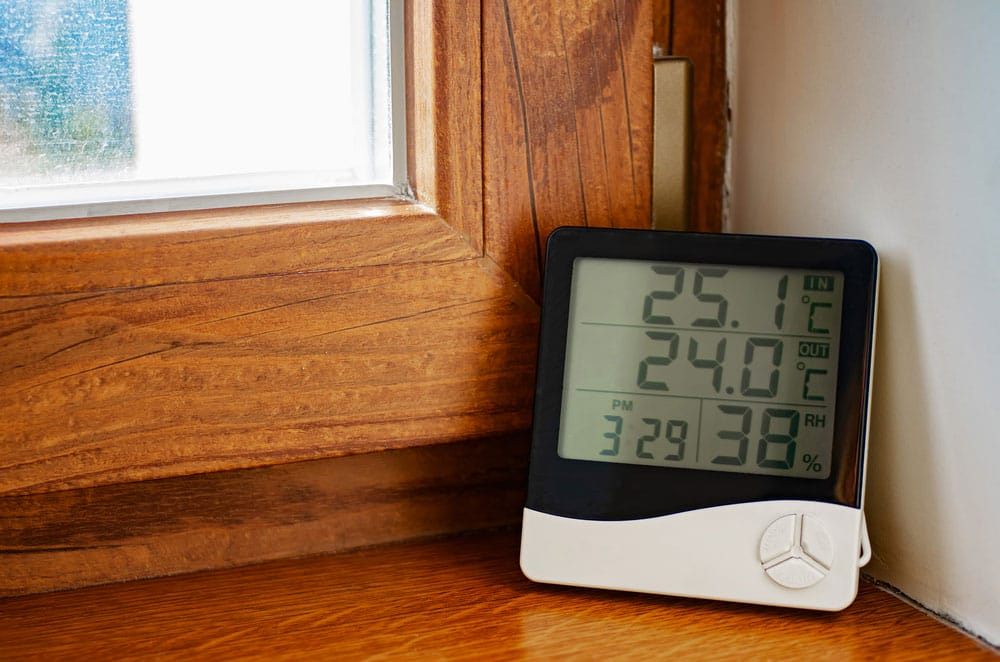
Digital indoor temperature and humidity sensor. Home weather station.
Requirements
- A DS18B20 digital thermal probe
- A BME280 humidity, temperature, and barometric pressure sensor
- A Raspberry Pi, with a WiFi dongle or built-in wireless connectivity
- Jumper wires, a breadboard
- PCB mount screw terminal blocks
- Two 4.7 KOhm resistors
- A rain gauge, wind vane, and anemometer
- Weather enclosures
- An MCP3008 analog 0 to-digital integrated circuit converter
- Two RJ11 breakout boards (optional)
Software
- The MariaDB server software
- The BME280 Python library
- The Oracle Raspberry Pi. No need for installation; open a Terminal window and clone the GitHub respiratory and type:

Additional Resources for weather stations
- Insulating tape
- Two 2-pin male headers
- Solid core wire (22 AWG)
- Standard Prototyping equipment: screwdrivers, side-cutters, etc.
- A 16-pin DIL/DIP IC Socket
- An adafruit Perma-Proto HAT
- 3D printing services access
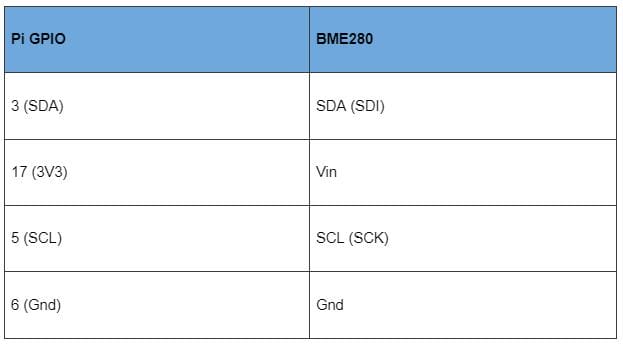
Wiring Up the Humidity, Temperature, and Pressure Sensor
Begin by connecting the sensor to your Pi. Note that some breakout boards might have some pins that aren't required, such as CSB and SDO.
Open the IDLE – a Python's Integrated Development Environment
To open it, choose programming in the menu bar, and you will see two IDLE versions. Ensure you open the one named Python 3 (IDLE). You will use it to write and run code.
Generate a new Python file and save it as the following /home/pi/weather-station/bme280_sensor.py
Then, add the code.

Afterward, examine the code. Then exhale the sensor as the code runs. The humidity readings should escalate, and the temperature values undoubtedly. Once you complete reading, dismiss the principles through the Python shell by keying ctrl+c.
You are sure that the sensor is recording accurate figures and happy with the results. Next, you will need to amend the program so it's usable later within the entire operation in the weather station.
To ensure the humidity, pressure, and temperature readings return typically in that order, substitute while True loop with read_all() function.
Ground Temperature
Wiring Up the Sensor
Step One
First, assess and prototype the DS18B20 sensor, using PCB terminal blocks, ensuring it plugs into the breakout boards. Usually, the DS18B20 features three bare wires. Make sure you set up the Ground rails and 3.3V adjacent to the breadboard side. You will use it along the way when adding additional accuracy sensors to the circuit.
BMP280 vs. BME280--Step Two
Open the /boot/config.txt file
Toward the bottom, edit the code by adding a line.
BMP280 vs. BME280--Step Three
Open /etc/modules file.
Towards the bottom of the file, add these lines.
BMP280 vs. BME280--Step Four
Re-install the Raspberry Pi.
BMP280 vs. BME280--Step Five
In the IDLE, open the /home/pi/weather-station/ds18b20_therm.py file and run it. In the Python window shell, you will see a temperature printout.
BMP280 vs. BME280-- Step 6
Reiterate the program by putting a probe in a cold-water container. Unless working in a cold-freezing room, You will notice that the temperatures are lower.
BMP280 vs. BME280--Troubleshooting
At this point, you should be able to take your readings from DS18B20. However, If unable to take them, recheck the probe wires whether they are tightly attached to the terminal screw. Recheck also whether the /boot/config.txt and/etc/modules acclimate appropriately.
Summary
As seen in our experimental automation projects, you can see how BME280 sensors work in different temperature ranges. While it's a bit expensive, it features more functionalities than BMP280. For instance, you can construct an entire project, such as a weather station. Besides, interlinking it with Arduino Related Sensors is very easy, thanks to Adafruit unified sensor library. BME280 is the best option. Nevertheless, if your project doesn't require humidity measurements, you can work with BMP280.
Special Offer: Get $100 off your order!
Email [email protected] to get started!