Contents
- Key Takeaways
- What is a Stop-Start Circuit?
- How Can PCB Manufacturing Improve Start-Stop Circuits?
- Components Used in Start-stop Circuits
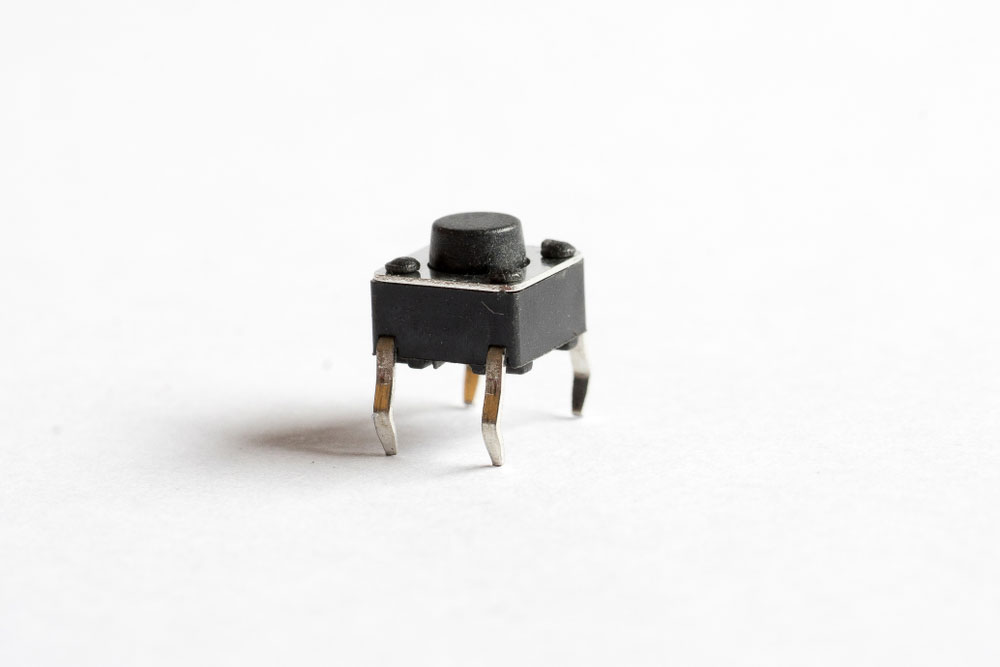
- Buttons/Contacts
- Relay/Contactor
- Motor
- Overload
- The Electrical Supply Required For a Start-Stop Circuit
- Ways to Control the Wiring in a Start-Stop Circuit
- Start-Stop Circuits: 2 Wire Control
- Start-Stop Circuits: 3 Wire Control
- Other Start-Stop Circuits
- Start-Stop Jog Circuit
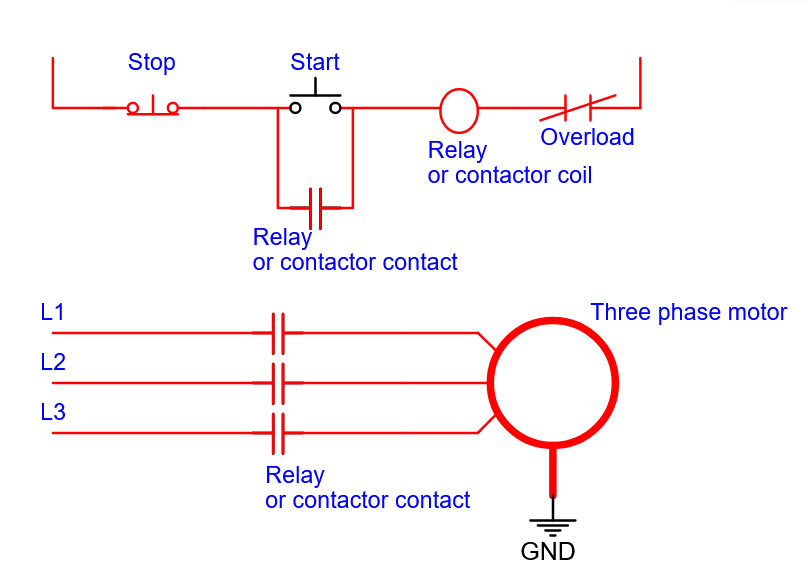
- Start-Stop Circuits With a Motor Connected
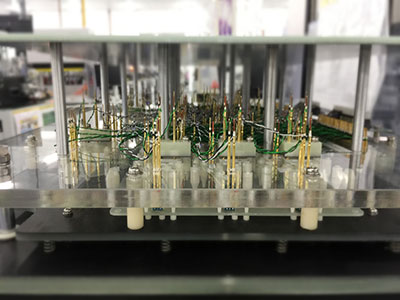
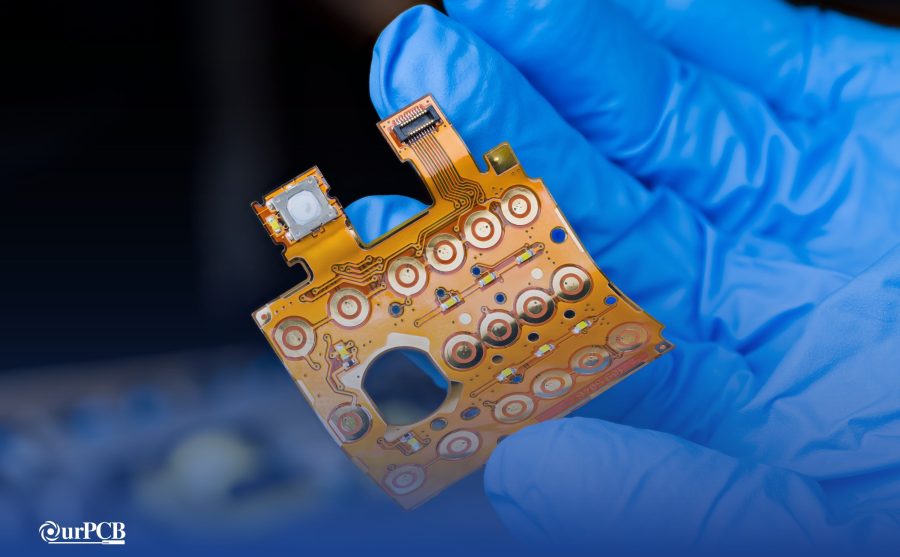
- OurPCB: Start-Stop Application PCB Assembly
- Designing Start-Stop Circuits for Automated Systems FAQs
- What is a remote start-stop control circuit?
- How many wires minimum are needed to a stop start station?
- How can a contactor be used to control a single phase motor circuit with a stop start button?
Key Takeaways
- Start-stop circuits are vital for controlling machinery safely and are commonly used in automation settings.
- These circuits can use two-wire or three-wire configurations, each offering unique control options.
- PLC start-stop circuits and start-stop ladder diagrams help visualize control pathways in automation.
- A start-stop circuit typically includes push buttons, relays/contactors, and overload protection to regulate power flow.
- Start-stop circuits with jog functionality allow selective control of motors, making them ideal for specific automation tasks.
What is a Stop-Start Circuit?
The start-stop circuit is a circuit with integrated single push buttons for starting or stopping electrical components, equipment, or motors. These electrical circuits also feature a combination of overloads, relays or contactors, and contacts. You can typically find these connected to machinery, such as conveyor belts, with control circuits. Generally, a control circuit determines when a component or motor should begin and cease operations.
A start-stop control circuit typically uses a start/stop ladder diagram to illustrate its functionality, showing how each component interacts within the circuit design. In most setups, the start pushbutton and stop pushbutton are connected in series with normally open and normally closed contacts, respectively, to control the flow of control voltage.
When you press the start button, the control circuit closes, allowing current to pass and activating the motor or equipment. If the stop pushbutton or emergency stop button is pressed, the circuit immediately opens, cutting off the control voltage and stopping the device. These circuits are commonly built into circuit boards to facilitate applications like auto start functions and stop generator control, providing reliable and safe start-stop mechanisms for various industrial and commercial systems.
How Can PCB Manufacturing Improve Start-Stop Circuits?
In PCB manufacturing, designing start-stop circuits involves creating precise control pathways to manage power distribution, motor activation, and emergency stop functions. PCBs for such circuits are engineered to handle the electrical loads and mechanical demands of applications like conveyor belts, jog motors, and automated systems.
Special Offer: Get $100 off your order!
Email [email protected] to get started!
Components Used in Start-stop Circuits
A start-stop circuit generally relies on various connected components to function. These include buttons/contacts, relay/contactor, motor, and overload.
| Component | Description |
|---|---|
| Buttons/Contacts | Distributes power and controls start/stop functions via logic gates. |
| Relay/Contactor | Controls power flow to components, activated by a low-voltage coil. |
| Motor | Drives machinery in start-stop circuits, such as conveyor belts. |
| Overload | Protects against overcurrent/overvoltage, typically with overload relays. |
Start-stop circuits rely on a push button and contact for electrical power distribution. These also rely on logic gates to start or stop operations for any provided application.
Relay/Contactor
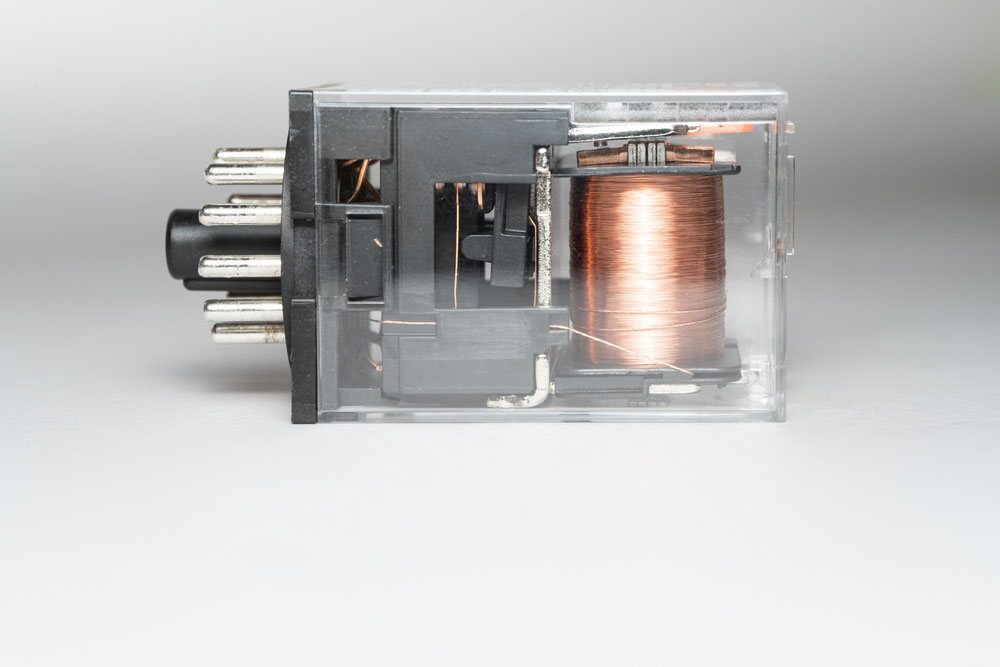
A relay or contactor controls components connected to the contactor or relay. In this case, a contactor’s coil connects to the control circuit’s lower voltage. Pressing the button provides power to the ring. Meanwhile, a motor receives voltage.
Motor
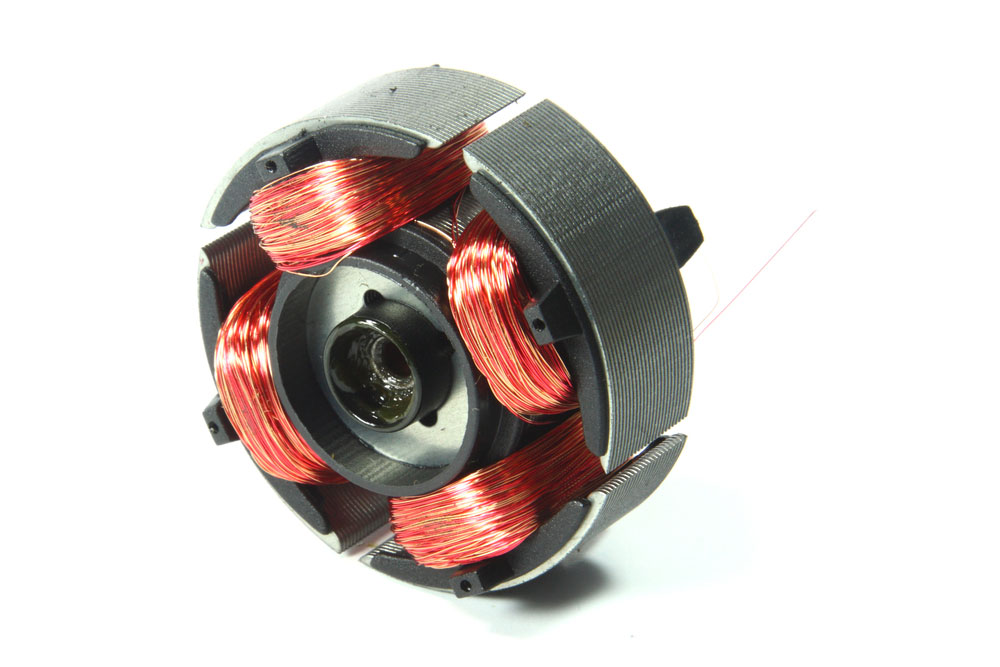
An electrical motor, which generates kinetic energy, provides start-stop functionality on a circuit. For example, it can control conveyor belts and process machinery movements.
Overload

Components need protection against overcurrent and overvoltage, so a circuit generally features an overload device. An example could include overload relays.
The Electrical Supply Required For a Start-Stop Circuit
Current flows throughout the circuit after pushing the start button.
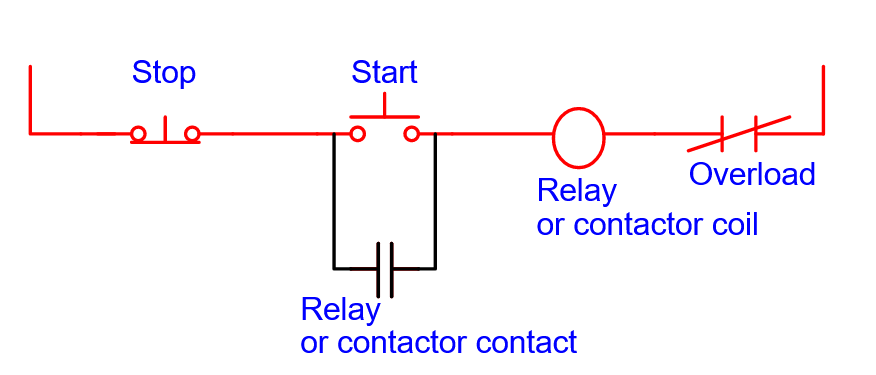
The red highlighted area demonstrates the start-stop circuit’s current flow path. Typically, a control circuit will have a voltage rating ranging from 24V – 400V. The control functionality relies on 24V in this case.
The relay or contactor coil sets to an active state.
The current will pass through once you push the start button. Afterward, the relay or contactor coil sets to an active state. A contactor provides motor control capabilities. Stimulating the contactor sends current to the motor, allowing it to operate.
The contact becomes powered up after the relay or contactor coil energizes. In turn, the circuit sets to a closed position, which means you can release the button, and the current will still flow. Otherwise, the course remains fully functional until you press the stop button or if a fault occurs.
Pressing the stop button (closed position) stops current flow throughout the circuit.
As implied, pushing the stop button, also called the closed position, prevents continued current flow throughout the circuit. In turn, the coil loses power, causing the course to open. Moreover, you can make the circuit functional again by pushing the start button.
Ways to Control the Wiring in a Start-Stop Circuit
You can control the start-stop circuit’s wiring with two configurations: two-wire and three-wire control.
Start-Stop Circuits: 2 Wire Control
A two-wire control has a control device with contacts intended to either activate or deactivate the pilot device. These also require minimal current levels to operate since larger loads, which rely on more connections, could damage the circuit. Therefore, two-wire controls have applications for controlling motors or lights. Releasing the button for this configuration opens the coil, implementing closed contact to ensure functionality.
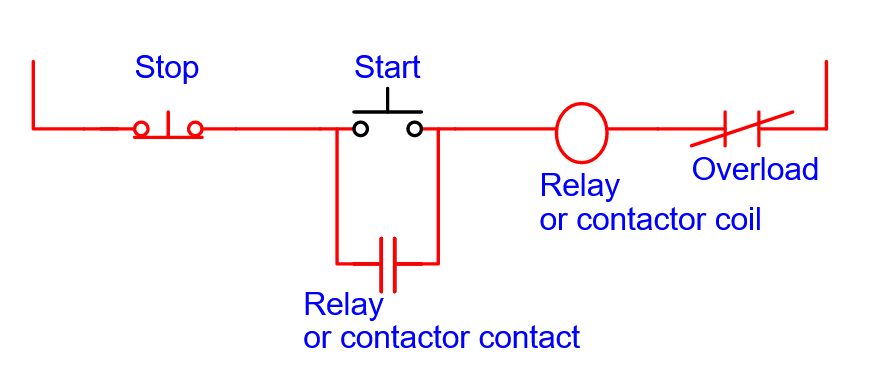
Start-Stop Circuits: 3 Wire Control
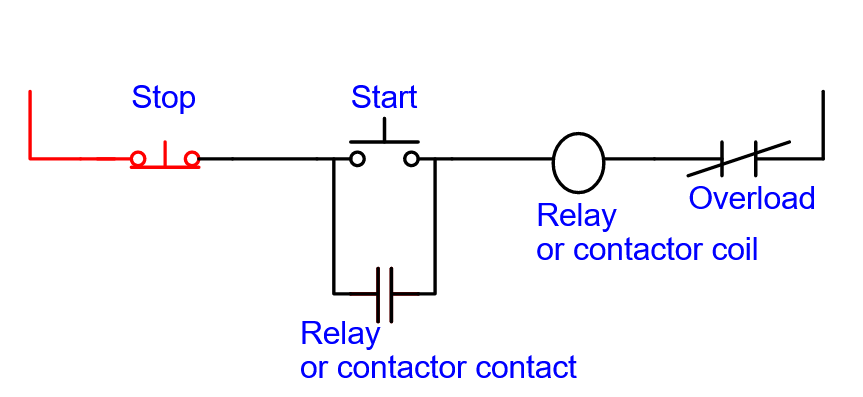
Example of a three-wire control position.
The start/stop control position circuit is an example of a three-wire control circuit. Generally, it relies on brief contact, start/stop stations, and a seal that opens upon contact. This contact connects to the start button in parallel, controlling the voltage that the coil receives. This configuration contains fewer components than the two-way control circuit, resulting in different functionality.
Other Start-Stop Circuits
You can also create other start circuit projects. We will look at the start-stop jog circuit, one with a connected motor.
Start-Stop Jog Circuit
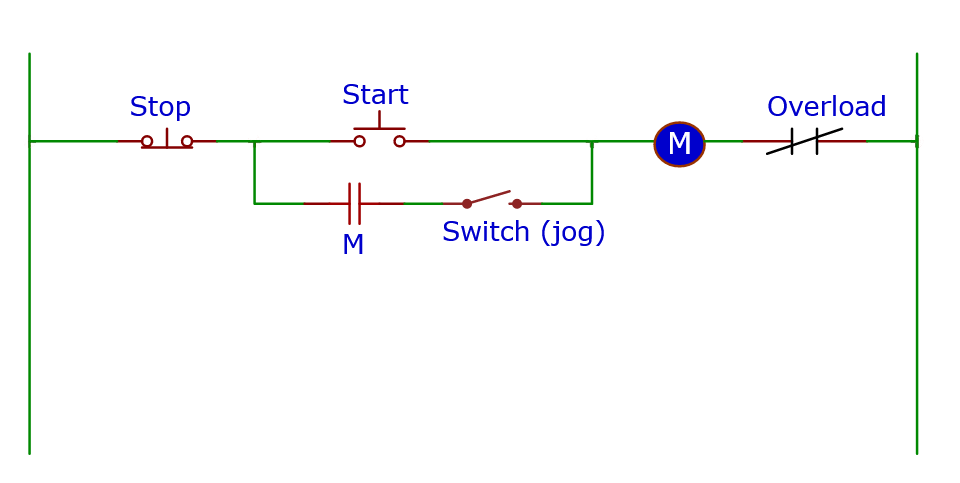
A start-stop circuit diagram with jog input.
Pushing the start button will cause the current to flow through the push button and seal-in contact. Next, the contact manages coil power distribution. So you can release the start button without interrupting the current flow.
Pushing the start button will cause the current to flow through the push button switch and seal-in contact. Next, the contact manages coil power distribution. So you can release the push button switch without interrupting the current flow.
You can de-energize the motor's coil through varying methods. If the motor overloads, then the contacts will open. Pushing the stop button will prevent power from reaching the seal-in contact, leading to a de-energized coil. Another option for closing the control circuit involves placing the switch in the jog state. It, in turn, de-energizes the lock. As a result, the seal-in contact will no longer supply power to the device.
You will need to push the start button to re-energize the coil.
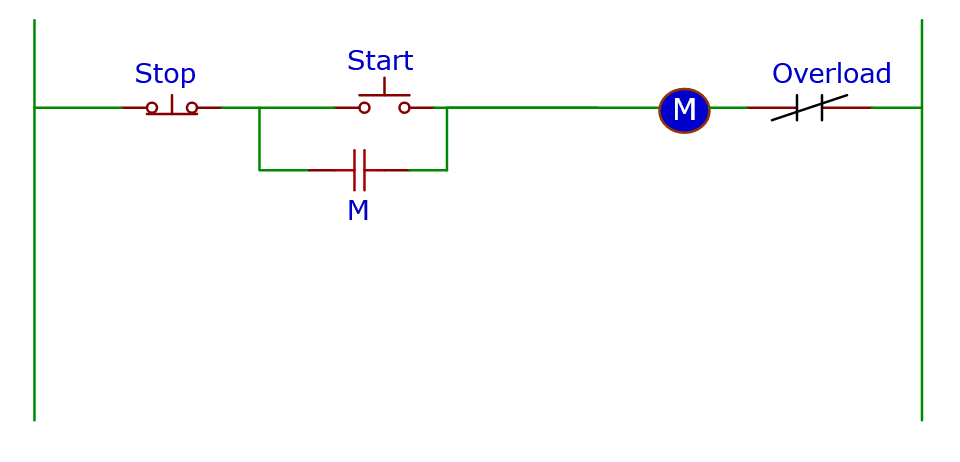
Start-Stop Circuits With a Motor Connected
Current flows throughout the circuit after pressing the button, activating the motor.
As you can see, the motor begins operating whenever current passes through a contactor coil.

Letting go of the start button or pressing the stop button stops the current flow.
The current will no longer flow throughout the circuit after you release the start button. Pressing the stop button also results in that effect. The motor will not run without applied power as a result.
OurPCB: Start-Stop Application PCB Assembly
Safety is essential in industrial and automotive settings, especially when working with complex control systems. Start-stop circuits enable streamlined control of processes, allowing machinery to be started or stopped instantly with the push of a button, which can significantly reduce the risk of accidents. As automation evolves, these control circuits will become even more integral to machinery, supporting more accessible and efficient operations. In automotive applications, collaborating with reliable automotive wire harness manufacturers ensures these safety-critical circuits are properly integrated into vehicle electrical systems.
If you have questions about designing start-stop circuits, OurPCB is here to help. Our PCB assembly services can create customized circuit boards for start-stop applications, ensuring reliable performance tailored to your specific needs. Contact us to learn how we can assist with your project!
Designing Start-Stop Circuits for Automated Systems FAQs
What is a remote start-stop control circuit?
A remote start-stop control circuit is a simple circuit allowing control over equipment from a distance by engaging a control relay. When the start button is pressed, this circuit enables power to the motor or equipment until the stop switch is used.
How many wires minimum are needed to a stop start station?
A 2-wire control configuration is the minimum required for basic start-stop circuit wiring to function. This circuit requires one wire each for the start and stop switches, connecting to the control relay.
A contactor can manage power to the motor by closing its contacts in a start-stop circuit when the start button is pressed. To maintain control, a level switch in the circuit or a parallel secondary starter circuit can engage the contactor until the stop switch opens the circuit.
Back to Top: Designing Start-Stop Circuits for Automated Systems
Special Offer: Get $100 off your order!
Email [email protected] to get started!