The default development environment for Arduino projects is the Arduino IDE, which works great. But what if you want an alternative development environment or something better?
VSCode Arduino is among the best in the market and offers multiple benefits over the default IDE. Here’s an in-depth review of this IDE to show you its benefits and capabilities.
Contents
What Is VSCode Arduino?
VSCode is short for Visual Studio Code, and it is a lightweight, open-source code editor that can run code bases for C, C++, Javascript, Python, etc.
The meaning of open source software
This Microsoft-supported code editor is available for Windows, MacOS, and Linux platforms, and it has a broad user base due to its multiple free extensions.
These include one for Arduino to allow Arduino programming directly on the code editor.
Special Offer: Get $100 off your order!
Email [email protected] to get started!
Why Is VSCode Arduino Better Than the Arduino IDE?
Although the Arduino IDE works well for microcontroller projects, it lacks critical features, making it inferior to modern IDEs. And this design is not by accident.
Arduino’s goal is to make it easier and less daunting for people new to coding. And more features make applications more complex to use.
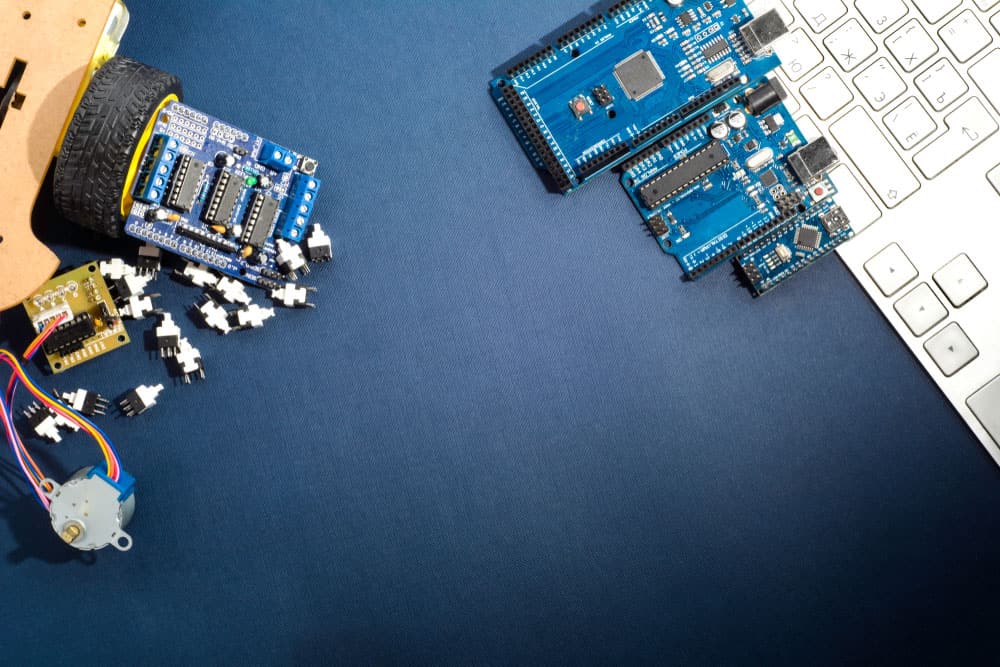
Arduino AVR boards (Arduino UNO, Mega, and Mini) next to a computer
Therefore, the IDE is ideal for beginners and developers making simple programs.
However, advanced programmers wanting to develop complex, fully-fledged applications won’t find it easy to follow the code. This issue becomes more profound when dealing with hundreds of lines of code and multiple files.
In such a case, VSCode becomes a relevant alternative, especially considering it has these rich features.
- Open-source platform (free to use and modify)
- Cross-platform application
- Code auto-completion (Microsoft Intellisense)

The concept behind Intellisense (intelligent code completion)
- Syntax highlighting
- Debugging functionality
- Integrated consoles/terminals
- Multiple extensions
- GitHub synchronization
- Git repository management and version control
- Advanced text editor
- Can run almost all programming languages
- Automatic Arduino project scaffolding
- Beautiful icons and themes
- Fast and lightweight design
- Snippets for sketches

VSCode color and theme options in the “getting started” tab
How To Install and Run VSCode
VSCode cannot work as your Arduino IDE alone. It needs the drivers installed by the Arduino IDE in your OS. So download and install the Arduino IDE first if you don’t have it in your system. Ensure you download the correct IDE that matches your computer’s OS.
When installing the software, leave all the sections, selections, and options in default. If prompted to install the USB drivers and COM port, install them. After that, follow these steps to install and run VSCode.
Step 1: Download and Install VSCode
Download the latest version of VSCode for your computer OS, then run the installer after downloading.
Step 2: VSCode Environment Setup
Launch the application, then click “Extensions” on the left side to open the extension marketplace.
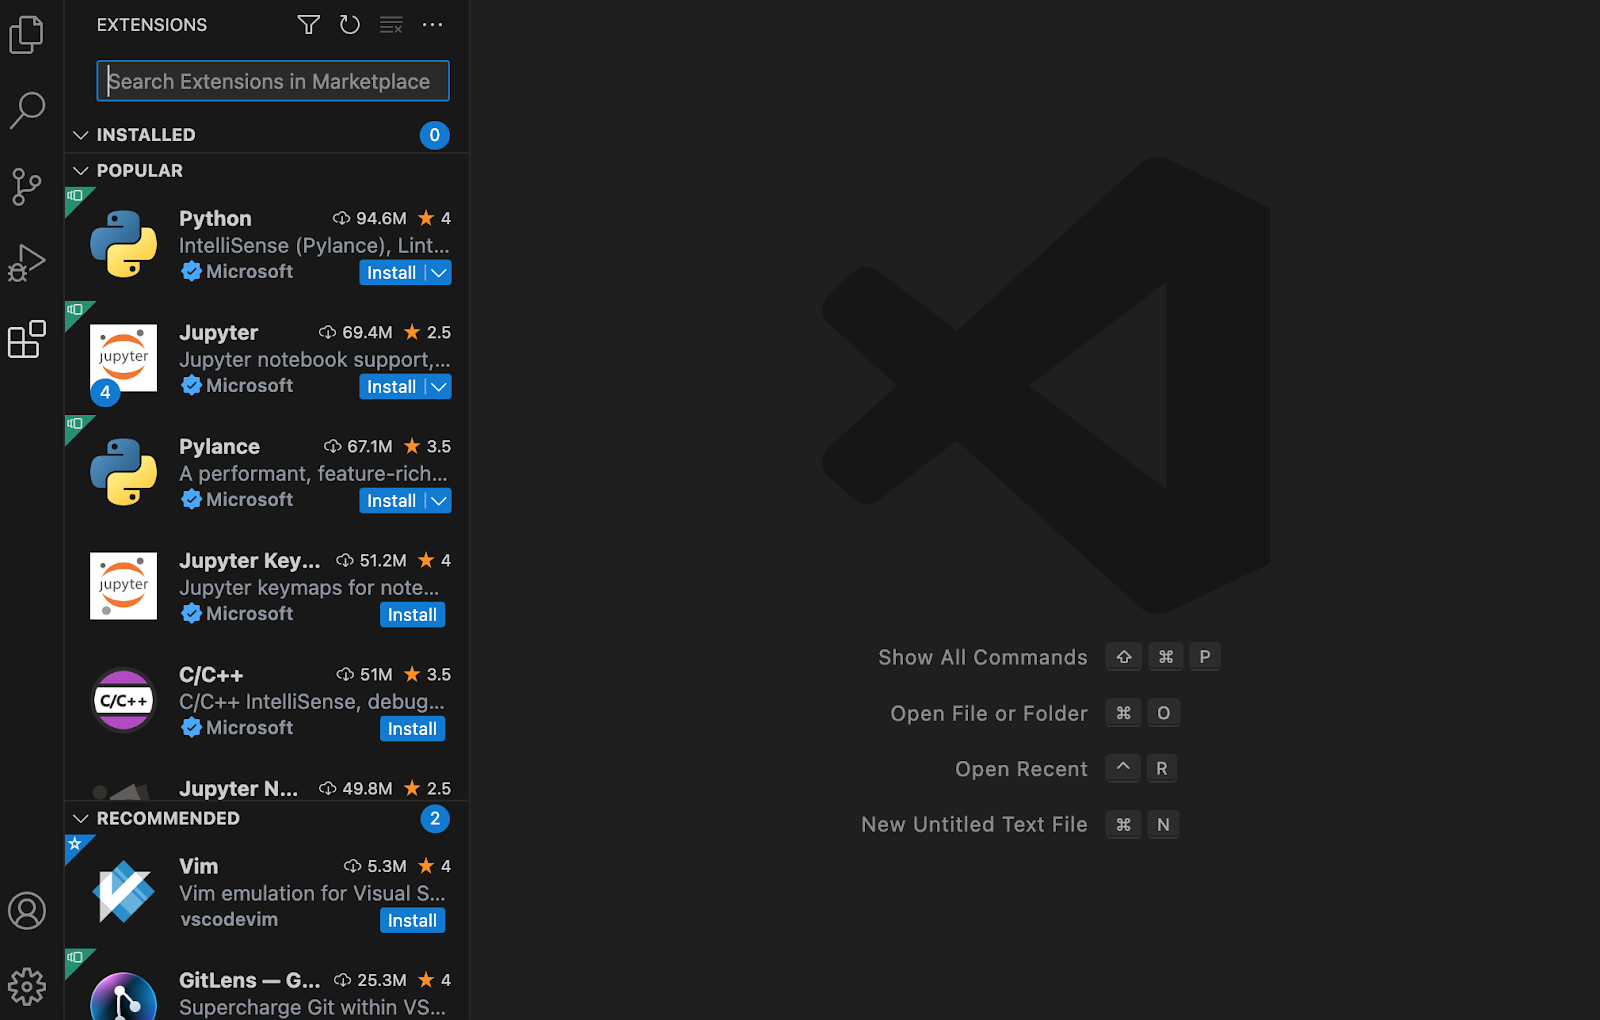
The VSCode extensions tab shows the top and most popular marketplace extensions.
Type “Arduino” in the search bar to filter through the extensions and get only those related to Arduino. You will get several Arduino extensions, and we recommend downloading the one officially supported by Microsoft.
Install this Arduino extension and allow dependencies when prompted. Click “Reload” to relaunch the software with the extension enabled.
In some operating systems, especially Windows, you might have to give VSCode firewall access, depending on your settings. So, allow access if the security alert window pops up.
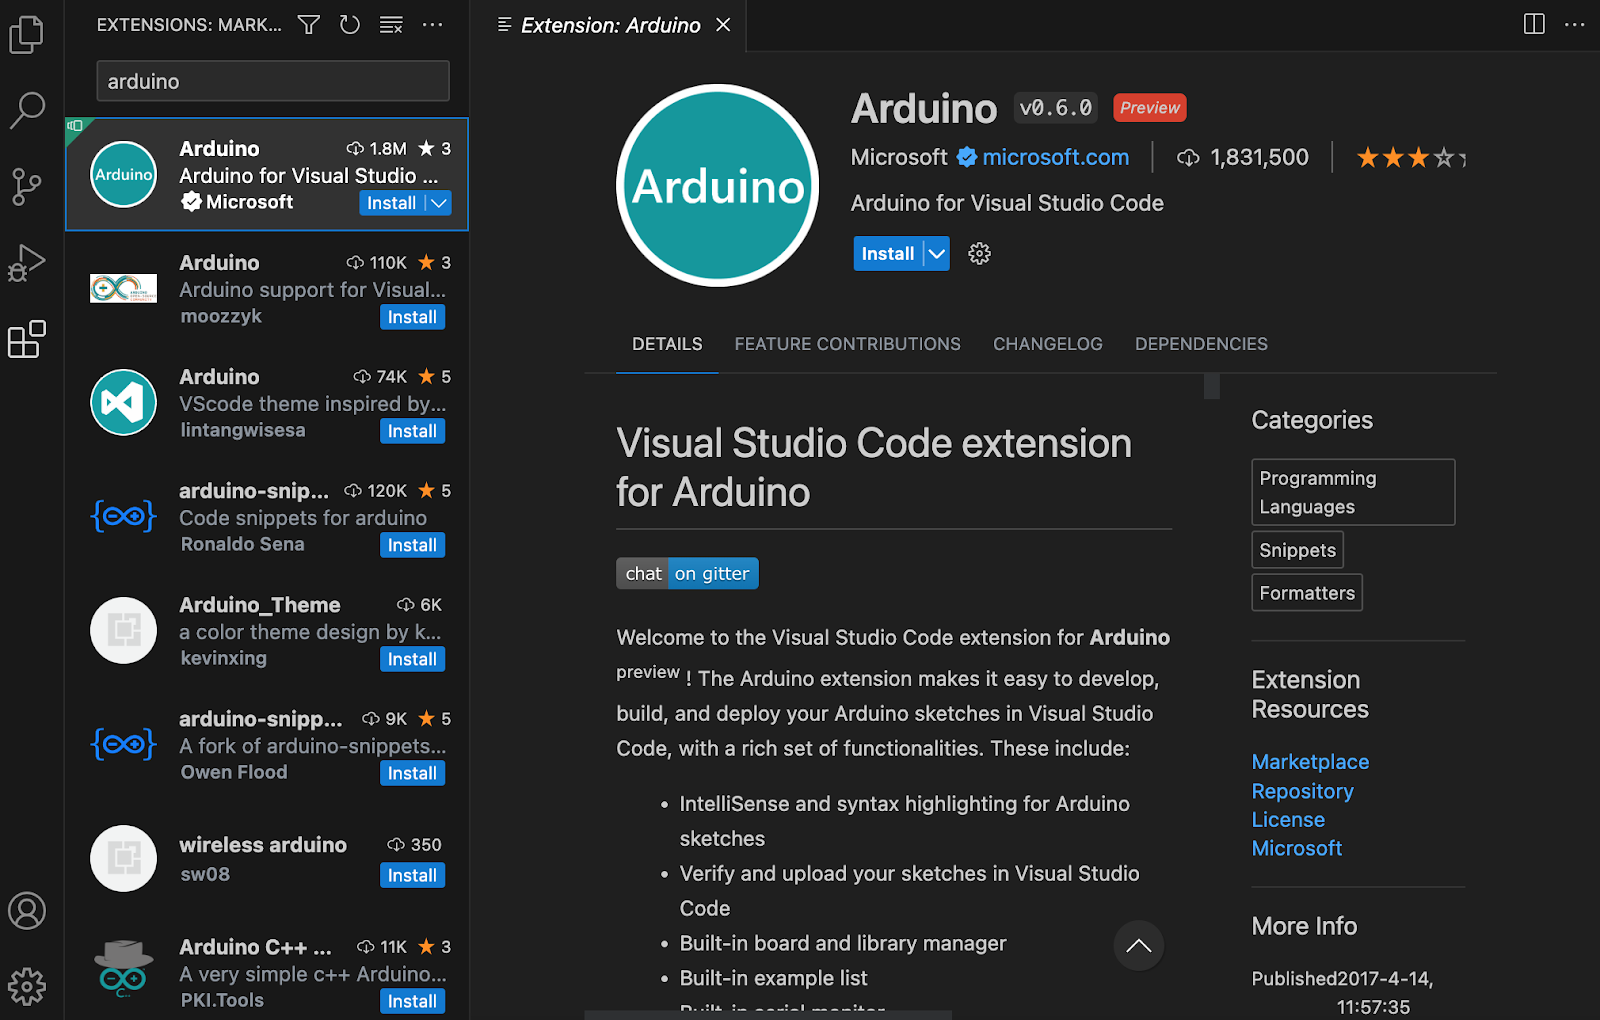
The Arduino extension by Microsoft
Step 3: Arduino Programming in VSCode
Go to the command palette using the Ctrl+Shift+P shortcut key combination. Search for Arduino example projects in the palette’s search bar, and choose a sample project, like the one named “Blink.”
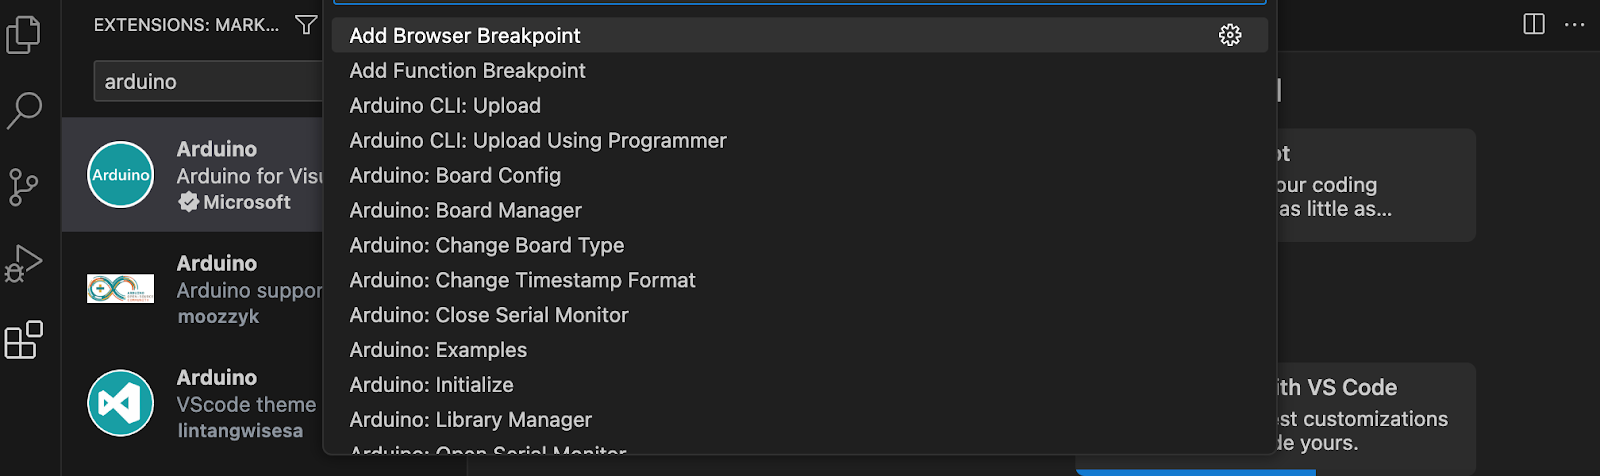
The command palette in VSCode
This selection will open a new window that shows the Blink sketch file and lists the help text file on the left explorer pane. Click “Blink. in” on the explorer pane to launch the sketch in the editor.
Connect your Arduino development board to the computer via a USB cable, click “Arduino Board Config,” then select the board type you’re using for your project.
This menu opens a right panel that lists various Arduino dev board types. Ensure you pick the specific board configuration if it has several variants.

The Arduino board manager in VSCode
Next, select the serial port corresponding to the Arduino board picked earlier in the board manager.
Clicking COM should open a tiny window above the VSCode to indicate the connected Arduino board. Next, go to the select programmer selection drop-down menu and select “AVRISP mkII.”
Hit the upload button on the top-right corner of the VSCode application window, then check the console for the upload status. If everything is okay, the console should indicate the code is loading.
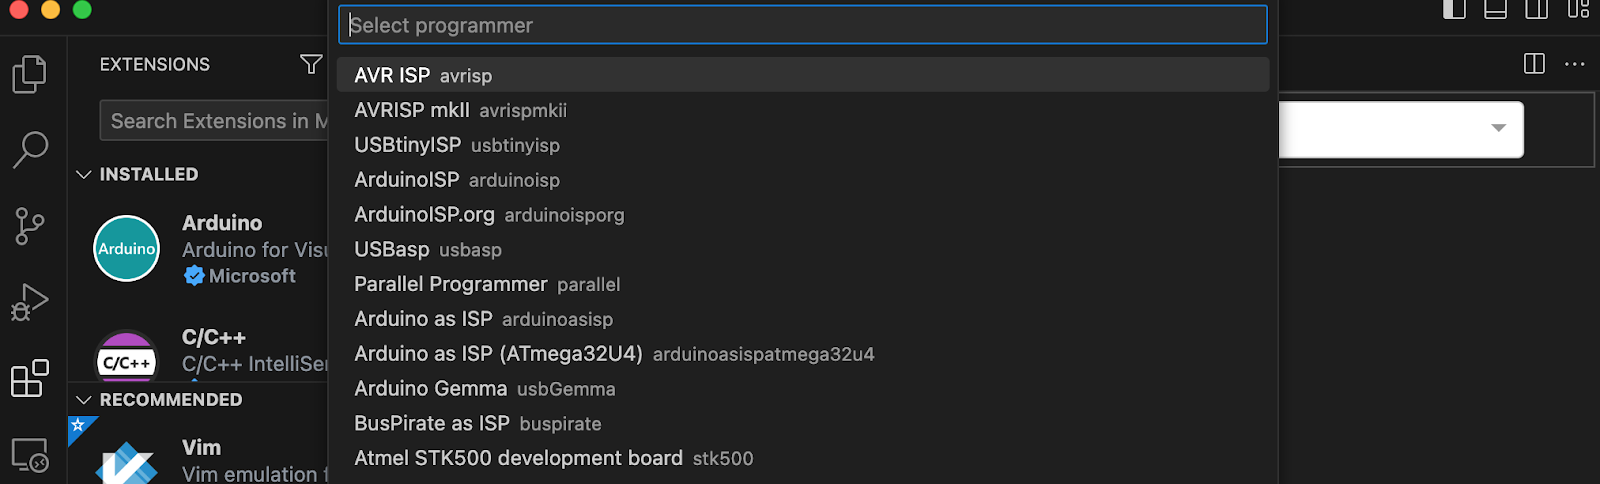
The “select-programmer” section highlights different options.
And you’ll know if the process is complete and successful by checking the LED on your Arduino board. It should blink at a rate of about one blink/second.
You can modify the baud rate in the bottom-right configuration bar.
Step 4: Sending Commands to the Built-In Serial Monitor
It is also possible to send commands via the serial port. Go back to the command palette using the Ctrl+Shift+P shortcut, then enter the words “Send Text to Serial Port” in the search bar. Hit enter. An input bar should pop up.
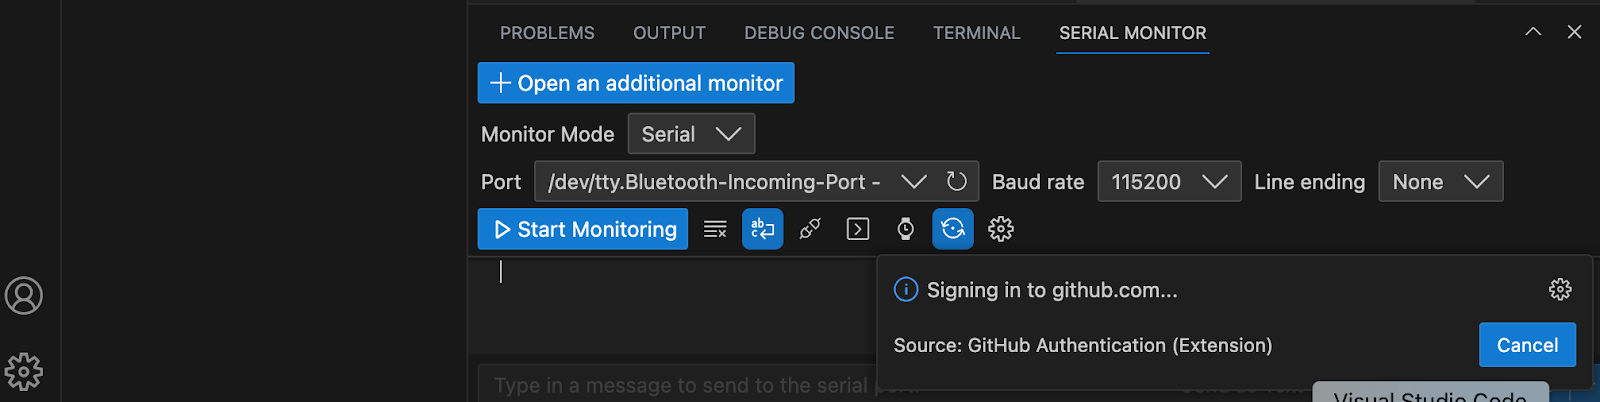
The VSCode serial monitor
If you use this command often, you can create its shortcut easily by pressing the gear icon on the right section of the search bar result for this command. Next, customize the shortcut keys in the key binding tab.
Wrap Up
Switching to VSCode Arduino opens new possibilities for your coding experience to streamline your workflow and make the process easier when developing complex projects.
And the software is free, meaning the switch has zero downsides. So try the open-source platform today and let us know what you think. That’s it for today. Have a good one!
Special Offer: Get $100 off your order!
Email [email protected] to get started!