The ability to cut off the power supply remotely is handy in several applications, especially in anti-theft car systems. It can also be ideal for car hire or fleet management, where you can turn off vehicles if they go beyond a preset range. So if you have a project requiring a remote kill switch, here's how you build the device.
Contents
- What is a Remote Kill Switch?
- How a Remote Kill Switch Works
- Types of Kill Switches
- Fuel Line Shut-Off Valve
- Fuse Box Kill Switch
- Car Battery Disconnect Switch
- Ignition Wire Kill Switch
- Remote Control Car Battery Switch
- How To Build a Remote Kill Switch
- The Control/Cut-Off Circuit
- Modify the Transmitter
- Install the Remote Kill Switch
- Conclusion
What is a Remote Kill Switch?
A kill switch is a device installed in a vehicle to stop it from starting until disengaged. The device usually has a button to disable the system by closing a circuit to enable electricity to flow into a car's ignition system. It could operate using other mechanisms, such as cutting the fuel supply.
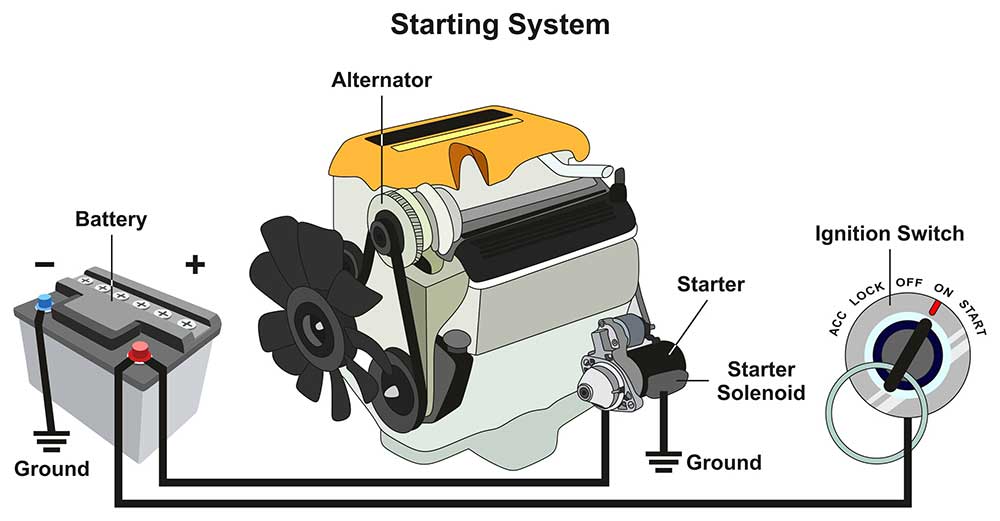
A vehicle’s ignition system
Remote kill switches disengage the system remotely. But in most cases, these devices turn off cars or cut off the power supply remotely to switch off the vehicle.
Special Offer: Get $100 off your order!
Email sales@ourpcb.net to get started!
How a Remote Kill Switch Works
Commercial remote kill switches usually have built-in GPS modules to help track the vehicle and turn it off from anywhere. However, short-range remote kill switches, such as for toys, can use radio transmitters and receivers to enable communication between the handheld switch and the circuit in the vehicle.
This remote device generally falls under the kill switch category, under which there are five types.
Types of Kill Switches
The five kill switch types include the following.
Fuel Line Shut-Off Valve
As the name suggests, this motor vehicle kill switch keeps fuel from getting to the engine. The motor will still crank but will not have enough juice to get it running.
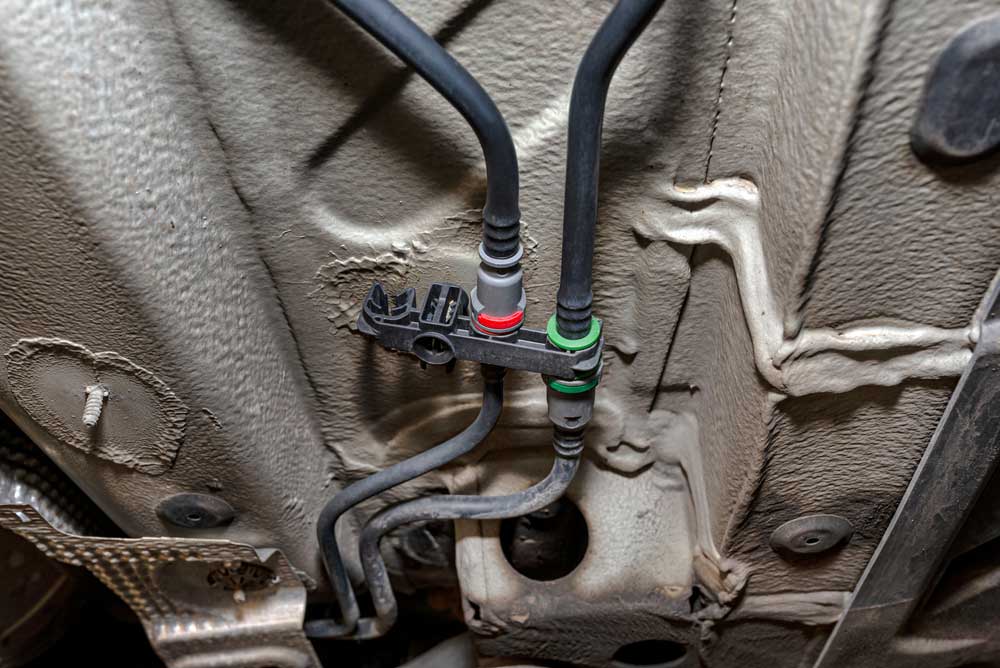
Fuel lines in a vehicle
This anti-theft system replaces a part of the fuel line, and you control it by turning a knob. Fuel will flow to the engine in the open position but will not flow through in the closed position.
Fuse Box Kill Switch
This device cuts power to the fuse box using a switch. You can run wires to it, which enables you to hide the switching mechanism inside the cabin. The device is ideal for the daily driver because working with it is easier and more convenient.
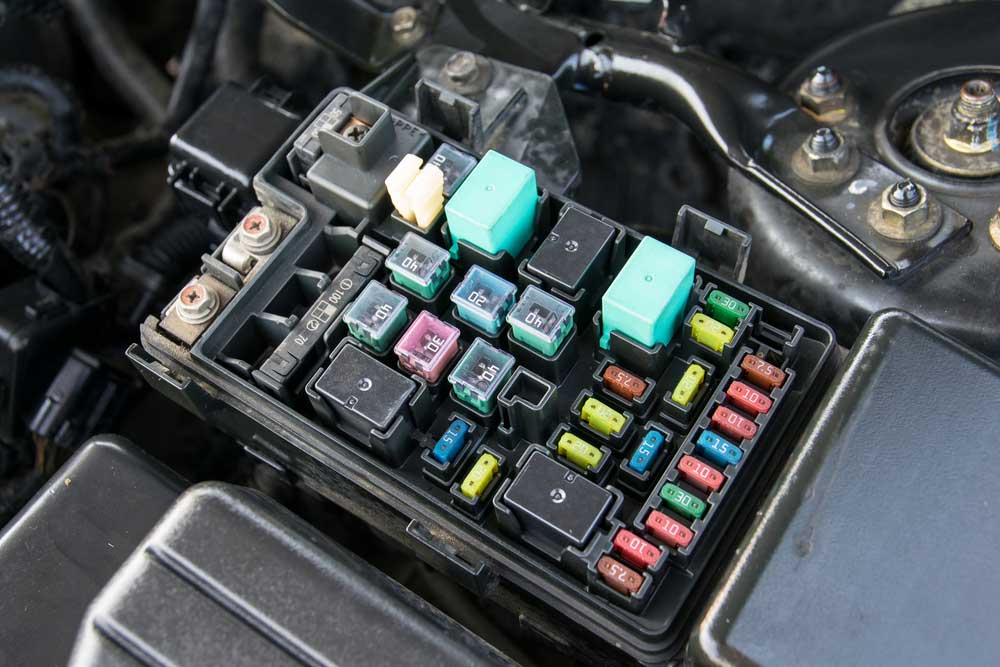
A car’s fuse box
Car Battery Disconnect Switch
A battery disconnect switch works by cutting off the negative battery terminal and reconnecting it to regulate power flow. The device could be a knob, an on/off switch, or require keys to disengage. Therefore, the car will not crank because power does not reach the starter.
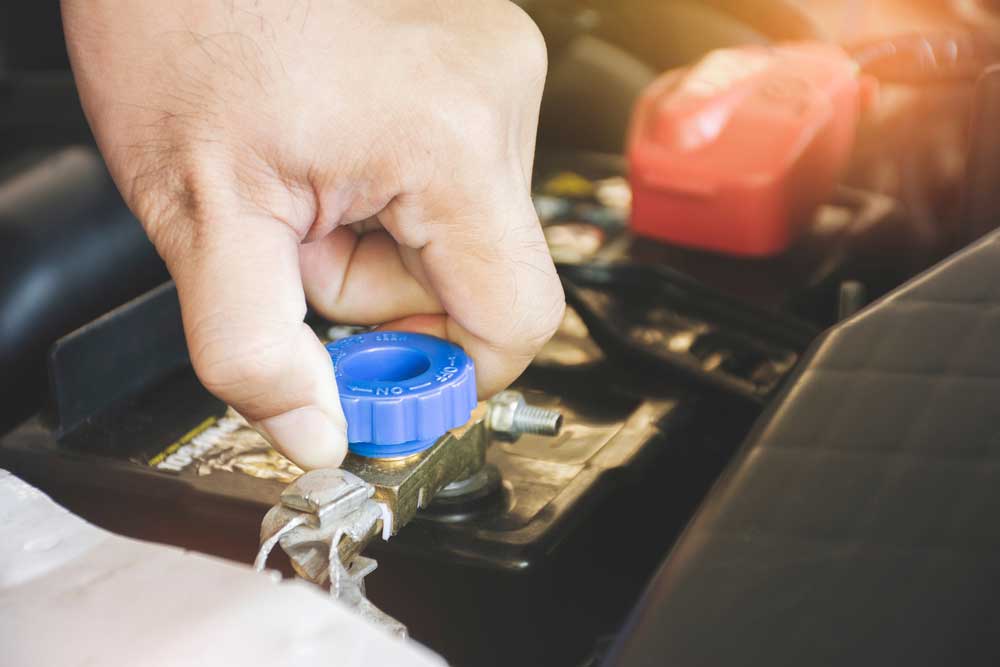
A car battery disconnect knob
Ignition Wire Kill Switch
This kill switch goes directly to the source, creating an open circuit in the ignition wire. Like a fuse box kill switch, you can wire this device and place it in any hidden spot inside the car. And similar to the fuse box and battery power kill switch, the ignition wire kill switch makes the vehicle seem like it has a dead battery because it won't crank.
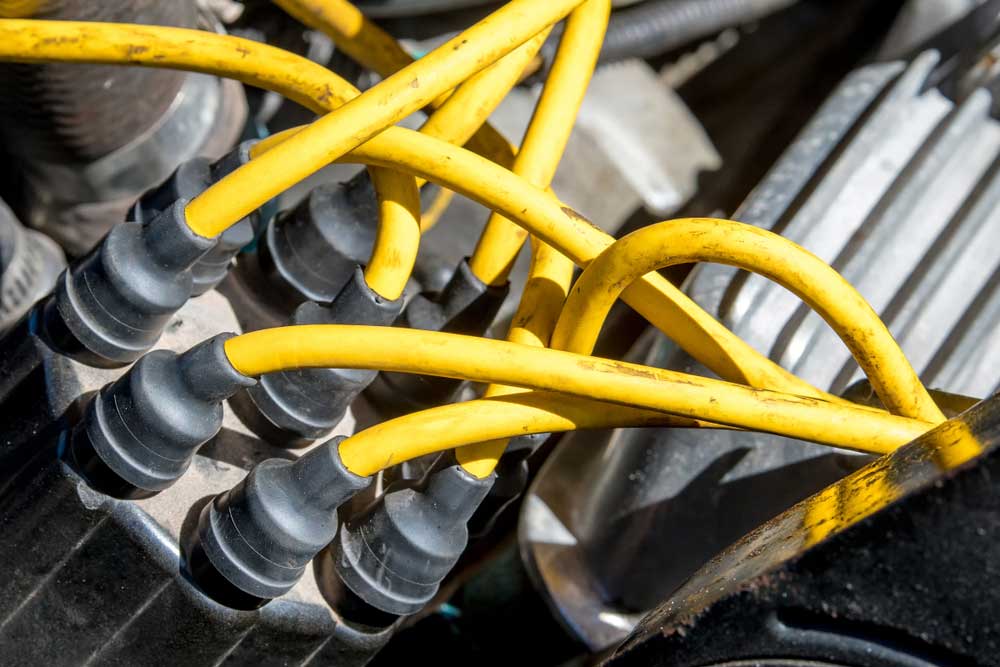
Yellow ignition wires on an engine
Remote Control Car Battery Switch
A remote control car battery switch sits along the power line from the battery. But instead of a knob or switch, you engage or disengage the system using a remote control transmitter. So there's no need to install hidden kill switches, and you can turn it on immediately if you detect suspicious activity.
The device uses an electromagnetic solenoid valve terminal and hooks to the negative terminal like the car battery disconnect switch. This magnet moves a piece of metal inside that opens and closes the circuit to operate the power-killing mechanism.
How To Build a Remote Kill Switch
You need the following components to build this project.
- Automotive relay
- Radio receiver and transmitter (from a wireless doorbell, walkie-talkies, etc.)
- Three resistors (1kΩ, 3.3kΩ, and 10kΩ)
- 741 op-amp IC

741 op-amp chips
- Power MOSFET
- 100 µF capacitor
- Two 1-amp diodes
- Small sliding switch
- Breadboard or circuit board
- Jumper wires
- Glue
- Heat shrink tubing
- Quick disconnect connectors
You will also need the following tools
- Knife
- Screwdriver
- Wire strippers
- Soldering iron
The transmitter and receiver are critical in a remote kill switch so get those with the longest possible range. Next, modify the receiver because you need to connect the positive and negative terminal wires to the control circuit.
If using a walkie-talkie, cut the speaker wires, strip the ends, then link them as shown in the circuit diagram below. Also, remove the call button from the walkie-talkie.
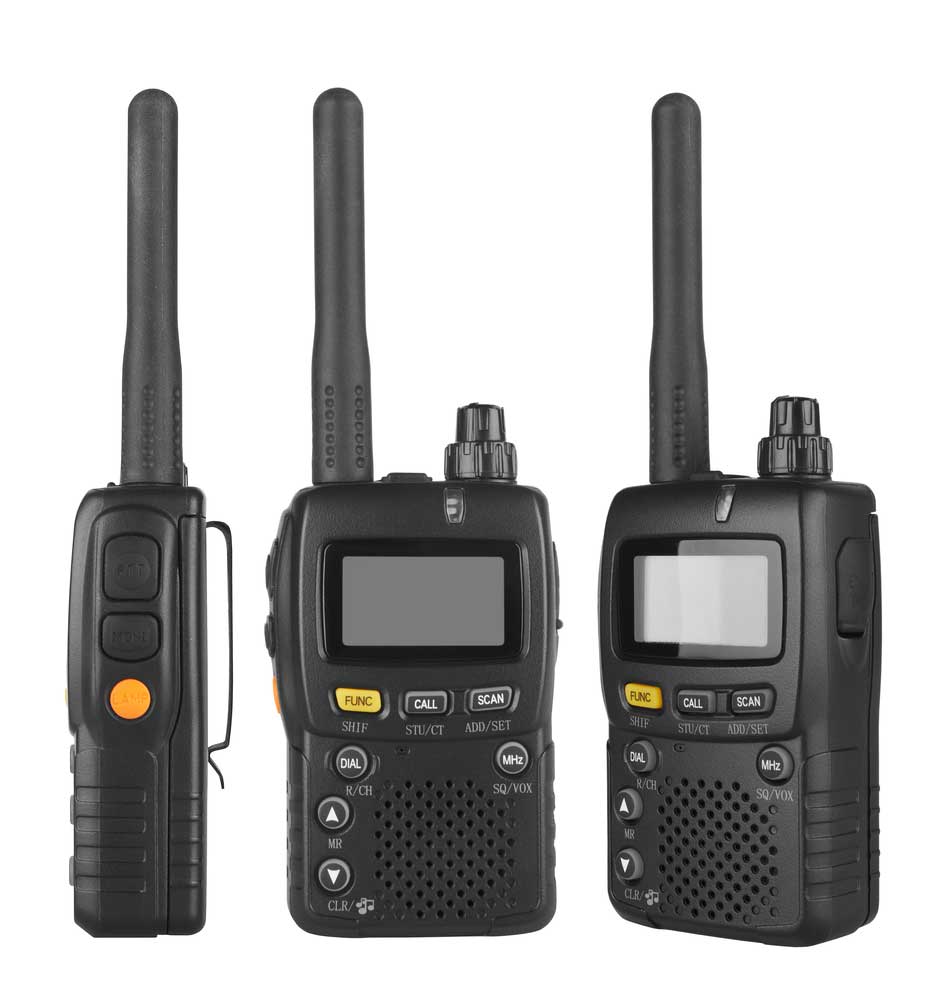
Walkie-talkies
The Control/Cut-Off Circuit
This circuit uses a 741 op-amp to monitor the receiver's output. The 1kΩ and 3.3kΩ resistors connected in series form the voltage divider, creating a reference voltage the op-amp uses for comparison. You might have to change these resistors to calibrate the receiver. So when the output voltage from the receiver exceeds the reference voltage, the op-amp switches to high and activates the relay.
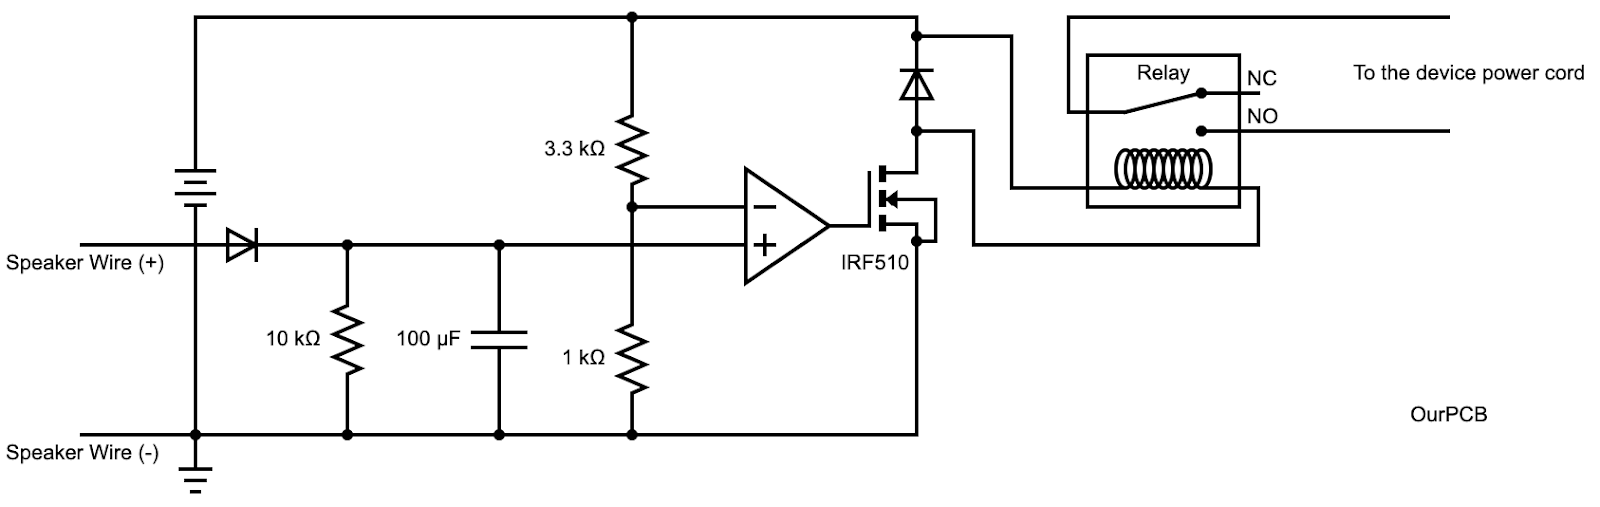
The capacitor, diode, and resistor in the control circuit's input filter out the noise and smoothen the control signal pulses from the receiver to prevent rapid on/off switching. Power comes from a 12V battery pack.
If the control circuit and receiver require a battery and operate at the same voltage, wire them together in parallel. However, if they use different voltages, use a voltage regulator to lower the voltage of the control circuit battery to match that of the receiver, then connect and power them using one battery.

An automotive relay switch
Modify the Transmitter
If your transmitter has a momentary switch, replace it with a latching switch so that it can stay on without needing to hold down the button. After soldering the latching switch, use heat shrink tubing to insulate the power connections. You might have to cut a slot in the walkie-talkie housing to fit this switch, then stick it in place using glue. Ensure you don't glue any of the moving parts.
Install the Remote Kill Switch
Install the remote kill switch along the power line in the vehicle. For instance, you can place it between one of the wires that power the car wheels (motor) in a power wheels car. When working with vehicle electrical systems, sourcing quality components from trusted automotive wire harness manufacturers ensures reliable connections and proper integration. Ensure you connect the relay terminals to these electric wires using the normally open terminal.

An electric toy car for kids
Once connected, the control circuit will disconnect the battery when it activates the relay. So if the car goes beyond the transmitter's range, the lack of an incoming signal will cause the control circuit to activate the relay and cut off the power supply.
Mount the receiver and control circuit inside the vehicle and keep the transmitter on hand. If your boy has a small power wheels car, you can use this device to keep him from going off limits.
Conclusion
In conclusion, remote kill switches are arguably the easiest to use, safest, and most convenient kill switches among the five types. And they are easy to build. If you require a circuit board to make your device look professional and more compact, get in touch for more details. We’re always happy to help.
Special Offer: Get $100 off your order!
Email sales@ourpcb.net to get started!