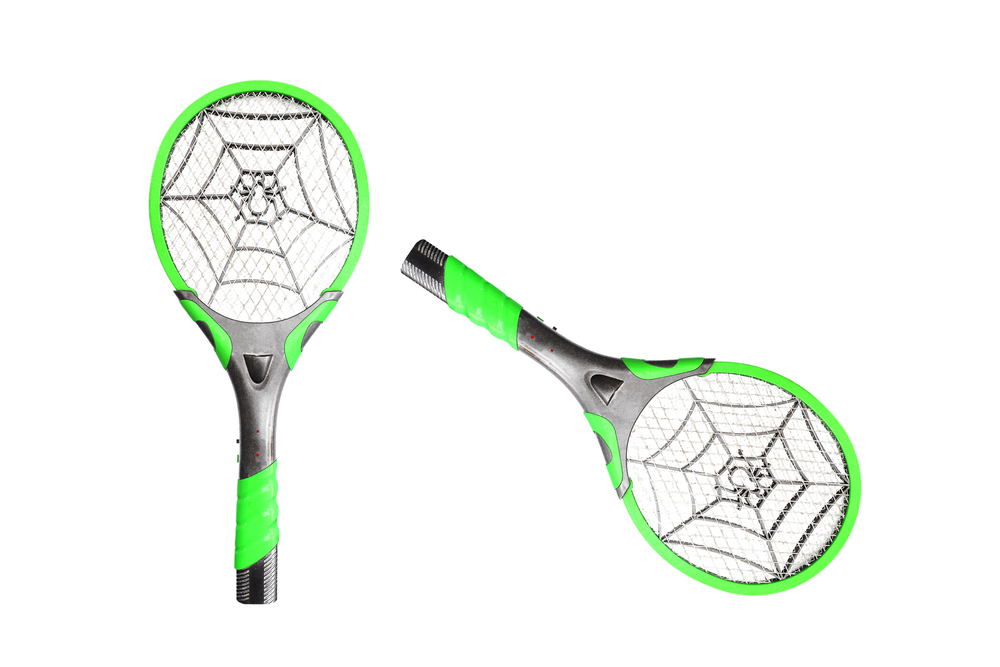
A bug zapper, an electric insect trap, lures insects using ultraviolet (UV) light. Once insects are drawn toward the light, they encounter a high-voltage metal grid that electrocutes them on contact. The characteristic “zap” sound signals a successful catch, hence the name “bug zapper.” Bug zappers are effective against various flying insects, including mosquitoes, flies, and gnats.
Contents
- How does a Bug Zapper Circuit Work?
- Key Stages of a Bug Zapper Circuit
- Voltage and Power in Bug Zappers
- Voltage Output
- Bug Zapper Circuit Diagram
- How to Build a DIY Bug Zapper Circuit
- Materials Needed
- Step-by-Step Bug Zapper Circuit Assembly
- PCB Design for Bug Zappers
- Troubleshooting Tips for Your Bug Zapper Circuit
- Bug Zapper Circuit FAQs
- How many volts are in a bug zapper?
- Is it safe to use a bug zapper indoors?
How does a Bug Zapper Circuit Work?
The bug zapper circuit uses a high-voltage alternating current (AC) to deliver a fatal shock to insects. Here’s a breakdown of the bug zapper’s basic components and their functions.
| Component | Function |
| UV Bulb | Attracts insects to the zapper. |
| Electric Mesh Grid | Delivers a high-voltage shock to kill insects on contact. |
| Flyback Transformer | Generates the high voltage needed for the zapper. |
| Voltage Multiplier | Boosts the current to lethal voltage levels. |
Key Stages of a Bug Zapper Circuit
The zapper circuit consists of three main stages:
- Charging Circuit Stage: This section controls and stabilizes the voltage using a capacitive power supply that charges the grid and eliminates electrical noise. Capacitors and Zener diodes help regulate voltage levels, allowing safe charging.
- Transistor Stage: The transistor stage manages the flow of current, inducing a high-voltage pulse in the feedback coil when the transistor’s core collapses. This mechanism generates the electric arc needed to zap insects effectively.
- Voltage Booster Stage: The voltage multiplier circuit, using capacitors and diodes, amplifies the voltage output. This high-voltage output powers the mesh grid, which then arcs when an insect contacts it.
Voltage and Power in Bug Zappers
Most bug zappers operate between 500V to 2000V AC. While the device’s current is low enough to be safe for humans, it is sufficient to kill most small insects. The high voltage generates an electric arc between the metal grids, so when an insect enters this gap, it completes the circuit and is electrocuted.
Voltage Output
The voltage on a bug zapper's circuit grid varies but can typically reach 2000V or more. This high voltage is necessary to create an electric arc that effectively electrocutes bugs upon contact with the mesh.
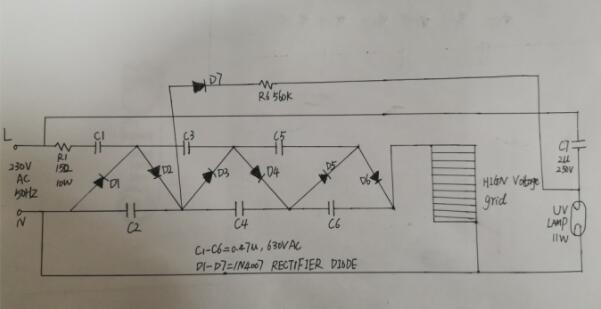
Bug Zapper Circuit Diagram
Special Offer: Get $100 off your order!
Email [email protected] to get started!
How to Build a DIY Bug Zapper Circuit
Here’s OurPCB’s step-by-step guide to help you build a DIY bug zapper circuit.
Materials Needed
| Item | Description |
| UV Light Bulb | Attracts insects with ultraviolet light. |
| Wire Mesh | Conducts high voltage and electrocutes insects. |
| Transformer | Boosts voltage to lethal levels (1800V to 2000V). |
| 6V Rechargeable Battery | Powers the device. |
| Soldering Gun and Wire | Used to connect the circuit components. |
| Outer Casing | Provides a safe housing for all components. |
Step-by-Step Bug Zapper Circuit Assembly
Step 1: Building the Framework
- Prepare the Base: Use a plant vase cover or a similar object to form the outer casing for your zapper. Create a round wooden base plate to fit inside the vase cover, drilling six evenly spaced holes around its circumference.
- Drill Support Holes: These will hold the wooden rods that will reinforce the structure and act as insulation between layers of the mesh grid.
- Assemble the Mesh Grid: Roll the wire mesh into a cylindrical shape around the UV bulb. Ensure that the layers don’t touch; this spacing is essential to allow an electric arc to form.
Step 2: Install the UV Light Bulb

Place the UV bulb at the center of the zapper structure. The bulb will serve as the lure to attract insects. Drill a hole in the wooden base to fit the light’s wiring, ensuring the bulb is positioned securely in the center.
Step 3: Electrify the Mesh Grid
Connect the mesh grid to the zapper circuit, using soldered black and red wires. The transformer and voltage multiplier stages will power this grid with high voltage. When an insect bridges the gap between the mesh layers, the high voltage will complete the circuit and deliver a shock.
Step 4: Wire the Circuit Components
Using the bug zapper circuit board as a base, assemble the following key components:
- Capacitors and Diodes: These will stabilize and boost the voltage.
- Flyback Transformer: Essential for generating high voltage to the mesh.
- Voltage Multiplier: Boosts the battery’s output to lethal levels.
Each component connects to the PCB layout according to a bug zapper schematic. Carefully solder all connections, ensuring there are no crossed wires that could lead to a short circuit.
Step 5: Add the Handle and Finishing Touches
For added convenience, attach a handle to your DIY bug zapper. Reuse a handle from an old lantern if available. This handle makes the zapper easy to carry and position. Drill a small hole at the top for mounting the handle and power switch.
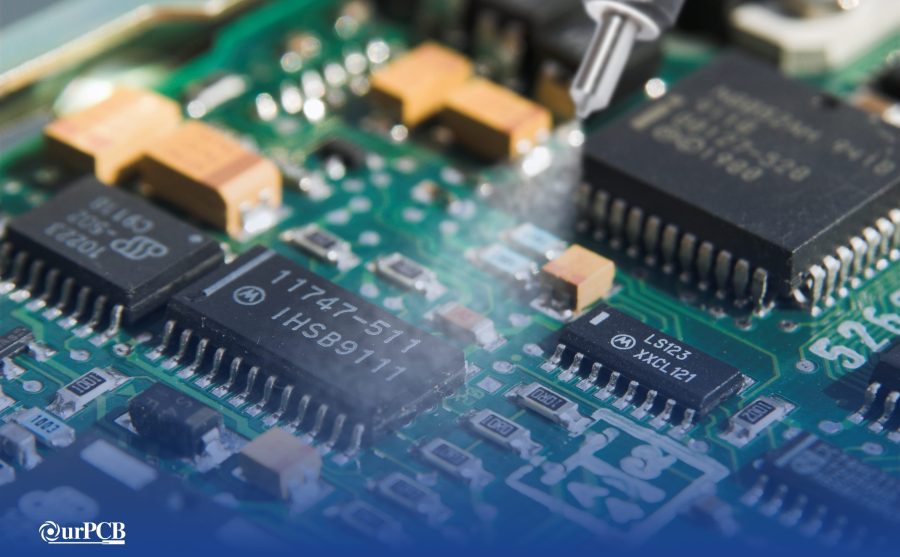
PCB Design for Bug Zappers
Creating a custom PCB for your DIY bug zapper can improve durability and create a more compact and efficient design. A PCB design will help you to correctly organize components and minimize wiring errors. Here’s what to consider when designing a bug zapper PCB:
- Power Input: Includes connections for the battery or external power source.
- Transformer Section: Position the flyback transformer here to boost voltage.
- Voltage Stabilization: Capacitors and diodes in this section filter noise and stabilize the power output.
- High-Voltage Output: This section connects to the mesh grid and delivers the high-voltage charge required to zap insects effectively.
Troubleshooting Tips for Your Bug Zapper Circuit
If your homemade bug zapper isn’t working correctly, here are some troubleshooting steps to ensure each component functions as intended.
| Issue | Solution |
| No Light | Check that the UV bulb is properly connected, and the power source is functional. |
| No Arc on the Grid | Inspect the mesh for crossed wires; clean off any insect residue to ensure conductivity. |
| Low Voltage Output | Test the transformer and capacitors to confirm they’re working. Replace as needed. |
Constructing a DIY bug zapper offers a hands-on way to learn about electronics while creating an effective tool for insect control. With a basic understanding of the bug zapper circuit and its components, you can design a highly efficient insect or mosquito zapper that’s easy to assemble and maintain.
OurPCB provides PCB manufacturing services that can support the development of bug zapper circuits, ensuring reliable and efficient operation for this essential pest control device. For personal use or educational purposes, creating a homemade bug zapper is a rewarding project that combines technical knowledge with practical application — all while helping to keep pesky insects at bay.
Bug Zapper Circuit FAQs
How many volts are in a bug zapper?
Bug zappers typically operate at a voltage of 500V to 2000V AC. This high voltage allows for an effective electric arc that can instantly kill insects.
Is it safe to use a bug zapper indoors?
Yes, bug zappers can be used indoors. However, they should be placed away from food preparation and dining areas to avoid contamination from electrocuted insects.
Back to Top: Bug Zapper Circuit: Your Complete DIY Guide
Special Offer: Get $100 off your order!
Email [email protected] to get started!