The best list of sensors technology is increasingly affecting our lives positively in many ways. Various applications and systems come with built-in tiny sensors that automate a lot of their functions. Sensors produce signals in electrical, optical, or other forms. The signs are useful in operating systems more efficiently, controlling and monitoring operations, making design changes to improve performance and many more.
Sensors play a vital role in healthcare, aviation, textile, marine, automotive, and many other industries. Sensors enable us to keep an eye on our environment for early signs of natural disasters. They also help in monitoring smoke levels and unauthorized entries in our homes.
Contents
- What is a Sensor?
- Sensors Definition
- How do Sensors Work?
- Types of Sensors
- 1. Temperature Sensors
- 2. Proximity Sensors
- What are Proximity Sensors?
- 3. Accelerometer Sensors
- 4. Best List of Sensors-- Infrared Sensors
- 5. Pressure Sensors
- How do Tire Pressure Sensors Work?
- 6. Best List of Sensors-- Light Sensors
- 7. Segment Display Sensors and Applications
- 8. Ultrasonic Sensors
- 9. Smoke, Gas, and Alcohol Sensors
- 10. Best List of Sensors--Touch Sensors
- 11. Color Sensors
- 12. Humidity Sensors
- 13. Best List of Sensors-- Tilt Sensors
- 14. Flow and Level Sensors
- 15. Arduino Sensors
- 16. Best List of Sensors--Raspberry PI Sensors
- 17. Door Sensors
- How to Align Garage Door Sensors
- 18. IoT Sensors
- 19. Parking Sensors
- 20. Motion Sensors
- How do Motion Sensors Work?
- 21. Home Sensors
- 22. Car Sensors
- 23. MEMS Sensors
- 24. O24 Sensors
- 25. A-C Current Sensors / AC Current Sensors
- 26. RPM Sensors
- 27. Water Sensors
- 28. Smart Sensors
- 28. ABS Speed Sensors / ABS Wheel Speed Sensors
- 30. Hall Effect Sensors / Hall Sensors
- 31. Wearable Sensors
- 32. Force Sensors
- 33. Driveway Sensors
- 34. Inductive Sensors
- 35. Camera Sensors
- 36. Environmental Sensors
- 37. Chemical Sensors
- 38. Vibration Sensors / Vibrometer Sensors
- 39. Lidar Sensors
- 40. Barometric Sensors
- 41. Angle Sensors
- 42. Catalytic Converter Sensors
- 43. Capacitive Sensors
- 44. Custom Control Sensors
- 45. Knock Sensors
- 46. Optical Sensors / Fiber Optic Sensors
- 47. Position Sensors
- 48. Electronic Sensors
- 49. Precision Sensors
- 50. Engine Sensors
- 51. Accelerator Pedal Sensors / Accelerator Sensors
- 52. Weight Sensors
- 53. Magnetic Sensors
- 54. Wireless Sensors
- 55. Elderly Monitoring Sensors
- 56. Laser Sensors
- 57. Thermal Sensors / Remote Thermostat Sensors
- 58. Reversing Sensors
- 59. Distance Sensors
- 60. Wind Speed Sensors
- 61. Air Quality Sensors
- 62. Photoelectric Sensors
- 63. Body Sensors
- 64. Best List of Sensors--Liquid Level Sensors
- 65. Flood Sensors
- 66. Ultrasonic Proximity Sensors
- 67. Sonar Sensors
- 68. Best List of Sensors--Current Sensors
- 69. Heat Sensors
- 70. Remote Sensors
- 71. Best List of Sensors-- Radar Sensors
- 72. Drone Sensors
- 73. Best List of Sensors-- RV Tank Sensors
- 74. PH Sensors
- How Does a PH Sensor Work?
- Sensors Manufacturing Companies
- Conclusion
What is a Sensor?
Sensors are generally the various subsystems, devices, and machines that detect the environment's changes and transfer the information to a processor or other electronics. It takes the inclusion of sensors and sensor circuits in power systems to automate our homes and industries.
Sensors Definition
A sensor is a module or an electronic device that reads physical parameters changes and produces signals or outputs that correspond to the input. Physical parameters include speed, temperature, acceleration, distance, pressure, torque, and others generated by machines, appliances, equipment, and other systems.
How do Sensors Work?
Sensors work by converting input such as motion, light, heat, and sound into electrical signals. The signals usually show up in a human-readable format or will need further interpretation by another system.
Sensors come in two broad categories, which include analog and digital sensors. Analog sensors measure the continuous variables such as temperature and speed and detect differences in their values. On the other hand, a digital sensor detects variables' status to show whether they are working or not.
Types of Sensors
Here is a list of the various sensors and their functions.
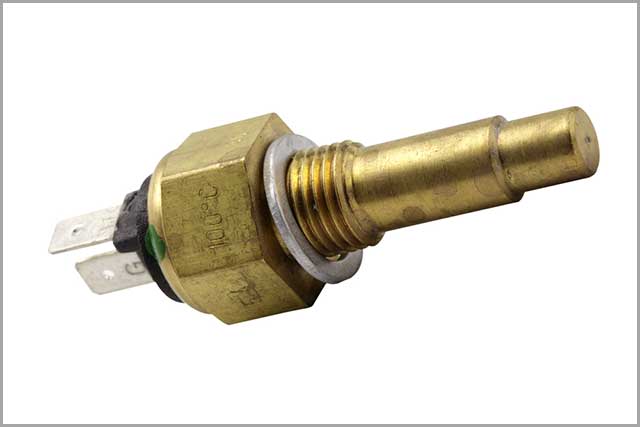
1. Temperature Sensors
Temperature sensors are the most popular and common types of sensors in various devices. Examples are computers, air conditioning systems, mobile phones, and others. They measure changes in the temperature.
The different temperature sensors are:
- LM35 temperature sensors,
- Bluetooth temperature sensors,
- USB temperature sensors,
- Digital temp sensors,
- Nest sensors,
- Nest temperature sensor,
- Nest thermostat sensors,
- Battery temperature sensors, and
- Nest room sensors.
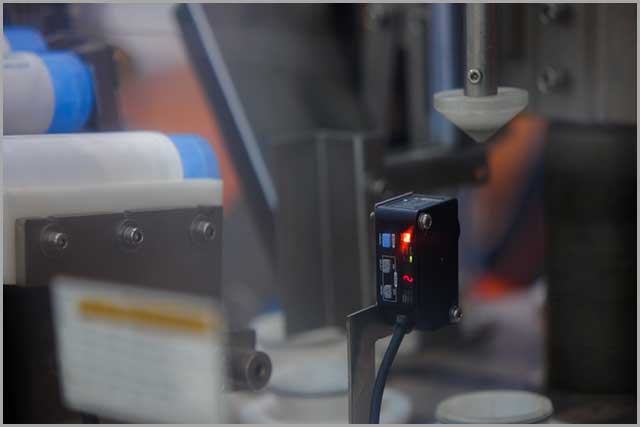
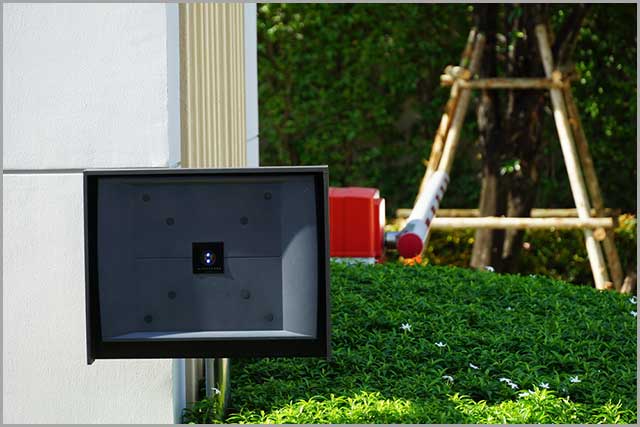
2. Proximity Sensors
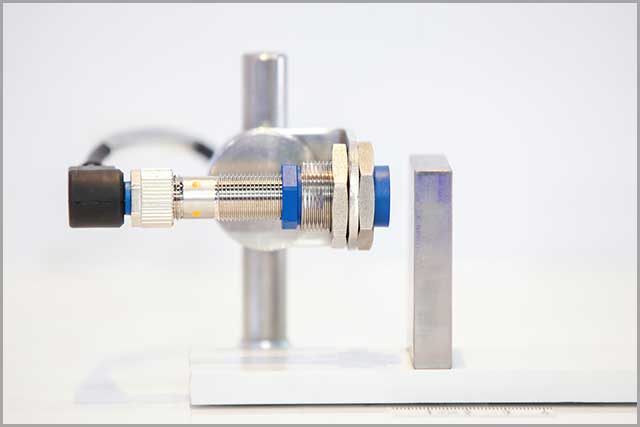
Some sensors don’t need to come into physical contact with objects to detect their presence. These types of sensors are called proximity sensors. Object alignment and parking sensors are some applications of proximity sensors.
What are Proximity Sensors?
A proximity sensor is a sensor that can detect nearby objects without making contact. It does so by emitting an electromagnetic field, and monitors change the field.
3. Accelerometer Sensors
An accelerometer sensor measures vibration, position, and speed by unit time (velocity) by sensing a body's motion. Typical accelerometer uses include detecting Smartphone orientation and sensing changes in car speed during crashes to deploy airbags.
4. Best List of Sensors-- Infrared Sensors
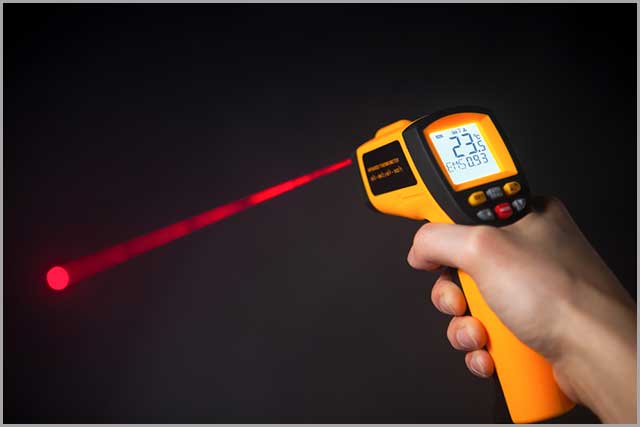
Infrared sensors or IR sensors emit and detect infrared radiations. Typical examples of these sensors are Infrared Proximity Sensors and Infrared Motion Sensors. These often act as obstacle detectors in LEDs.
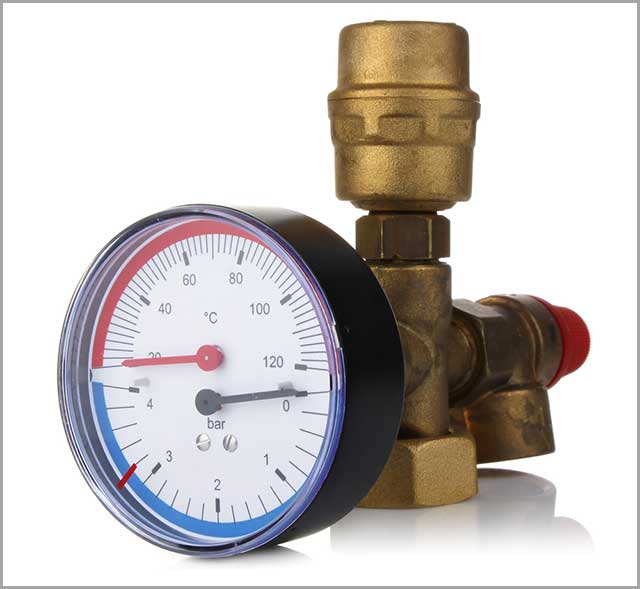
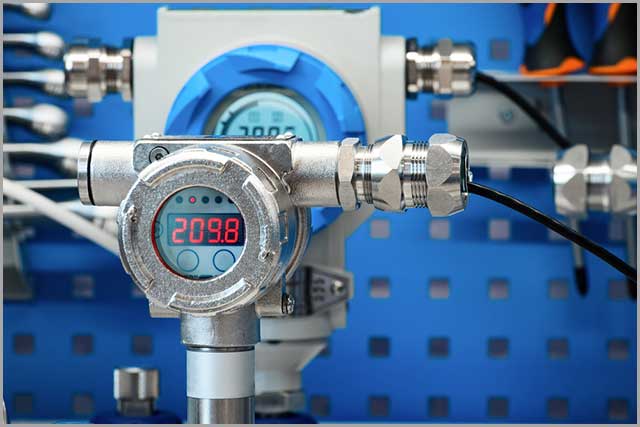
5. Pressure Sensors
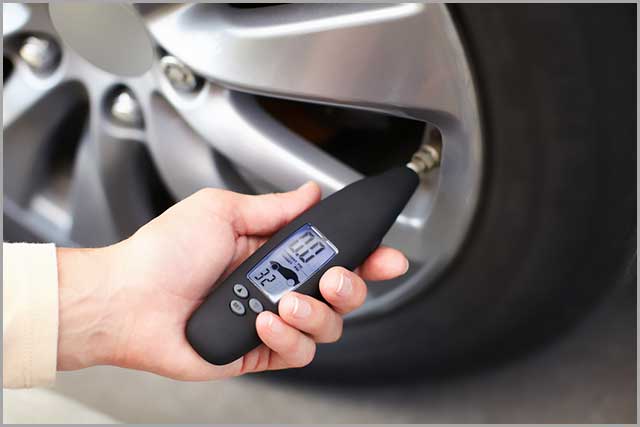
Pressure sensors are devices that measure the pressure of liquids and gasses. Absolute pressure sensors for measuring pressure relative to perfect vacuum are good examples of a pressure sensor. A common application of pressure sensors is the use of Tire Pressure Sensors / Tire Sensors.
How do Tire Pressure Sensors Work?
Tire-Pressure Monitoring System (TPMS) Sensors are small electronic devices that measure air pressure in tires. It gives early low tire warning by transmitting information to a vehicle’s on-board computer. It then displays readings per square inch (psi). TPMS typically lasts for about 5 to 10 years.
6. Best List of Sensors-- Light Sensors
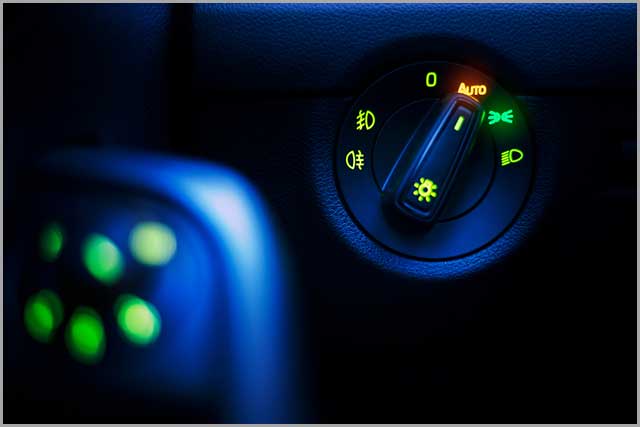
Light sensors are photoelectric devices that convert photons (light energy) into electrons (electrical energy). Essentially, a light sensor senses light. Common uses include:
- adjusting ambient light on tablets and phones,
- controlling streetlamps and
- controlling automatic lights in cars.
A few light sensors are automatic Light Sensors, auto light sensors, and traffic light sensors.
7. Segment Display Sensors and Applications
In addition to light sensors, Exploring 7 Segment Display Technology is important for devices that need to display sensor readings, like temperature or pressure sensors. These displays are everywhere - from digital clocks to handheld instruments - because they provide clear and straightforward visual feedback.
You’ll often see them in devices where users need to quickly see numbers or data at a glance. The advantage here is that they’re simple and easy to read, even from a distance. In some cases, a 7-segment display is the most cost-effective way to show information.
But you have to make sure you choose the right type of display for your application. There are a few common mistakes people make, like using displays that aren't suited for the voltage or current levels of their sensor output. If you don’t get the specs right, your display might not show accurate data or could burn out.
So, while 7-segment displays are practical, it’s important to match them correctly with your sensor’s output to avoid errors in measurement and display.
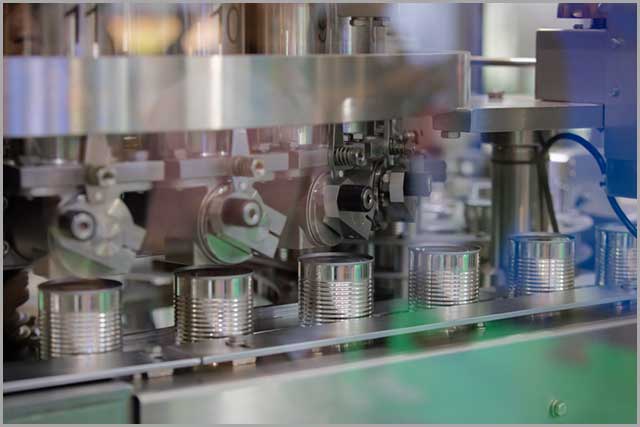
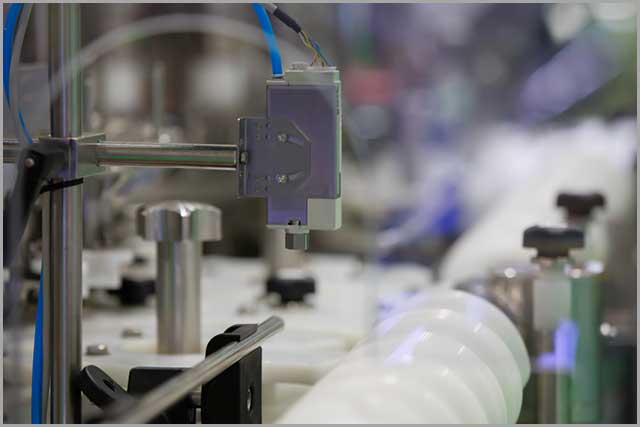
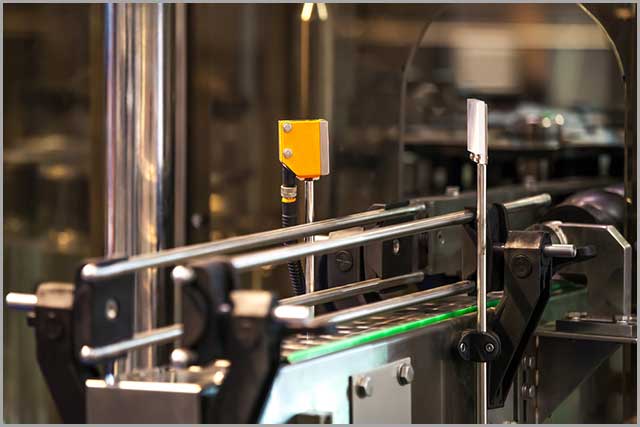
8. Ultrasonic Sensors
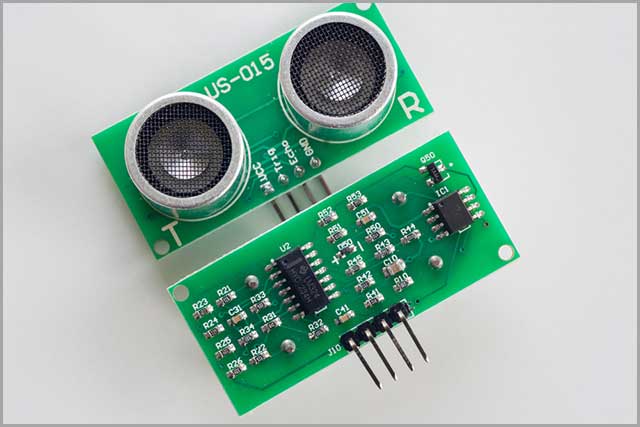
Ultrasonic sensors measure the time it takes for ultrasonic wave emissions to reach a target. A source emits the waves that hit a target and reflect a signal. The sensors emit sound waves too high for human ears to hear but effective for:
- liquid level sensing,
- trash level monitoring,
- anti-collision detection,
- bottle counting on drink filling machines, and many more.
9. Smoke, Gas, and Alcohol Sensors
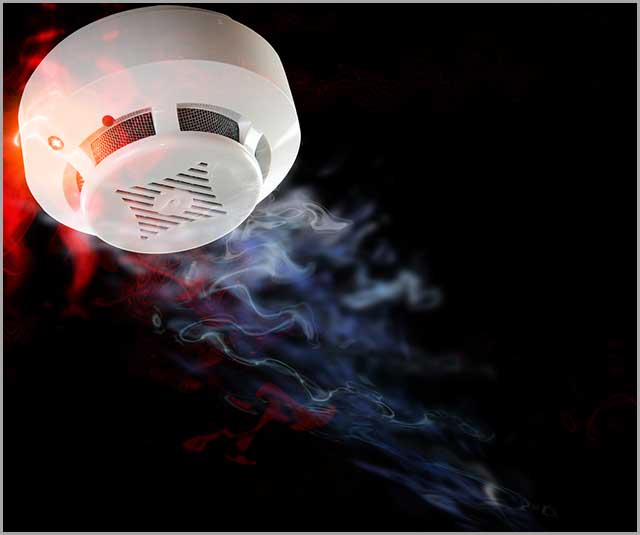
These sensors are useful for detecting smoke concentration, the presence of alcohol, and to sense steam, benzene, propane, LPG, and other toxic and flammable gases. They are common in oil rigs and firefighting.
10. Best List of Sensors--Touch Sensors
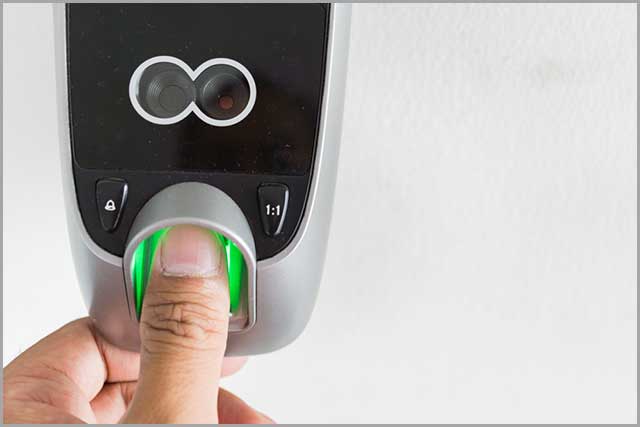
A touch sensor is a device or electronic switch that detects and records physical touch. They are common in public computer terminals, wall switches, lamps with metal exterior, and touch screen devices.
11. Color Sensors
A color sensor is a photoelectric sensor that emits light and uses a receiver to detect the light's reflection as it bounces back. They are common in consumer electronics for:
- display calibration,
- backlight control.
They also feature in industries such as automotive, manufacturing, and food and beverages.
12. Humidity Sensors
A humidity sensor is a device for detecting and measuring water vapor in the air. It works by sensing alterations in electrical currents in the air. Two common types of this sensor are:
- Relative Humidity Sensors and
- Humidity and Temperature Sensors.
They measure humidity in weather stations, HVAC systems, refrigerators, printers, food processing, and many more.
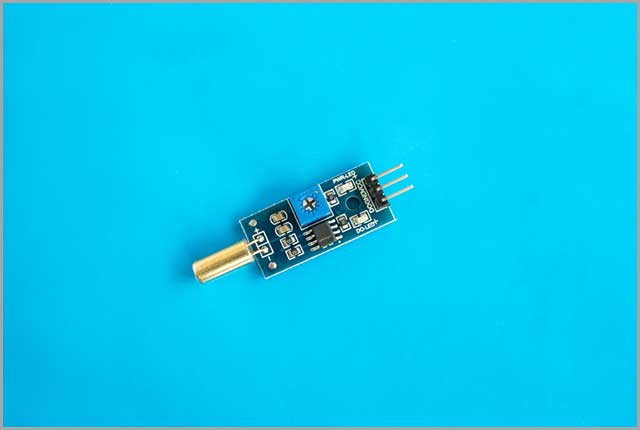
13. Best List of Sensors-- Tilt Sensors
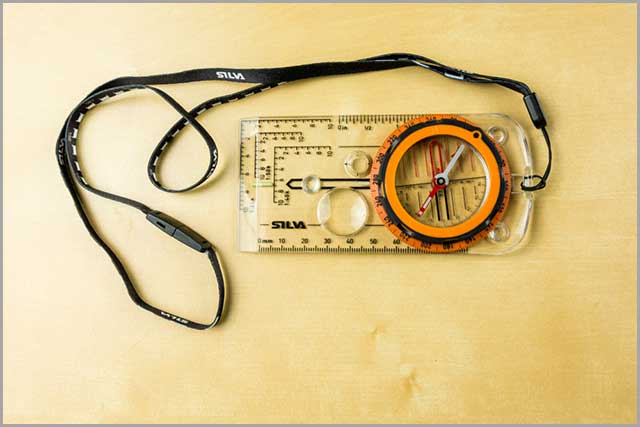
A tilt sensor is an instrument that measures multiple axes of a reference plane. They show the angle of elevation, depression, or slope of an object. Common applications include
- alarm-triggering mechanisms in vehicles,
- detecting an airplane’s inclination,
- auto-rotate function in tablets and mobile phones,
- detecting the position of game controllers, and
- measuring the height of the buildings.
14. Flow and Level Sensors
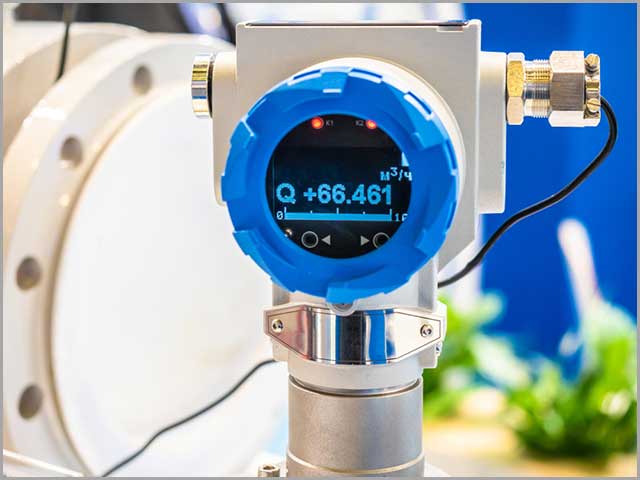
These sensors detect the level of liquids, granular materials, slurries, powders, and other substances that can flow. Common applications are:
- fields of food and beverages,
- wastewater treatment plants,
- pharmaceuticals, and
- detecting ink levels in printers.
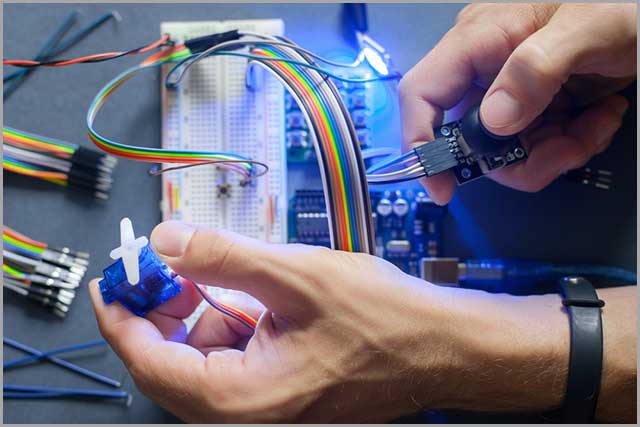
15. Arduino Sensors
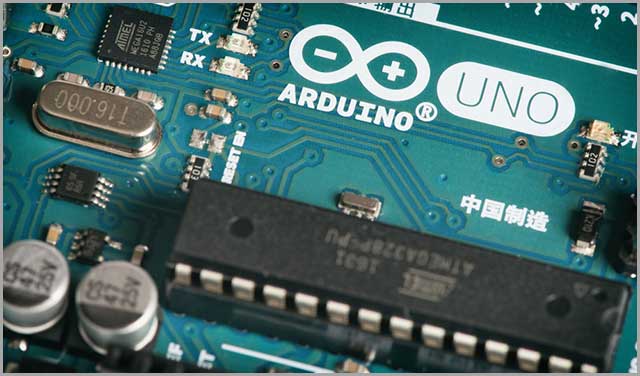
Arduino is an open-source electronics technology with boards that interface with several electronic devices. Some of these sensors include Arduino PH Sensors, Arduino Current Sensors, Arduino Sound Sensors, and Arduino Proximity Sensors.
They can read different input types ranging from a finger on a button to light sensors, and even messages on a social media platform and convert it into a corresponding output.
16. Best List of Sensors--Raspberry PI Sensors
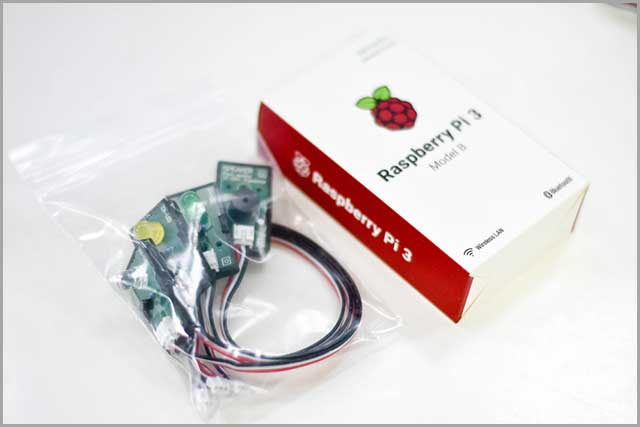
Raspberry PI sensors can detect several properties, including motion, infrared, wireless, Bluetooth, and many others. Typically, several standard components and sensors can generate output when they connect to a Raspberry Pi device.
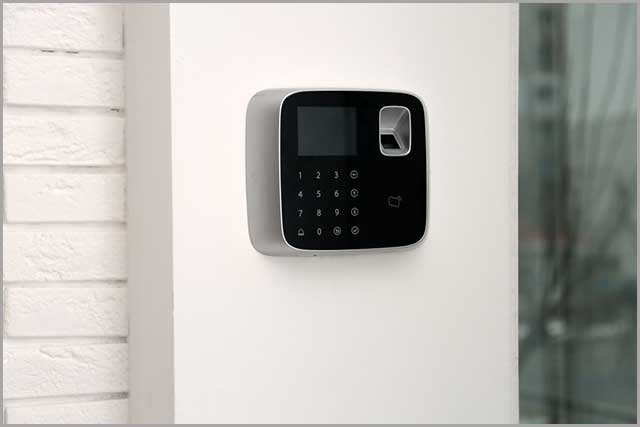
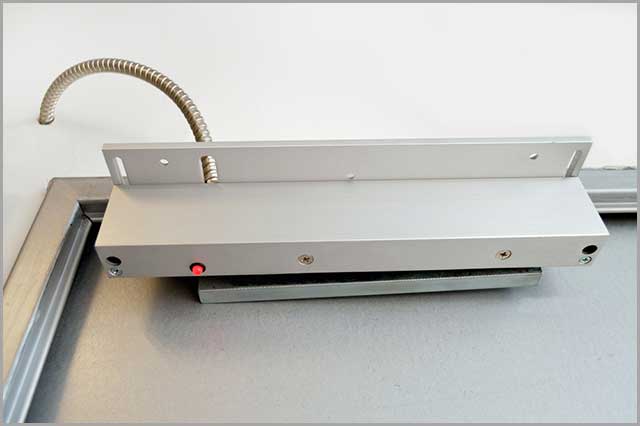
17. Door Sensors

These are security sensors with alarm systems that read when a door opens or closes. They are common in home security systems. Besides security, they also provide safety. A typical example of the safety feature is the Garage Door Sensors. These devices (also known as photo-eye) detect objects in the garage door path and stop hitting the object.
How to Align Garage Door Sensors
Sometimes, garage doors will refuse to align. Clearing the path of all obstructions such as toys, tools, and other items can restore normal function. Try cleaning the sensor with a damp cloth to remove dirt if clearing the path doesn’t work. If all fails, follow the troubleshooting process below:
- Take off the wing nut to remove the green light (receiving sensor) from the bracket.
- Point the receiving sensor away from the sending sensor to turn off the light completely. After this, wait for about 10 seconds.
- Rotate the receiving sensor slowly to align with the sending sensor. A strong green light indicates full alignment. When that happens, place the sensor back in the bracket and fix the wing nut.
You can manually close the garage doors by pressing and holding down the wall switch until the door shuts completely.
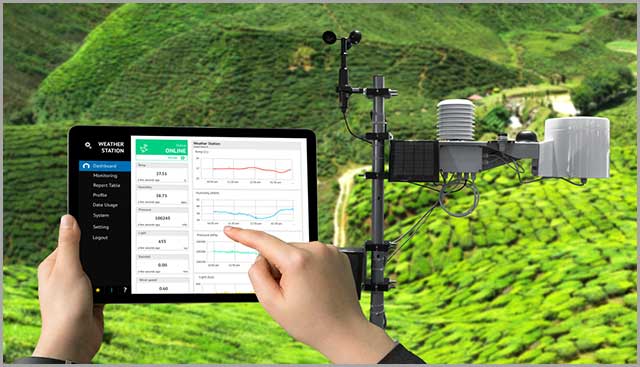
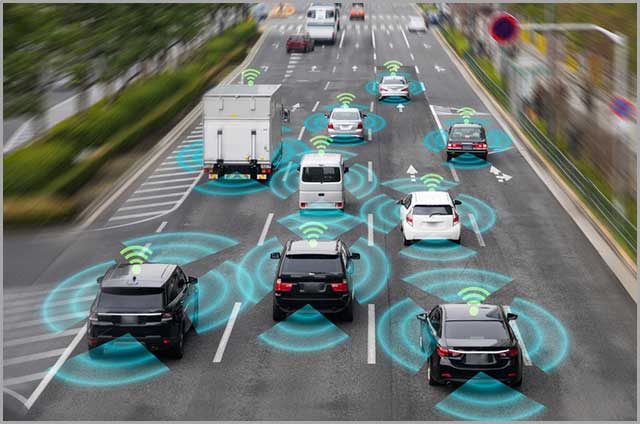
18. IoT Sensors
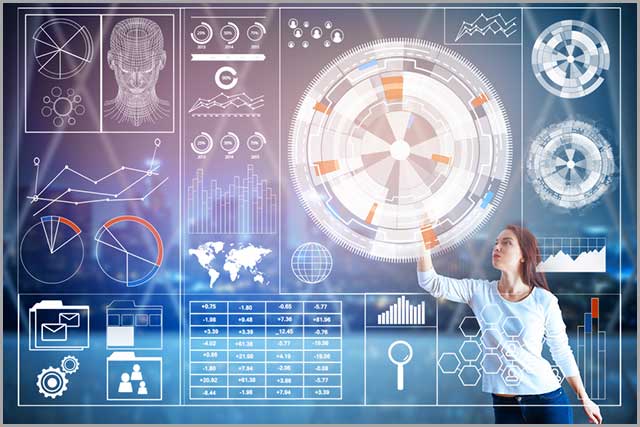
IoT sensors (Internet of Things) are sensors that foster seamless connectivity among several devices. The IoT sensors connect via a network (such as cellular, WiFi, and LPWAN) through which the data transmits. IoT sensors’ application cuts across various uses, from homes to workplaces to hospitals, and even shopping centers.
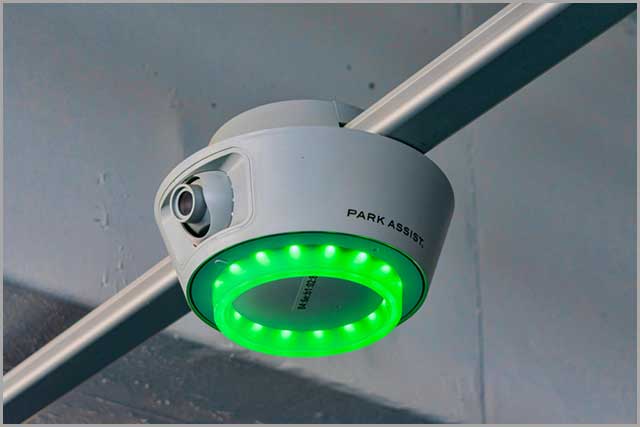
19. Parking Sensors
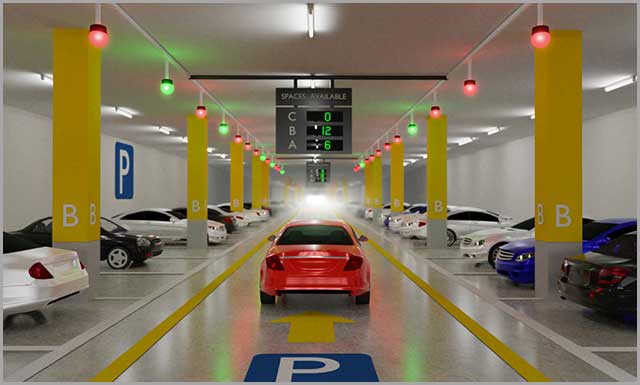
Parking sensors are proximity sensors that detect obstacles on the path of a vehicle. It also warns the driver while parking. Typically, a parking sensor in vehicles uses either ultrasonic or electromagnetic sensors. Some common types include:
- Backup Sensors/Rear Parking Sensors,
- Parking Sensors System/Parking Sensor Kits, and
- Front Parking Sensors.
20. Motion Sensors
A motion sensor is a device that detects nearby activity or motion. Some popular examples are Motion Sensors for Lights, Outdoor Motion Sensors, Fibaro Motion Sensors. Other useful ones, particularly in security systems, include Motion Detecting Sensors, Wireless Motion Sensors Alarms, and Security Motion Sensors.
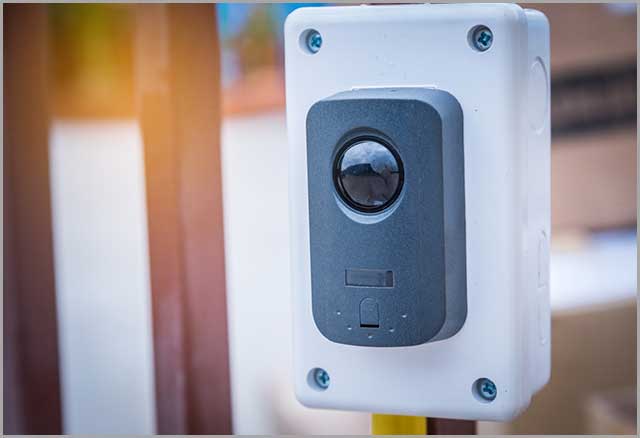
How do Motion Sensors Work?
The two basic types of motion sensors are active and passive sensors. Active motion sensors emit ultrasonic sound waves continuously. Disruption to the waves triggers a signal that generates an output. An example of such could be sounding an alarm or opening a door.
Passive motion sensors are more common in homes and offices. They can detect infrared or heat energy from humans and animals. An alarm sounds when there is a significant increase in the energy level.
21. Home Sensors
These sensors come in various applications that help build a smart home or automate the home. Examples include Touch Lamp Sensors, Window Sensors, Window Alarm Sensors, and Alarm Sensors.
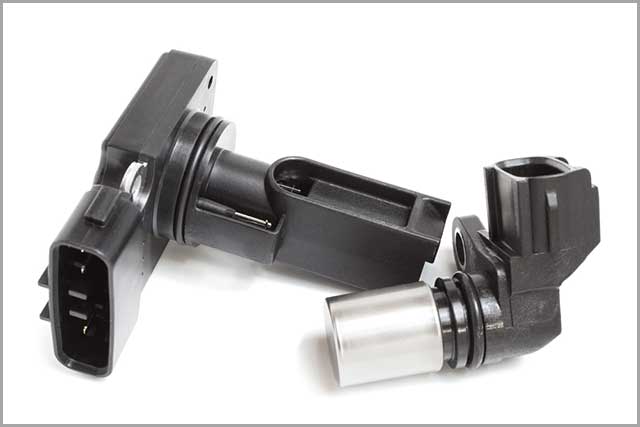
22. Car Sensors
Car sensors are intelligent detectors that control temperature levels, oil pressure, coolant levels, and emission levels in automobiles. A few examples include a fuel temperature sensor, mass airflow sensor, and spark knock sensor.
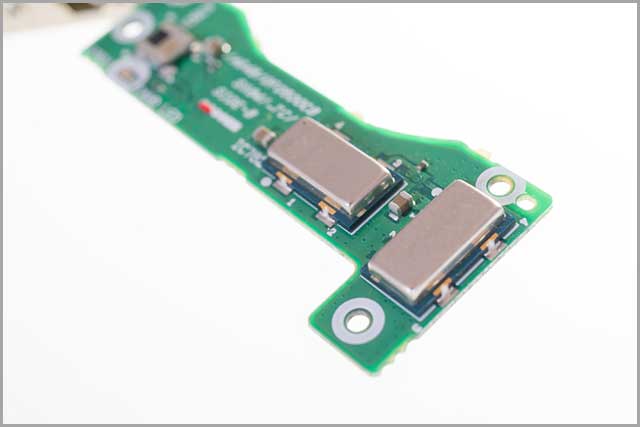
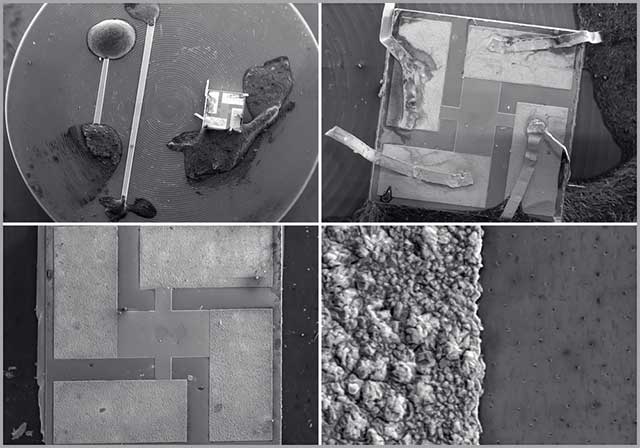
23. MEMS Sensors
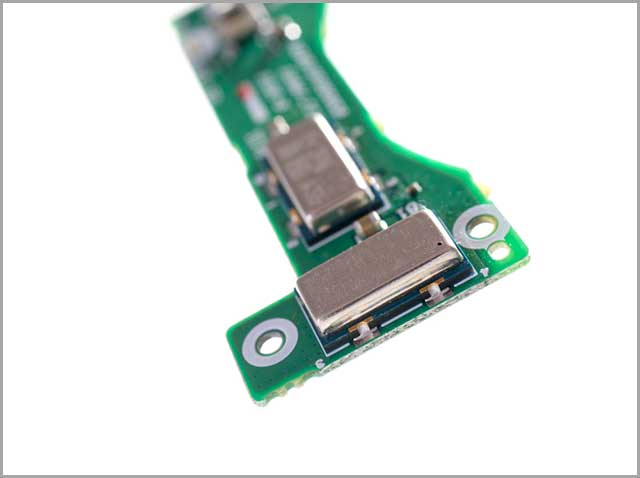
These microscopic devices combine mechanical, electrical, and electronic elements to perform a single function using the Microsystems Technology.
24. O24 Sensors
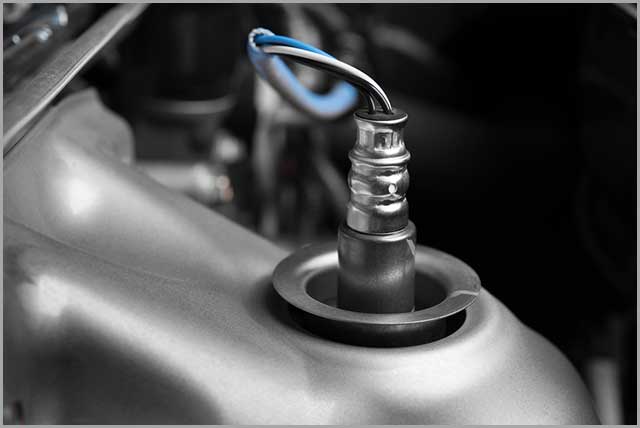
O2 sensors (oxygen sensors) are electronic devices that measure or monitor the amount of oxygen in a liquid or gas. O2 sensors find extensive use in medical and automotive applications. Some of the types are Upstream O2 Sensors, Oxygen Sensors, CO2 Sensors, and Carbon monoxide Sensors.
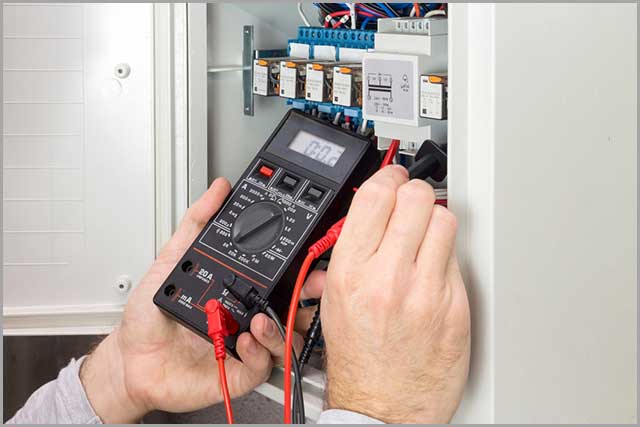
25. A-C Current Sensors / AC Current Sensors
These are devices that detect electric currents in wires and produce signals relative to the wind. Manipulating the output from these sensors is relatively easy, making them have various applications cutting across a wide range of industries.
26. RPM Sensors
An RPM sensor is a device that measures a shaft’s revolutions per minute. It generates useful information that helps the engine cylinders to fire up in the correct order. Typical applications include measuring the rotational speed of conveyor belts, motors, and other rotating systems.
27. Water Sensors
A water sensor is an electronic device that detects the presence of water. Some of its uses include providing early warnings for water leakages and measuring fuel, engine oil, and power steering fluid in vehicles.
Some common types include:
- Water Temp Sensors,
- Water Detection Sensors,
- Water Sensor Alarm, and
- Water Pressure Sensors.
28. Smart Sensors
A smart sensor is a device that performs preset functions using inputs that come from the physical environment. It has intelligent capabilities for wireless communication, digital processing, and being an on-board microcontroller.
28. ABS Speed Sensors / ABS Wheel Speed Sensors
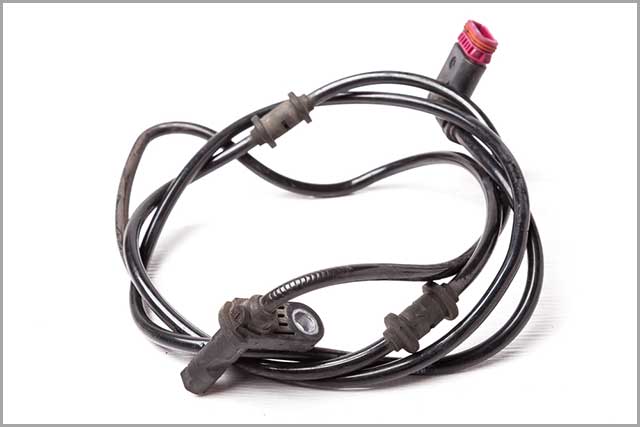
These types of sensors are sender devices that read the speed of wheel rotation in a vehicle. They find everyday use in various vehicle systems.
30. Hall Effect Sensors / Hall Sensors
These are devices for measuring the magnitude of a magnetic field. The output signal of the sensor represents the density of the magnetic field around it. Their uses range from proximity sensing to speed detection and current sensing.
31. Wearable Sensors

Wearable sensors integrate into clothes, wristwatches, and other wearable objects or directly on the body to monitor an individual’s health and provide clinical data.
How to Remove Clothes Sensors
Place the cloth in a freezer overnight.
Cover the sensor with a plastic bag and tap with a hammer. The ink won’t spill because it is frozen.
32. Force Sensors
These are devices that measure the compression and tension acting on an object. Force sensors convert the value of a force into a measurable quantity.
33. Driveway Sensors
These are wireless devices that detect vehicles or people on the driveway. The device alerts homeowners of visitors or unexpected intruders.
34. Inductive Sensors
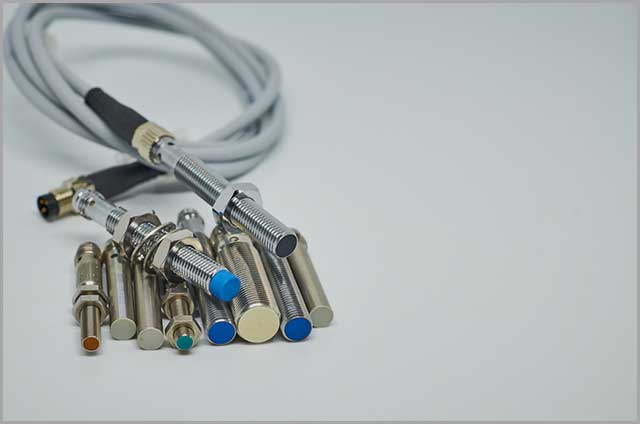
An inductive sensor is a device that measures or detects objects using the principle of electromagnetic induction. This type of sensor finds extensive use in industries, aerospace, robotics, and in the military.
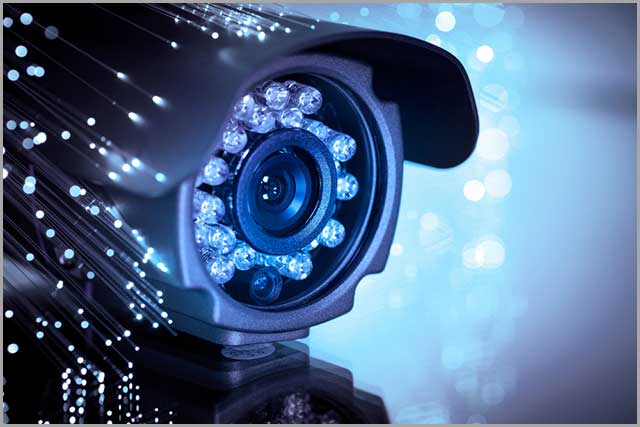
35. Camera Sensors
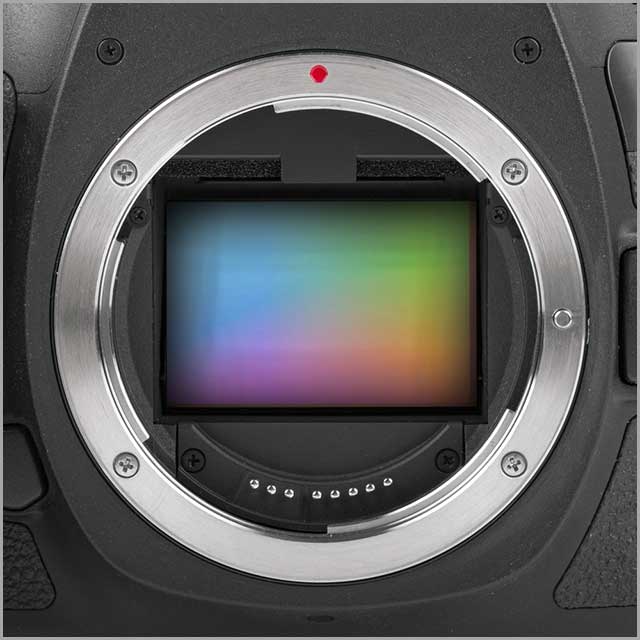
Camera sensors detect and convey information for making images. In simple terms, a camera’s sensor determines the quality of its appearance. How much light a camera uses to create an image depends on the digital camera sensor size. An example of a camera sensor is the Backup Camera with Sensors.
36. Environmental Sensors
Environmental sensors are eco-friendly devices that provide various useful information for monitoring soil, air, water, waste, biodiversity, and many others.
Special Offer: Get $100 off your order!
Enjoy $100 off your order! No hidden fees and no minimum order quantity required. Email [email protected] to get started!
Special Offer: Get $100 off your order!
Email [email protected] to get started!
37. Chemical Sensors
These are devices for converting a physical or chemical property of an analyte into a measurable signal. These sensors are useful in the medical, nanotechnology, and automotive industries.
38. Vibration Sensors / Vibrometer Sensors
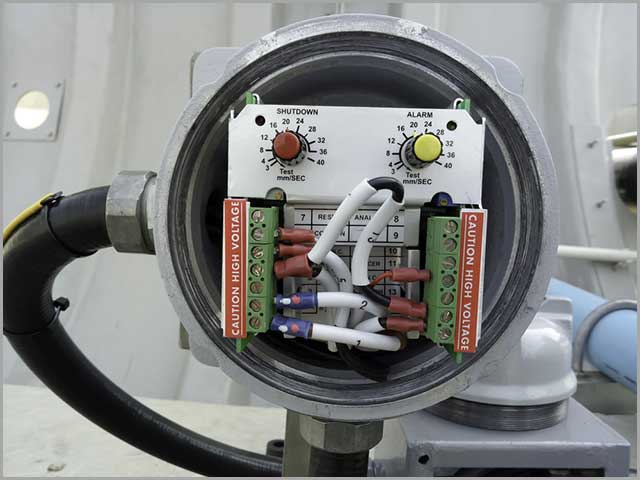
These are flexible devices that measure various processes. A vibration sensor uses the piezoelectric effect to measure changes in temperature, pressure, acceleration, and other properties. Its application cuts across industries such as mining, wind power, gas and oil, metalworking, and food and beverages.
39. Lidar Sensors
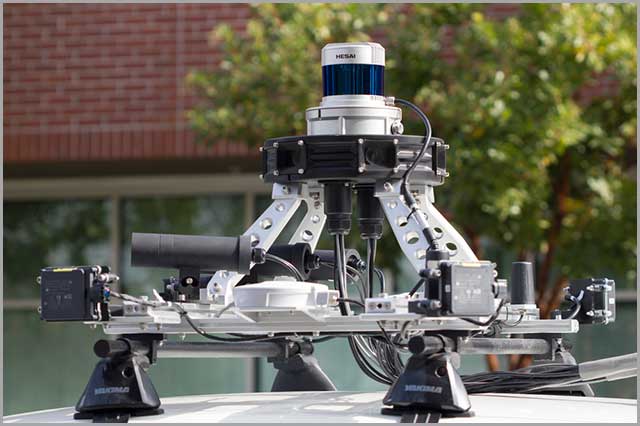
A lidar sensor is a device that emits light waves into the environment and measures distances using the reflection of the light that bounces back from surrounding objects.
40. Barometric Sensors
A barometric sensor is a device that detects atmospheric pressure. Its main application is in forecasting short term changes in the weather.
41. Angle Sensors
Angle sensors are devices that measure the relationship between the positions of objects. These sensors are useful in mechanical and industrial applications.
42. Catalytic Converter Sensors
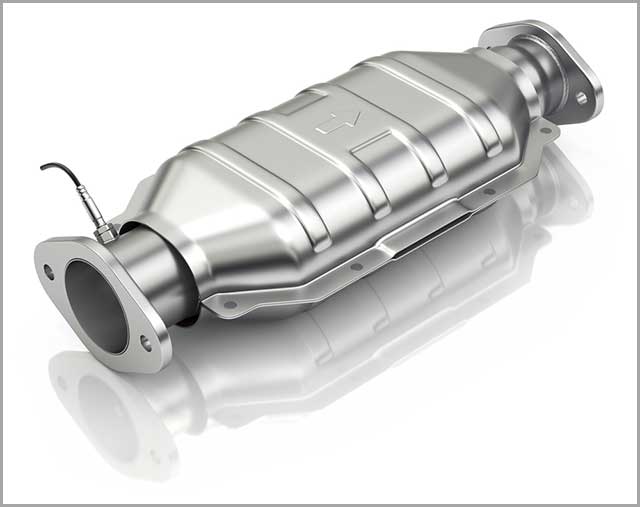
Catalytic converter sensors are emission control devices for reducing harmful pollutants in exhaust gases generated during combustion.
43. Capacitive Sensors
Capacitive sensors detect and measure anything with conductive property or have a different dielectric from the air. Typical use is in the measurement of brake disc deformation.
44. Custom Control Sensors
These include devices that measure temperature, pressure and liquid flow switches for mechanical sensing reliability and accuracy.
45. Knock Sensors
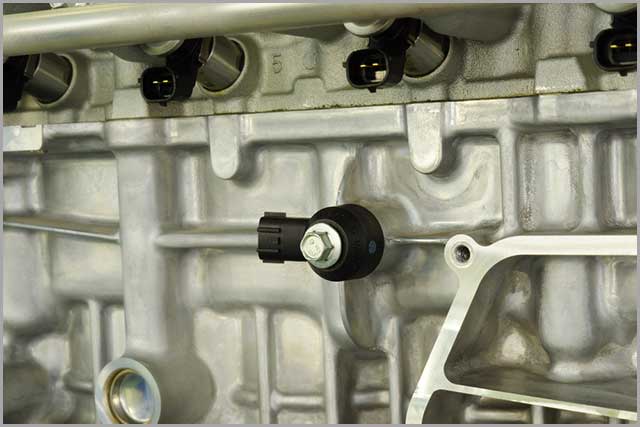
The knock sensor is a device that monitors an engine’s combustion process and senses unusual pulsations. Its everyday use is in the automotive industry.
46. Optical Sensors / Fiber Optic Sensors
These are electronic detectors that convert light rays into electronic signals. Optical sensors are useful in a wide range of applications, including biomedical applications, ambient light sensors in mobile phones, and motion detectors.
47. Position Sensors
A position sensor is a device that measures the absolute or relative position of an object. Most applications that require the measurement of movement uses one form of a position sensor.
48. Electronic Sensors
An electronic sensor is a device that can detect everything in its environment from distance to acceleration to light. Electronic sensors are widespread uses across almost all industries.
On the other hand, electrochemical sensors detect the variation of oxygen in the air and the presence of toxic gases such as SO2 and H2S.
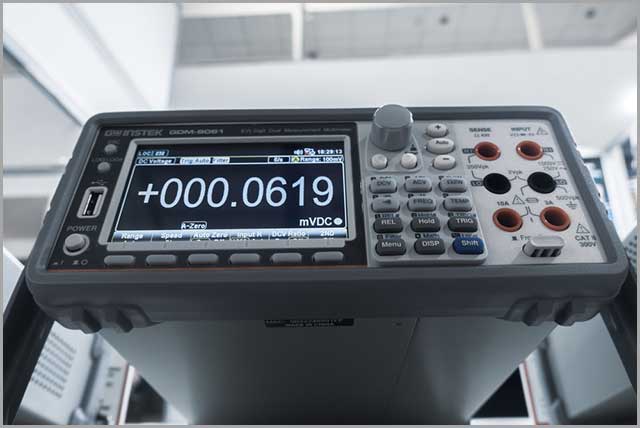
49. Precision Sensors

These types of sensors are devices that measure exhaust gas, gas distribution, temperature switches, and flow switches. The everyday use of these sensors is in the aerospace industry.
50. Engine Sensors
An engine sensor is an electromagnetic device that monitors the different parameters of an engine. These sensors are standard in the automotive industry.
51. Accelerator Pedal Sensors / Accelerator Sensors
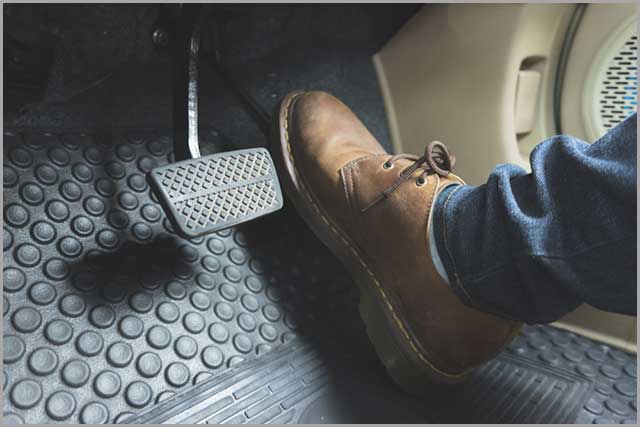
The accelerator pedal sensor is a device that transmits a vehicle’s pedal position to the engine control unit. These sensors come with modern cars as part of the throttle control system.
52. Weight Sensors
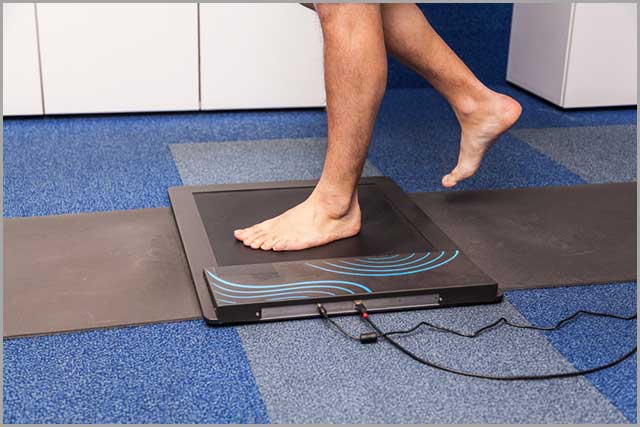
A weight sensor (also known as a load cell) is a force transducer that converts pressure, tension, compression, torque, and other forces into measurable electric signals. Everyday use of this type of sensor is in weighing machines.
53. Magnetic Sensors
A magnetic sensor is a device that detects geomagnetism and the magnitude of magnetism of a current or magnet. Wrapping a wire around a permanent magnet creates a simple magnetic sensor. When a ferrous object approaches the sensor, the magnetic flux in the wire or coil changes and produces a voltage.
54. Wireless Sensors
Wireless sensors detect changes in the immediate environment and collect sensory information for further processing and transmission.
55. Elderly Monitoring Sensors
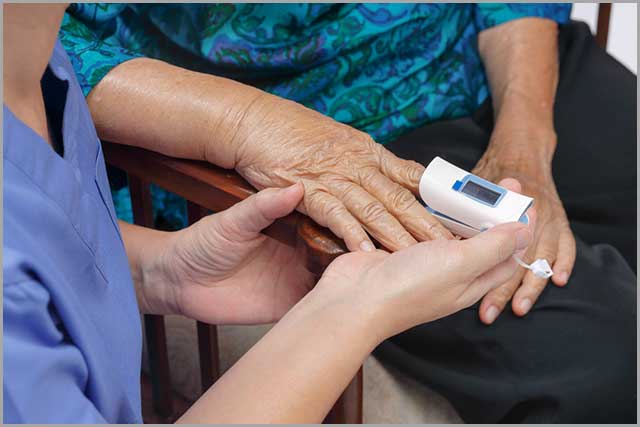
These are devices for detecting and monitoring behaviors of the elderly. They are common in homes with older adults and wearable devices for medical purposes.
56. Laser Sensors
These are sensors for detecting precise position or presence using light intensity. They are excellent for process monitoring and quality control in engineering.
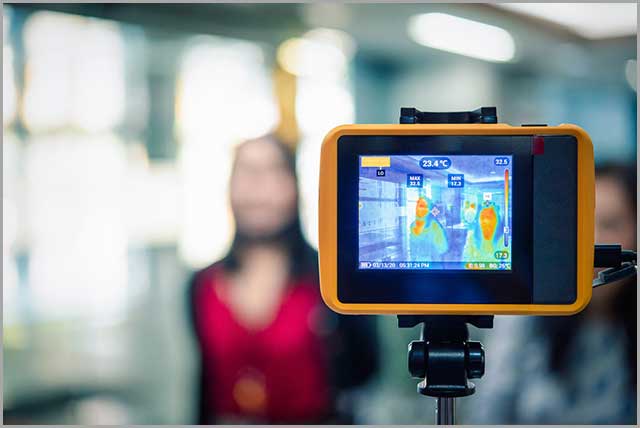
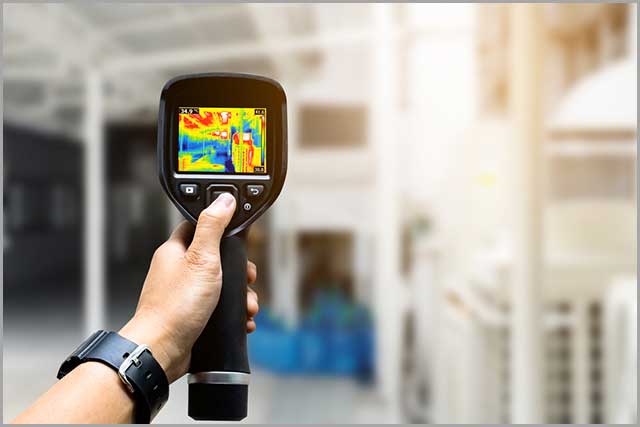
57. Thermal Sensors / Remote Thermostat Sensors
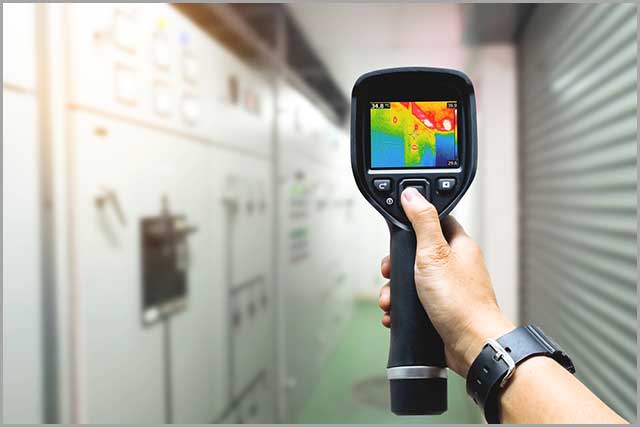
These are a type of conductometric sensors that detect changes in physical parameters. A typical use of thermal detectors is to design firefighting clothing for early warning of critical temperatures that can cause burn and heat stress.
58. Reversing Sensors
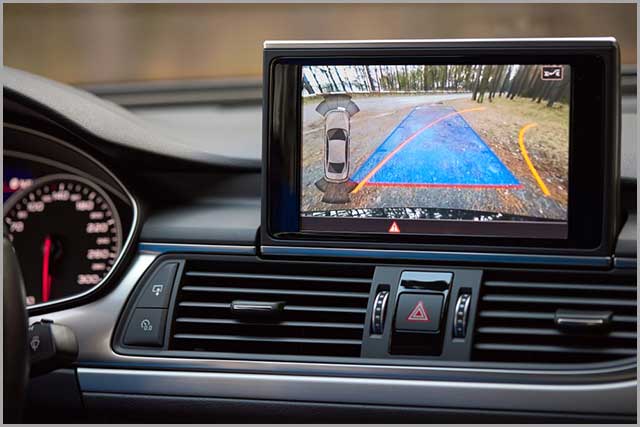
Reversing sensors are electronic guidance systems that aid drivers to reverse or park vehicles properly. The reserve sensor calculates an object's distance to the car by emitting sound pulses that bounce off nearby objects.
59. Distance Sensors
A distance sensor is a device that determines the proximity of a body without physical contact. It does so by emitting an electromagnetic field and senses changes in the area.
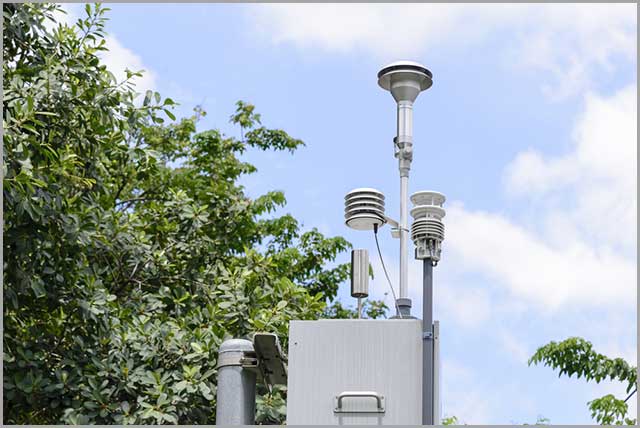
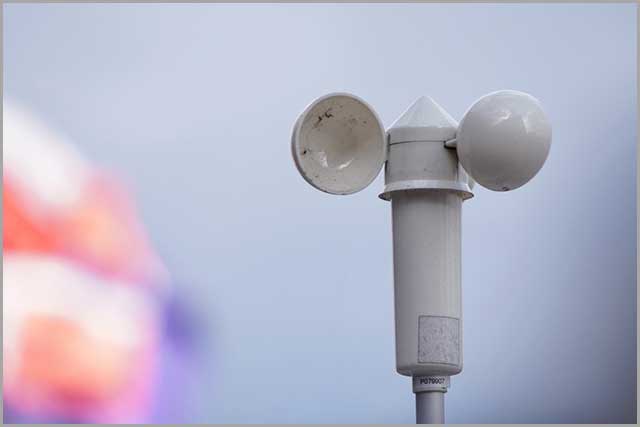
60. Wind Speed Sensors
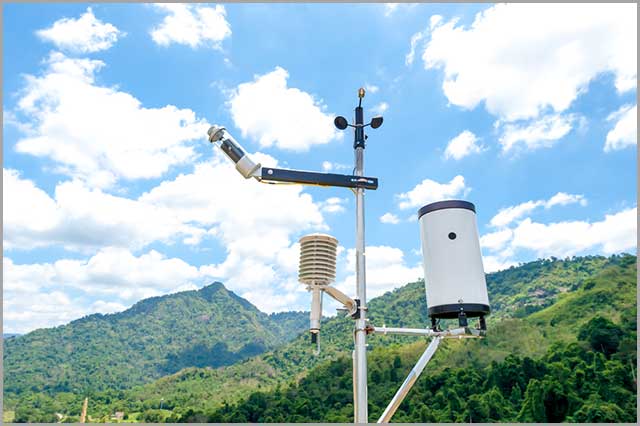
A wind speed sensor is a device that monitors the direction and speed of the wind. This type of sensor is useful in meteorology, shipping, aviation, and many more.
61. Air Quality Sensors
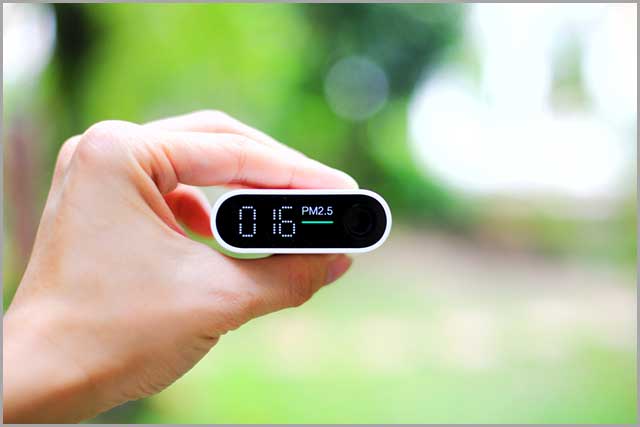
Air quality sensors monitor the weakness or reduction of infrared radiation in the air and show the level of cleanliness or pollution in the air.
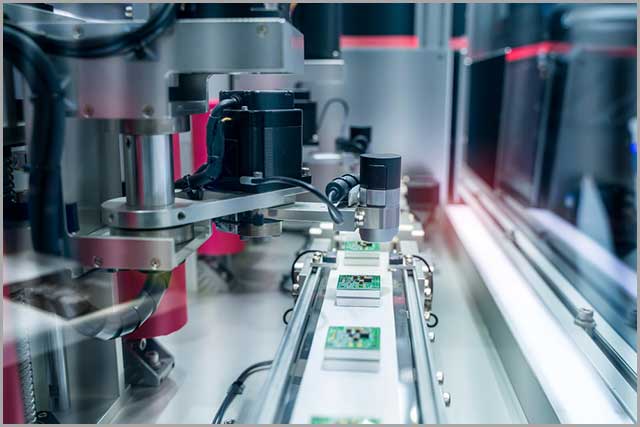
62. Photoelectric Sensors
A photoelectric sensor is a device that detects the presence, absence, or distance of an object by emitting light beams. It is common in industrial manufacturing.
63. Body Sensors

These are biomedical devices that identify and quantify external and internal body stimuli such as heat, vibration, texture, pressure, and compressive deformations. They are common in remote health monitoring.
64. Best List of Sensors--Liquid Level Sensors

These are instruments that measure liquid levels and convert the variables to electrical signals for further processing.
65. Flood Sensors
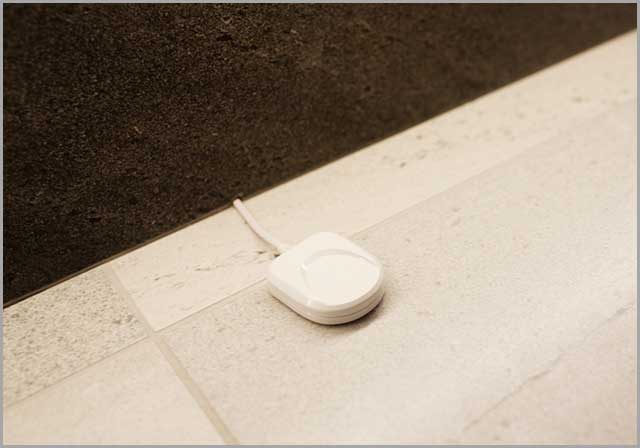
These are small sink-proof devices that monitor moisture and water levels to prevent flooding in homes.
66. Ultrasonic Proximity Sensors
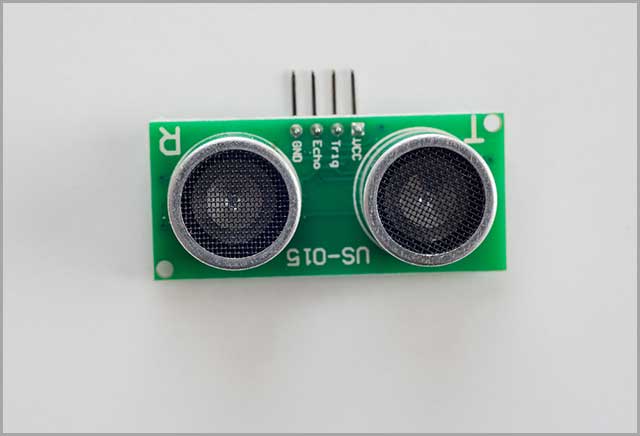
These are non-contact proximity sensors that detect the presence or absence of a material or object. They are versatile and reliable, making them usable in a wide range of applications.
67. Sonar Sensors
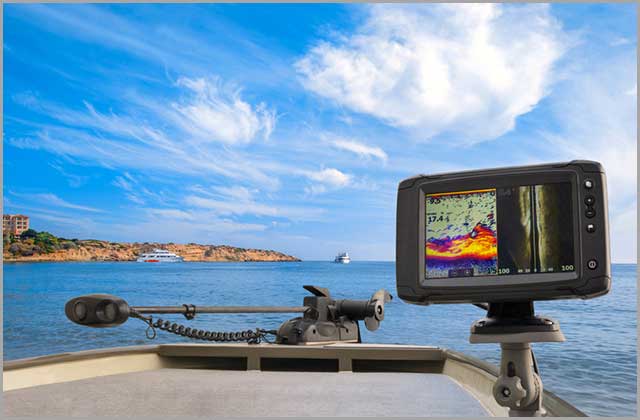
A sonar sensor measures the distance to an object using acoustic pulses and echoes. It is popular in robotics.
68. Best List of Sensors--Current Sensors
These are devices that detect current in wires and produce proportional signals to the wind.
69. Heat Sensors
A heat sensor is a device that detects heat around it. The sensor’s usage is common in personal computers, electric boilers, ovens, and industrial machines to prevent overheating.
70. Remote Sensors
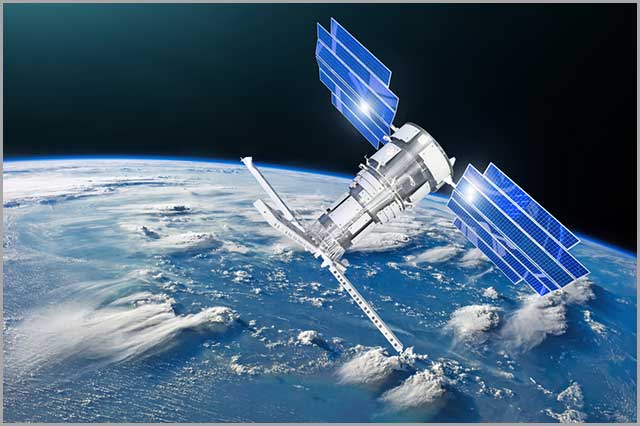
Remote sensors collect data about an object by detecting the energy around it without making physical contact. They are popular in satellites that perform remote sensing of the earth.
71. Best List of Sensors-- Radar Sensors
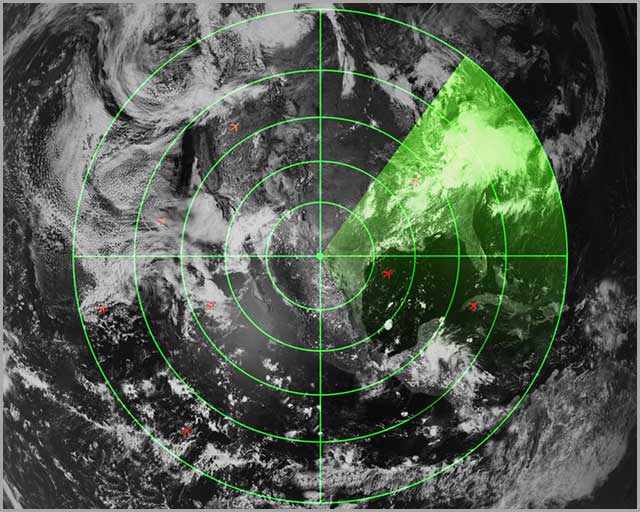
A radar sensor is a device that gives precise measurements of objects over a vast distance, even in extreme environments. They are common in automotive and security applications.
72. Drone Sensors
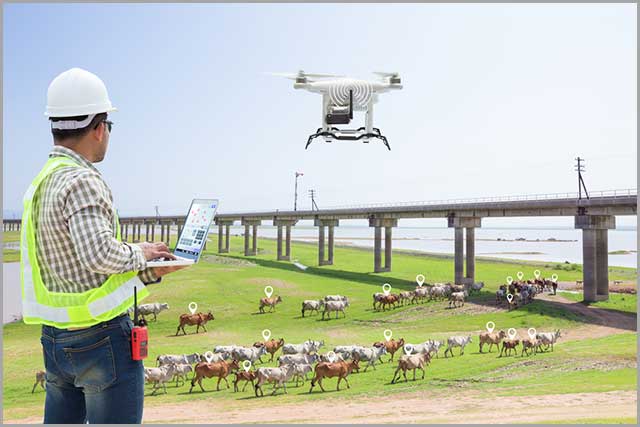
These are air pressure sensors that stabilize altitude and allow a drone to hover for photography and videography.
73. Best List of Sensors-- RV Tank Sensors
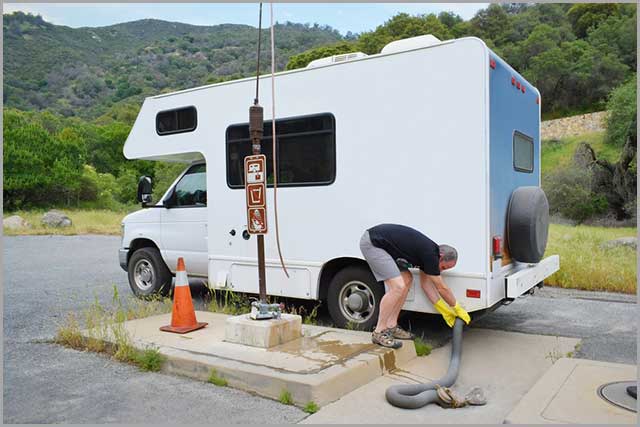
These are sensors on a holding tank that completes the circuit in a low voltage electrical system. They help in properly dumping or emptying an RV tank.
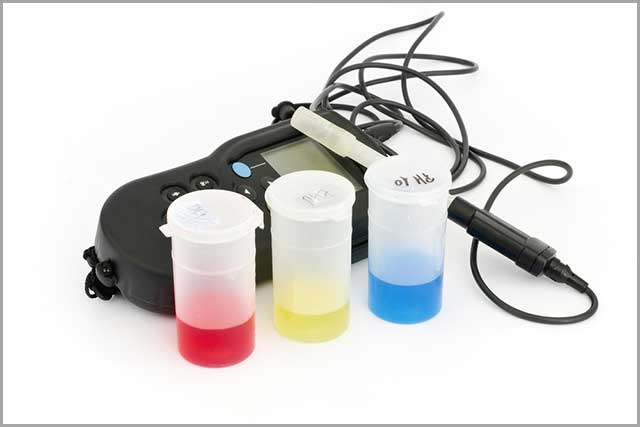
74. PH Sensors
A PH sensor is a critical device used to measure the hydrogen-ion concentration in a solution, determining whether it is acidic, neutral, or alkaline. This measurement is expressed on the pH scale, which ranges from 0 to 14.
How Does a PH Sensor Work?
PH sensors consist of two main parts:
- Glass Electrode: Measures the hydrogen ion activity in the solution.
- Reference Electrode: Provides a stable baseline for comparison.
When immersed in a solution, the sensor generates a voltage corresponding to the solution's pH value. This signal is then converted into a digital or analog format for easy reading or further processing.
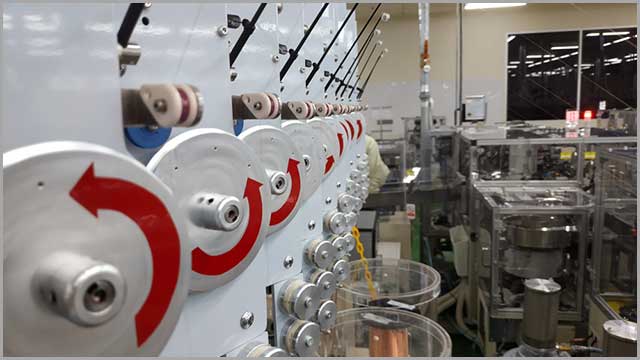
Sensors Manufacturing Companies
The sensor technology encompasses a wide range of industries, with several manufacturing companies constantly producing cutting-edge innovations. The sensor market has some big competing names such as:
- Simplisafe Sensors,
- Gems Sensors,
- Sick Sensors,
- Cables and Sensors,
- Ecobee Sensors (makers of Ecobee3 Lite Sensors and Ecobee Room Sensors),
- HTM Sensors,
- Adafruit Sensors,
Bebop Sensors, Daytona Sensors, and Hunter Industries (makers of Hunter Wireless Rain Sensors).
Other top-of-the-line manufacturers include Milo Sensors, MTS Sensors , Ring Sensors, Oculus Sensors, Franklin Sensors, Keyence Sensors, Swift Sensors, Banner Sensors, Validity Sensors, Telemecanique Sensors, Freestyle Libre Sensors, and Amphenol Advanced Sensors.
Conclusion
Almost every aspect of modern life has one type of sensor or the other. From homes to offices, and even airplanes, sensors make our lives a lot easier. By converting physical parameters into electrically measurable signals, these devices or modules can produce useful output signals in several forms. These output signals help us quickly detect smoke, operate the TV using a remote, monitor the weather, turn on lights, and even open car doors.
There are various types of sensors available. Understanding their functions is the first step in successfully developing an application that uses these tiny devices.
Special Offer: Get $100 off your order!
Email [email protected] to get started!