In the simplest terms, flight controllers are circuit boards with electronic chips.
These devices have intelligent software and hardware for effective drone flight data control and monitoring. Essentially, it is the drone's brain, and like all living organisms' brains, the controller's size, performance, and complexity vary.
One of the most advanced flight controllers is the Pixhawk 4.
Designed for commercial & academic developers and based on the FMUv5 open hardware Pixhawk-project design, the device is the latest in the lineup, which means it features the best technology.
We will look at the flight controller and how to wire it.
Contents
Special Offer: Get $100 off your order!
Please email [email protected] for details.
What is the Pixhawk 4 Flight Controller?
As the latest update in the highly successful family of Pixhawk flight controllers, the Pixhawk 4 is a product of the combined efforts of the PX4 team and Holybro.
Optimized to run using the full Dronecode stack and preinstalled with the latest PX4 firmware, the controller features the following technology.
- ST Microelectronics advanced processor technology
- InvenSense and Bosch sensor technology
- NuttX real-time operating system
These features deliver superb performance, reliability, and flexibility for drone control because they can handle complex algorithms.
Compared to the earlier versions, the Pixhawk 4 has more computing power & RAM resources to run more complex applications and low-noise, high-performance IMUs for stabilization purposes.
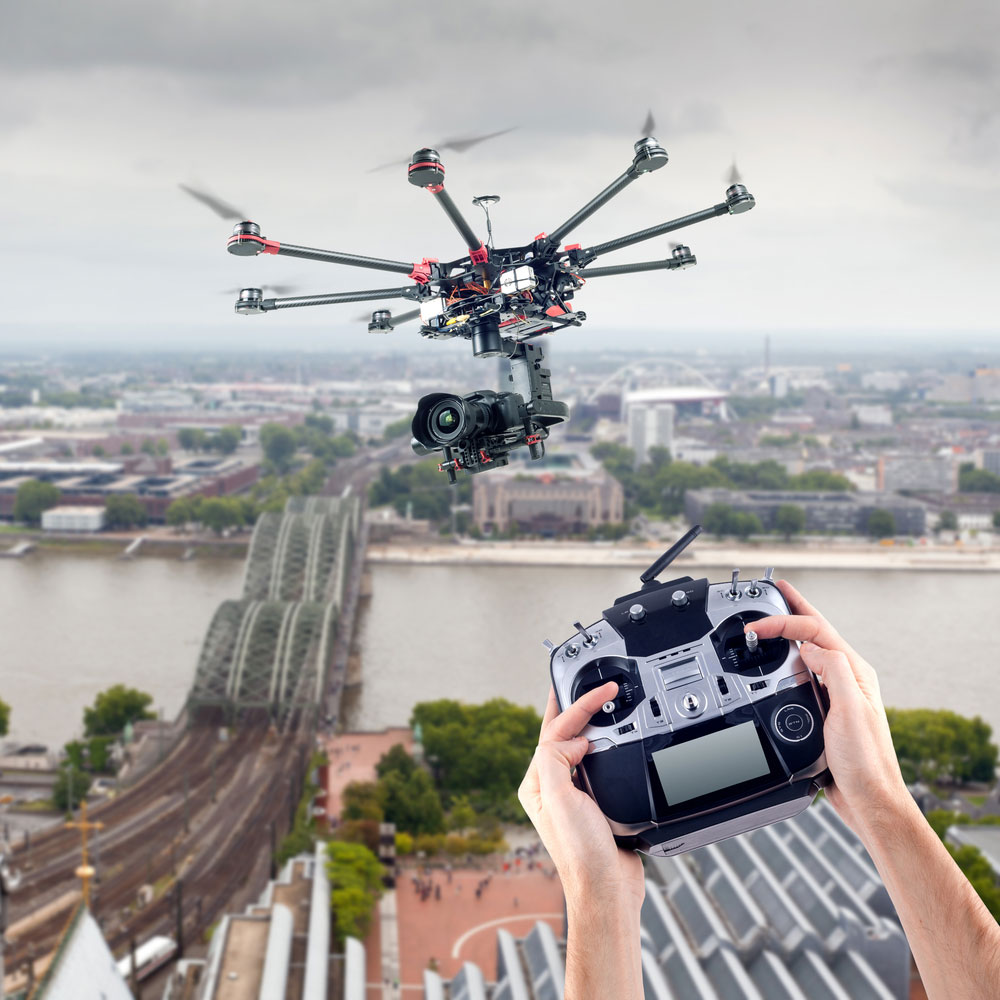
Man Controls the Flying Drones
Pair these with all the onboard interfaces, and you get the ideal autopilot development kit for research and development in labs, startups, academics, etc.
Special Offer: Get $100 off your order!
Please email [email protected] for details.
Pixhawk 4 Specifications and Features
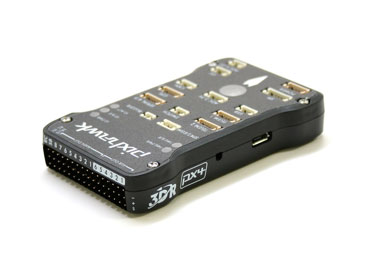
Pixhawk
Source: Wikimedia Commons.
The Pixhawk 4 has the following features and technical specifications:
- Main FMU processor
- STM32F765 microcontroller (32 Bit Arm Cortex-M7, 216MHz, 2 MB memory, 512KB RAM)
- IO Processor
- STM32F100 (32 Bit Arm Cortex-M3, 24MHz, 8KB SRAM)
- Sensors/IMUs on board
- ICM20689 Accel/Gyro
- BMI055 or ICM20602 Accel/Gyro
- IST8310 Magnetometer
- MS5611 Barometer
- GPS (IST8310 integrated magnetometer and u-blox Neo-M8N GPS/GLONASS receiver)
- Interfaces
- 8-16 PWM outputs (eight IO, eight FMU)
- Three dedicated PWM/ FMU capture inputs
- CPPM-dedicated R/C input
- Dedicated servo S.BUS output
- Dedicate Spektrum R/C input/ S.BUS and DSM with analog/ PWM RSSI input
- Five serial ports (general purpose)
- Two full-flow control
- A separate one with a 1.5A limit
- Four SPI buses
- Three I2C ports
- Dual CAN buses for dual CAN slots with serial ESC
- Each with individual silent controls/ ESC RX-MUX controls
- Analog battery voltage inputs for two batteries
- Two extra analog inputs
- Power Connectivity
- Servo rail input: 0V-36V
- USB input: 4.75V-5.25V
- Output module: 4.9V-5.5V
- Max input voltage: 6V
- Max current sensing: 120A
- Operating Temperature: 40-85°C
- Small form factor (84mm x44mm x12mm)
- Weight: 15.8 grams
- Other features
- MicroSD card slot
- External buzzer
- External safety button
- Servo rail and Vcc voltage monitoring
- Integrated vibrations isolation
Pixhawk 4 Pinouts
This flight controller has the following 17 pins.
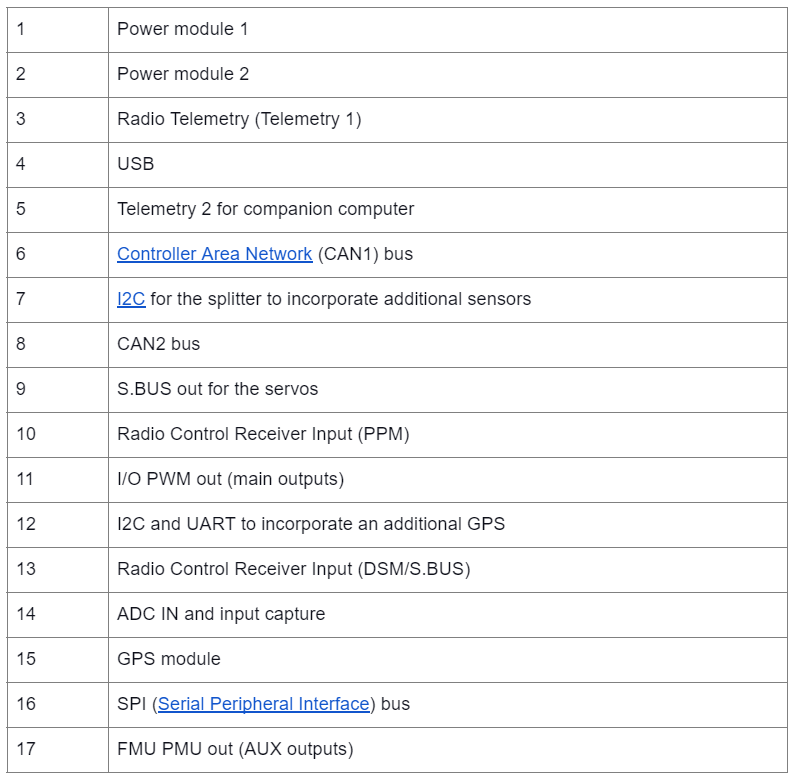
In addition, there is a micro-USB slot, SD card slot, I/O reset button, and FMU reset button on the sides of the controller.
Pixhawk 4 Wiring Quick Start
Since it has multiple sensors and peripherals, here's how to wire the Pixhawk 4 flight controller.
Wiring Chart Overview
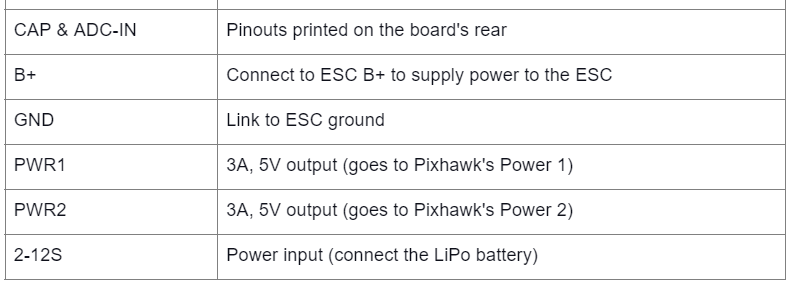
First, use the 6-wire cable to direct current from the LiPo battery to the Power Management Board to power the autopilot.
After that, connect the DSM, PPM, or SBUS radio control receiver to supply the autopilot with RC input in assisted flight or manual modes.
Next, use the 10-wire cable to link the Power Management Board to send signals to the motors.
Also, connect the provided GPS module to supply positioning data to the autopilot during flight.
A telemetry radio is optional for receiving data from the ground control station to communicate with the autopilot during flight.
Mount and Orient Controller
First, mount the controller to the drone's frame using the included foam pads for vibration isolation.
Next, position the Pixhawk 4 close to the vehicle's center of gravity and place the top side up with the arrow pointing towards the front of the drone.
You might encounter space constraints on the frame that make it impossible to mount in this orientation.
If this happens, fit the controller to match the available space, then reconfigure the autopilot.
GPS + Compass + Buzzer + Safety Switch + LED
After mounting the controller, connect the provided GPS (integrated with the safety switch, compass, LED, and buzzer) to the module slot.
Mount this module on the drone's frame but far from other electronics to prevent interference.
The component also features a direction marker that should point toward the vehicle's front when mounted.
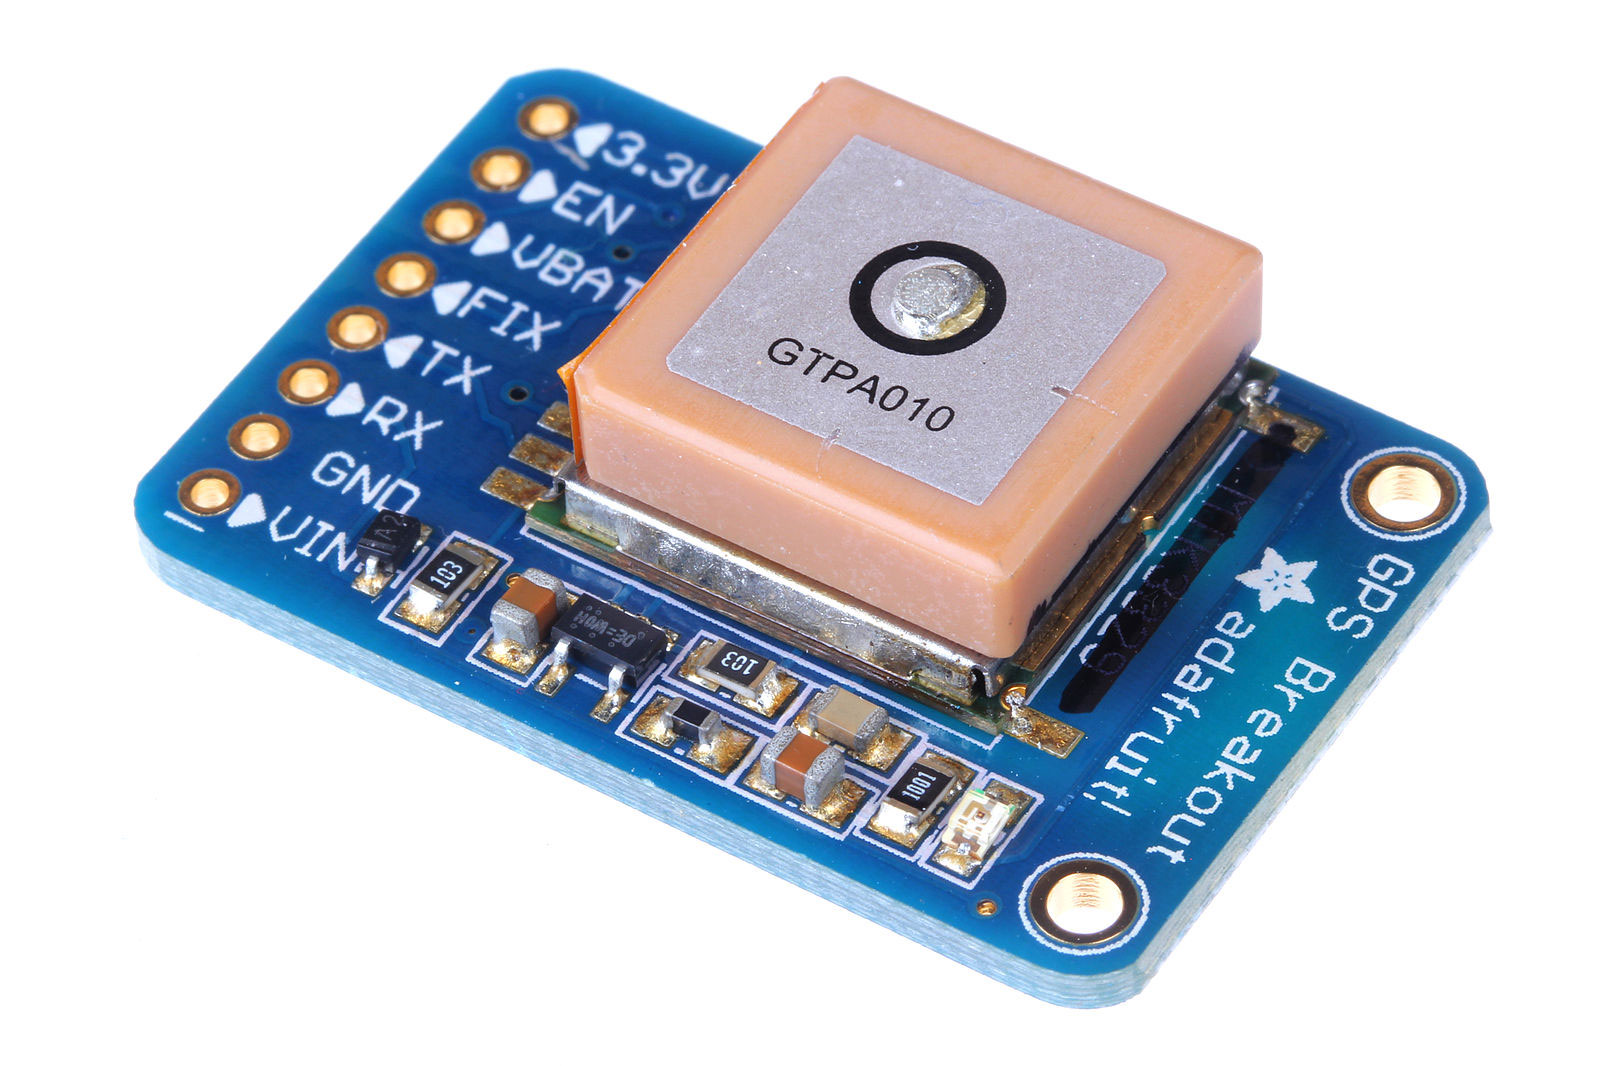
A GPS module
Source: Wikimedia Commons
It is essential to note that the GPS safety switch is on by default, which means the controller will not let you arm the vehicle.
To disable and enable it again, press and hold the safety button for one second.
Power
Connect the Pixhawk 4 Power Management Board as follows:

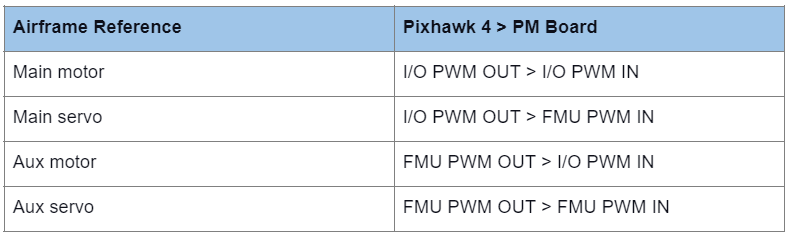
Depending on the airframe reference, here's how to connect the controller's PWM OUT slots to the Power Management Board's PWM IN ports.
Radio Control
Radio control is necessary for manual drone control but not required during autonomous flight mode. Select a compatible transceiver, then connect it as follows:

PPM and PWM receivers with individual wire channels must connect to the PPM RC slot through a PPM encoder.
Telemetry Radios (Optional)
Telemetry radios assist with drone control and communication in flight from a compatible ground station to alter the instructions. For instance, you can send a new mission or direct the bird to a particular place once airborne. Then, connect this radio to the TELEM1 port.
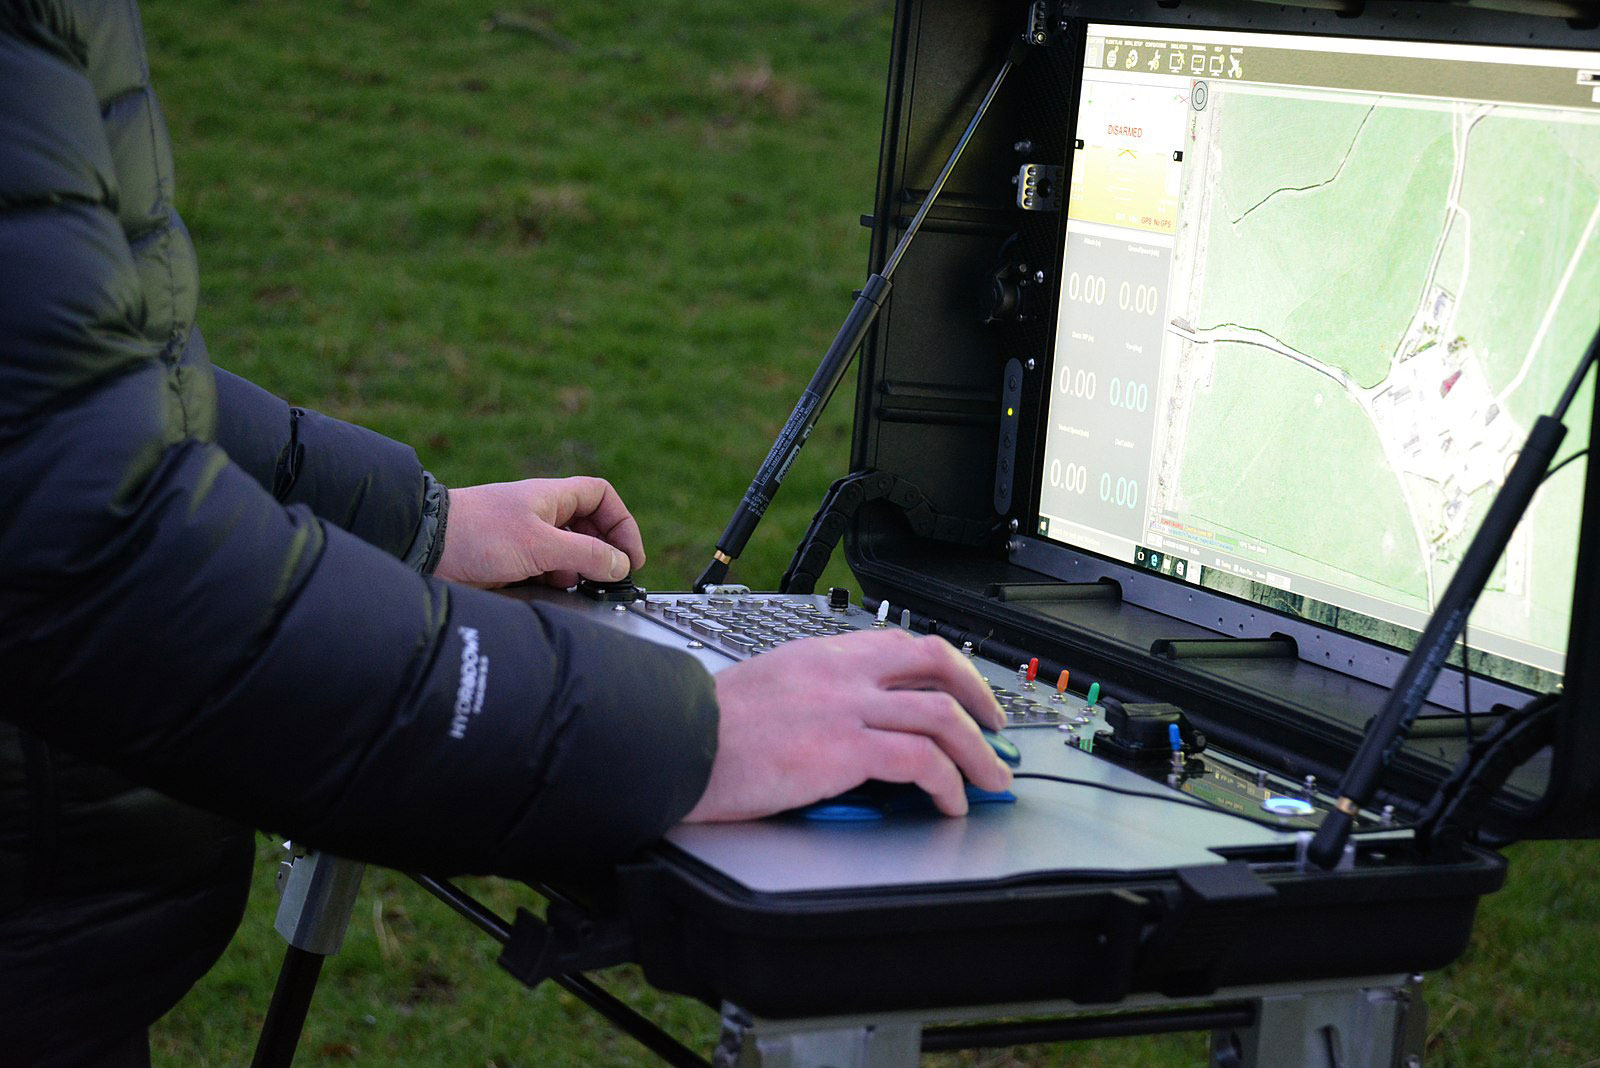
A portable UAV ground control station
Source: Wikimedia Commons
SD Card (Optional)
If you need to log and analyze flight details, use the UAVCAN bus hardware, or run missions, install the included SD card to store these details.
Motors
As per the airframe reference, connect the servos or motors to the main (I/O PWM OUT) or aux (FMU PWM OUT) slots.
However, it is vital to note that the mapping might not be consistent across frames.
Therefore, you should use the correct mapping for each drone. Also, if your frame is not in the reference list, use a generic airframe to match its type.
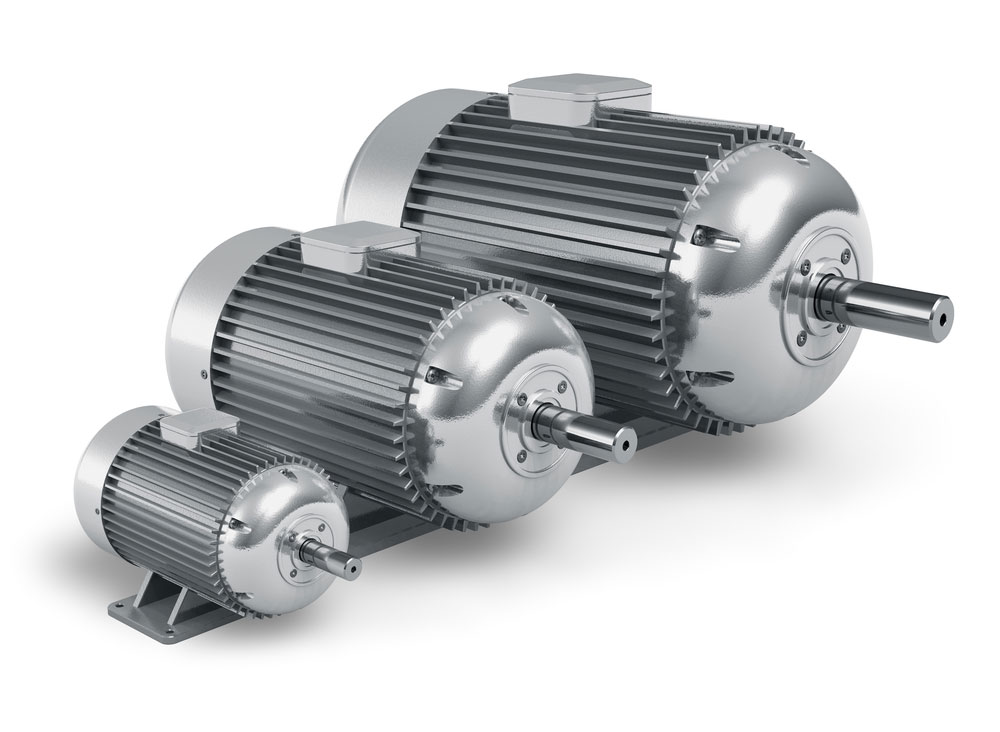
Motors
Summary
In conclusion, autonomous drone control has various applications, such as field surveying, infrastructure inspection, surveillance, etc.
The Pixhawk 4 is a critical component in its development, and if you need the controller or have any questions regarding setting up the project, contact us for more details.
Special Offer: Get $100 off your order!
Please email [email protected] for details.