Contents
SMTP Server Overview
SMTP is an acronym for Simple Mail Transfer Protocol, a communication protocol for sending email messages between servers. Some popular SMTP servers on the internet include Google G Suite, Exim, and Microsoft Exchange Server. In a nutshell, SMTP servers are responsible for forwarding, receiving, and delivering email messages. These email servers also send messages to local clients, such as Apple Mail and Microsoft Outlook.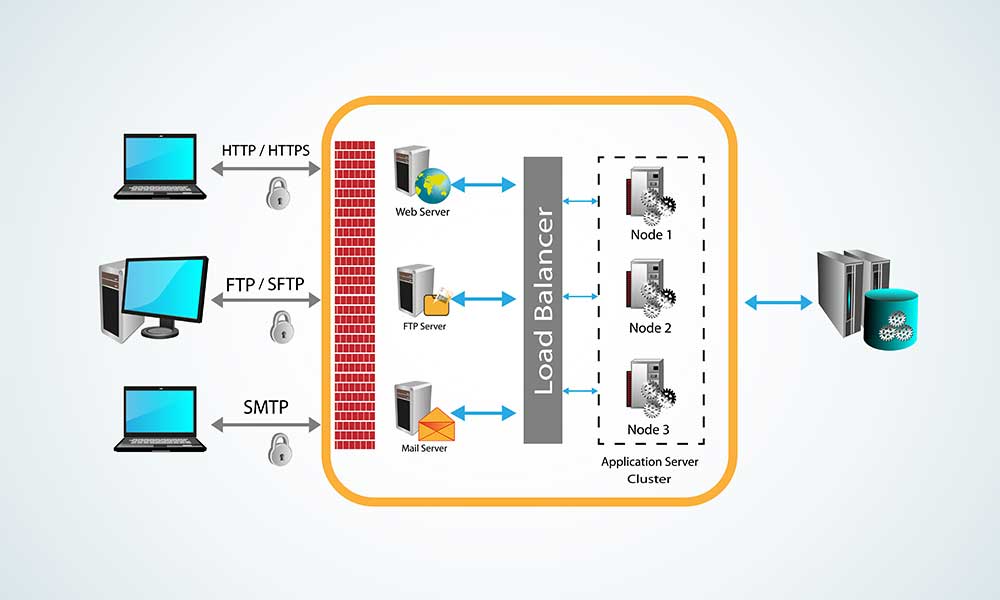
A vector illustration of clients accessing application servers via different protocols
Therefore, emails first go to the SMTP server for forwarding to the recipient’s email server. This email server then sends the email to the recipient’s client. SMTP servers have different options and settings, which you can configure to suit the project. For instance, you can set the IP address, hostname, domain name, etc.Where Arduino Comes In
The Arduino microcontroller can help you send an email using a Wi-Fi module, such as the ESP32 or ESP8266. You can program this Wi-Fi module via the microcontroller to send and receive email using SMTP and POP. This module primarily enables you to access the internet wirelessly. But you can access the ESP8266Mail libraries in the Arduino sketch to send emails. However, you must configure this sketch to have the correct email server credentials and settings. Once done, you can use the microcontroller to type an email and send it to the required recipient. But the system won’t have a touch or keyboard interface to send the email. We will use a push button as the trigger to send the mail. Therefore, we’ll hardcode the email message in the code. You won’t be able to edit the details during runtime.Special Offer: Get $100 off your order!
Claim your $100 discount by sending an inquiry today. Act now to save on your next project!
Please email [email protected] for details.
Please email [email protected] for details.
Required Components
Here’s a brief overview of the required components and their functions.Arduino UNO Board
We’ll use the UNO for this project, which runs on the ATmega328P chip. This microcontroller will run the code to control the Wi-Fi module and send the email using SMTP and POP.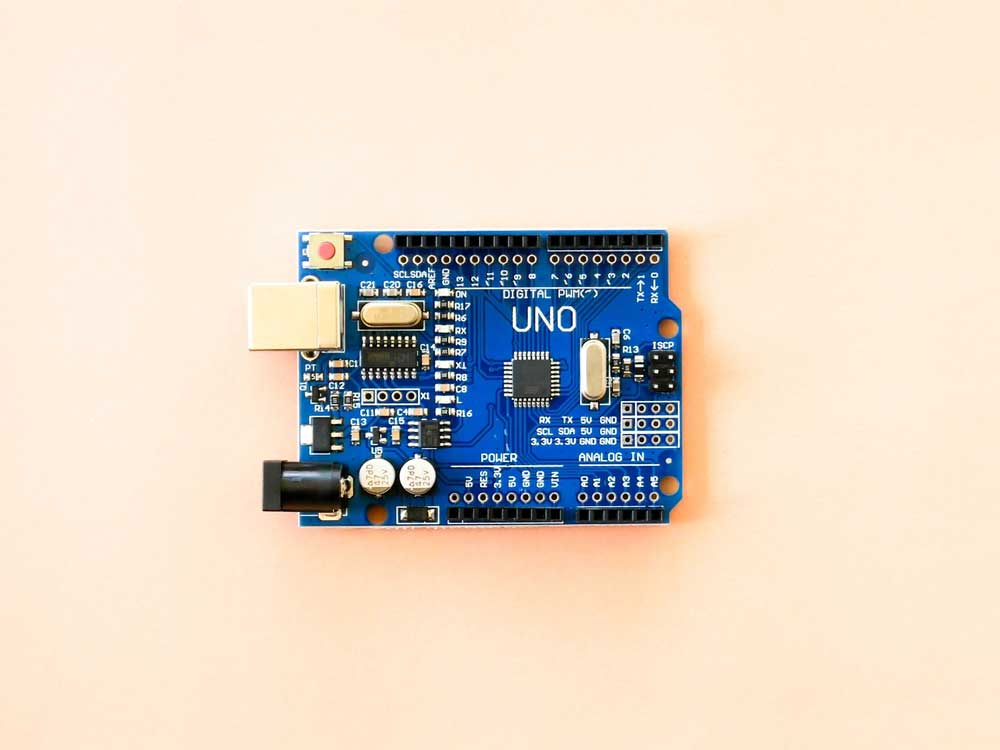
An Arduino UNO R3 board
ESP8266 WiFi Module
This low-cost Wi-Fi module provides internet connectivity to the Arduino UNO, enabling you to send emails. Once you’ve established an internet connection, you can send and receive other data, but we’ll focus on the email.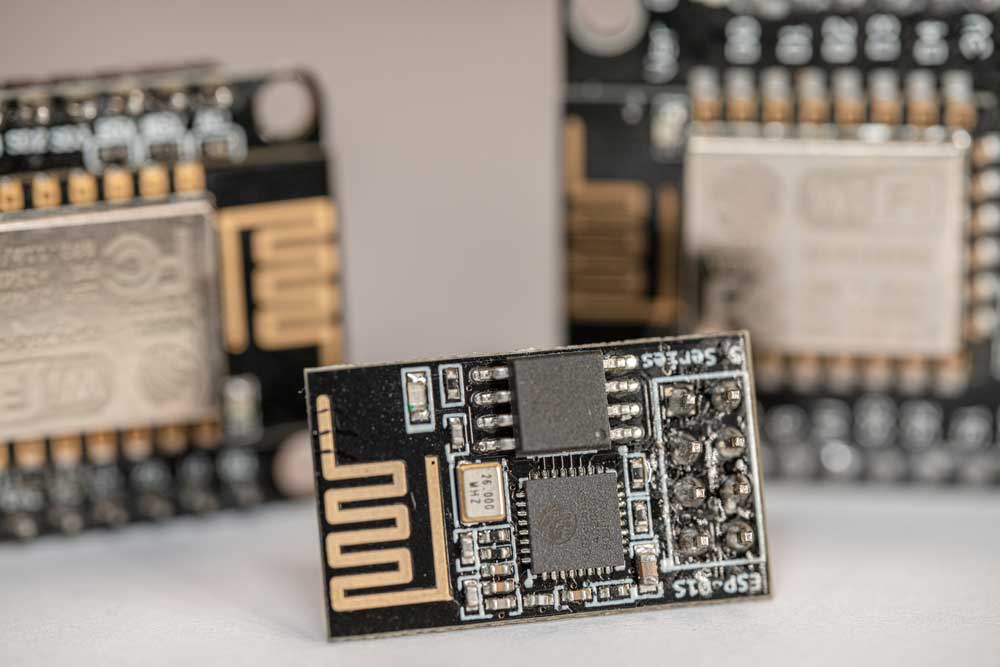
The ESP8266 WiFi module
You can use a 3G/GPRS/GSM shield with a SIM card if you don’t have a wireless network. This setup will enable you to access cellular internet.Power Supply Module
These modules deliver 3.3V or 5V to the microcontroller and Wi-Fi module to ensure they operate effectively. Picture a remote installation with a 12V power source, such as a solar battery. This module will drop the voltage to a level that won’t burn these sensitive electronics. Such an installation can send you sensor data via email at preset intervals.
A power supply module for a breadboard project
In this project, we’ll only use the power supply module to send regulated 5V power to the Wi-Fi module. The microcontroller (UNO) will draw its power from the USB connection to your computer. Other required components include a push button, breadboard, and connecting wires.Wiring Connections
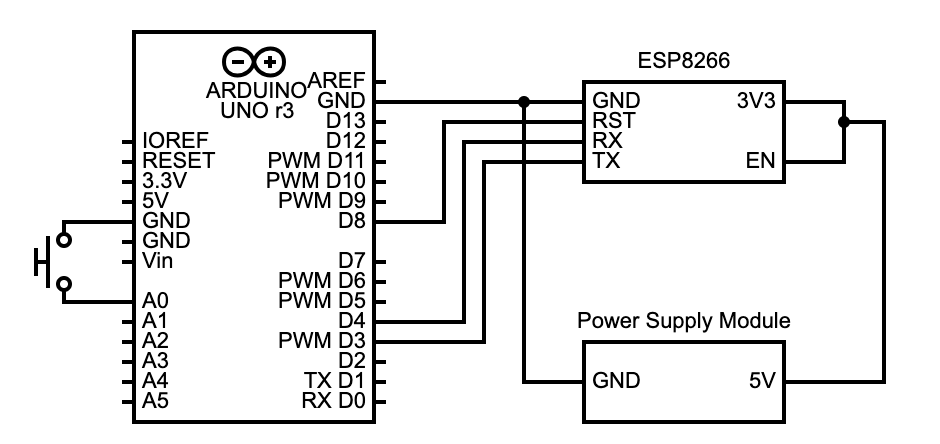
Wire these components in the following manner.| Arduino UNO | ESP8266 |
| D4 | RX |
| D3 | TX |
| GND | GND |
| D8 | RST |
| Arduino UNO | Push Button Switch |
| A0 | First leg |
| GND | Second leg |
| ESP8266 | Power Supply Module |
| 3V3 | 5V |
| EN | 5V |
| GND | GND |
Wiring Diagram
Arduino Code
Please note that you cannot use Gmail because the platform does not offer unencrypted authenticated access. But you can use AOL or Time Warner accounts. You can find your email’s port and SMTP server settings by Googling your email’s domain SMTP settings. Ensure you’ve flashed the Wi-Fi module with the recent AT firmware at a 9600 baud rate. Connect the Arduino board to your computer, open the Arduino IDE, paste this code sketch, and upload it.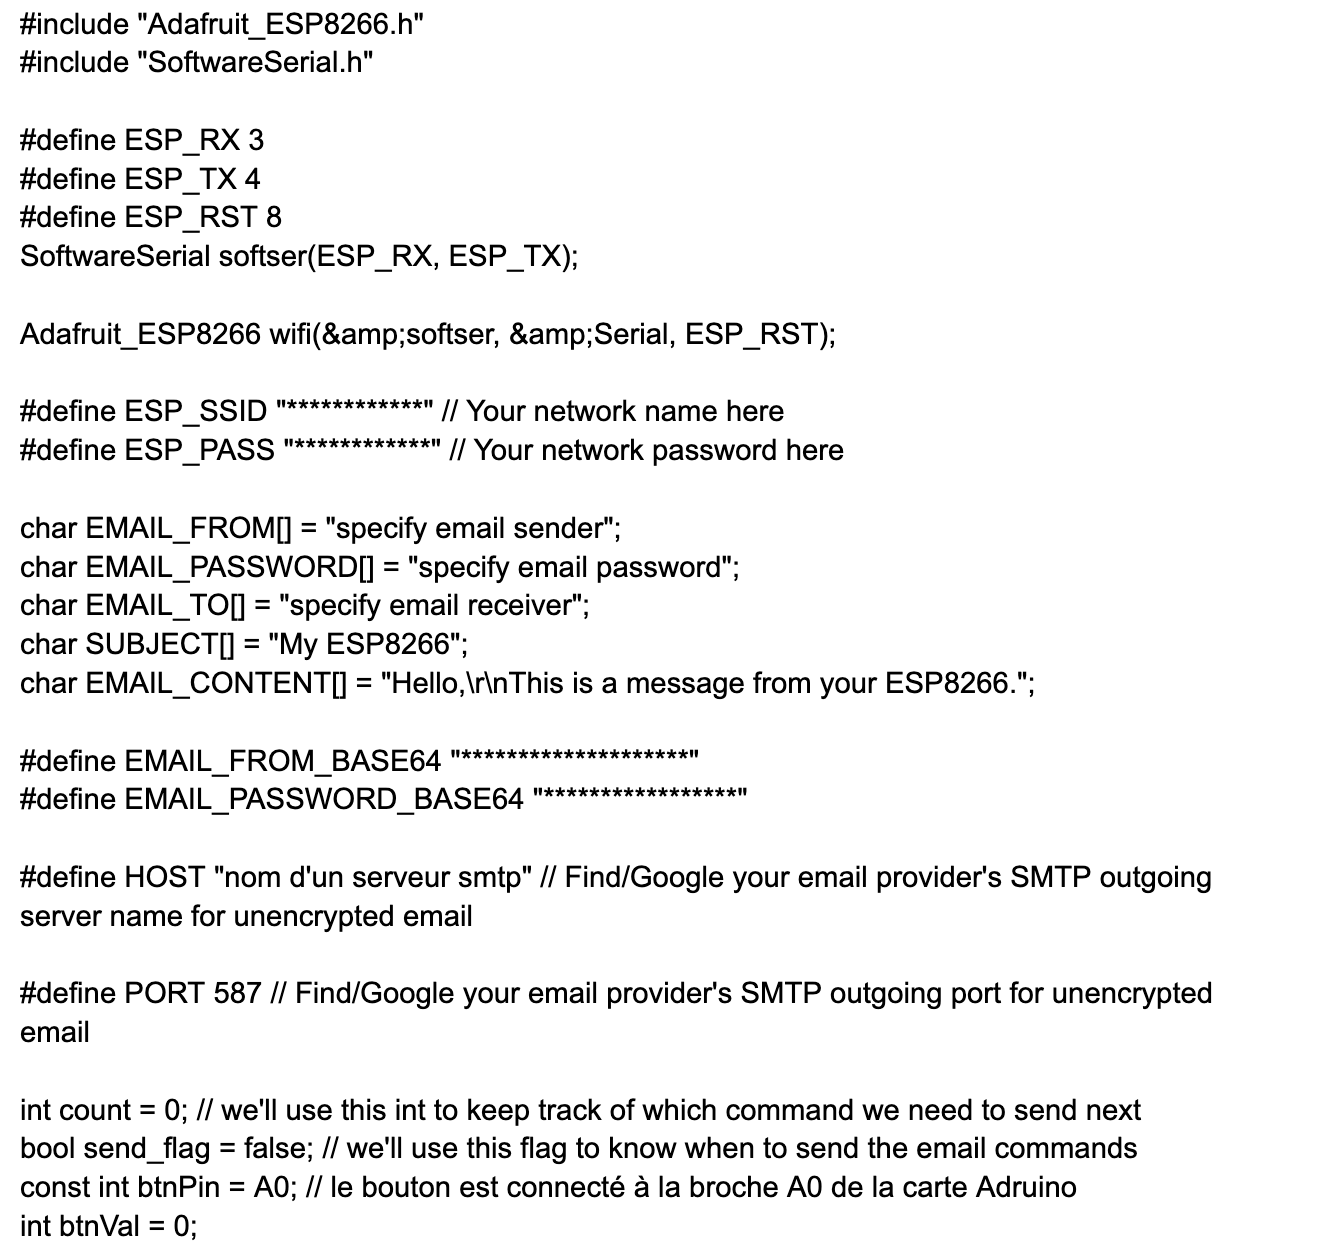
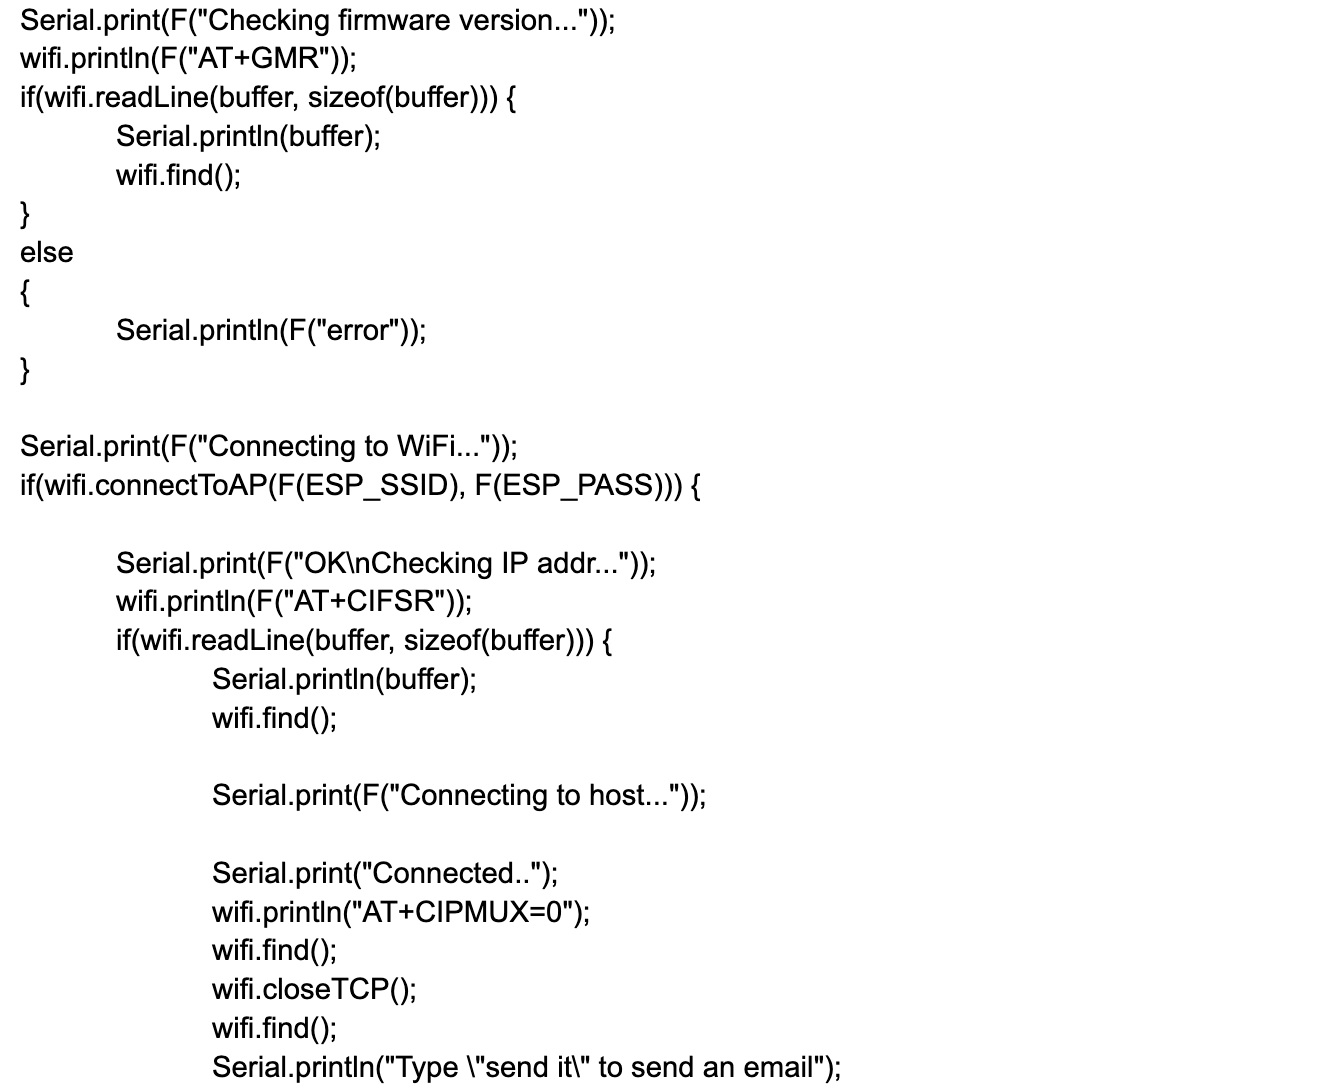
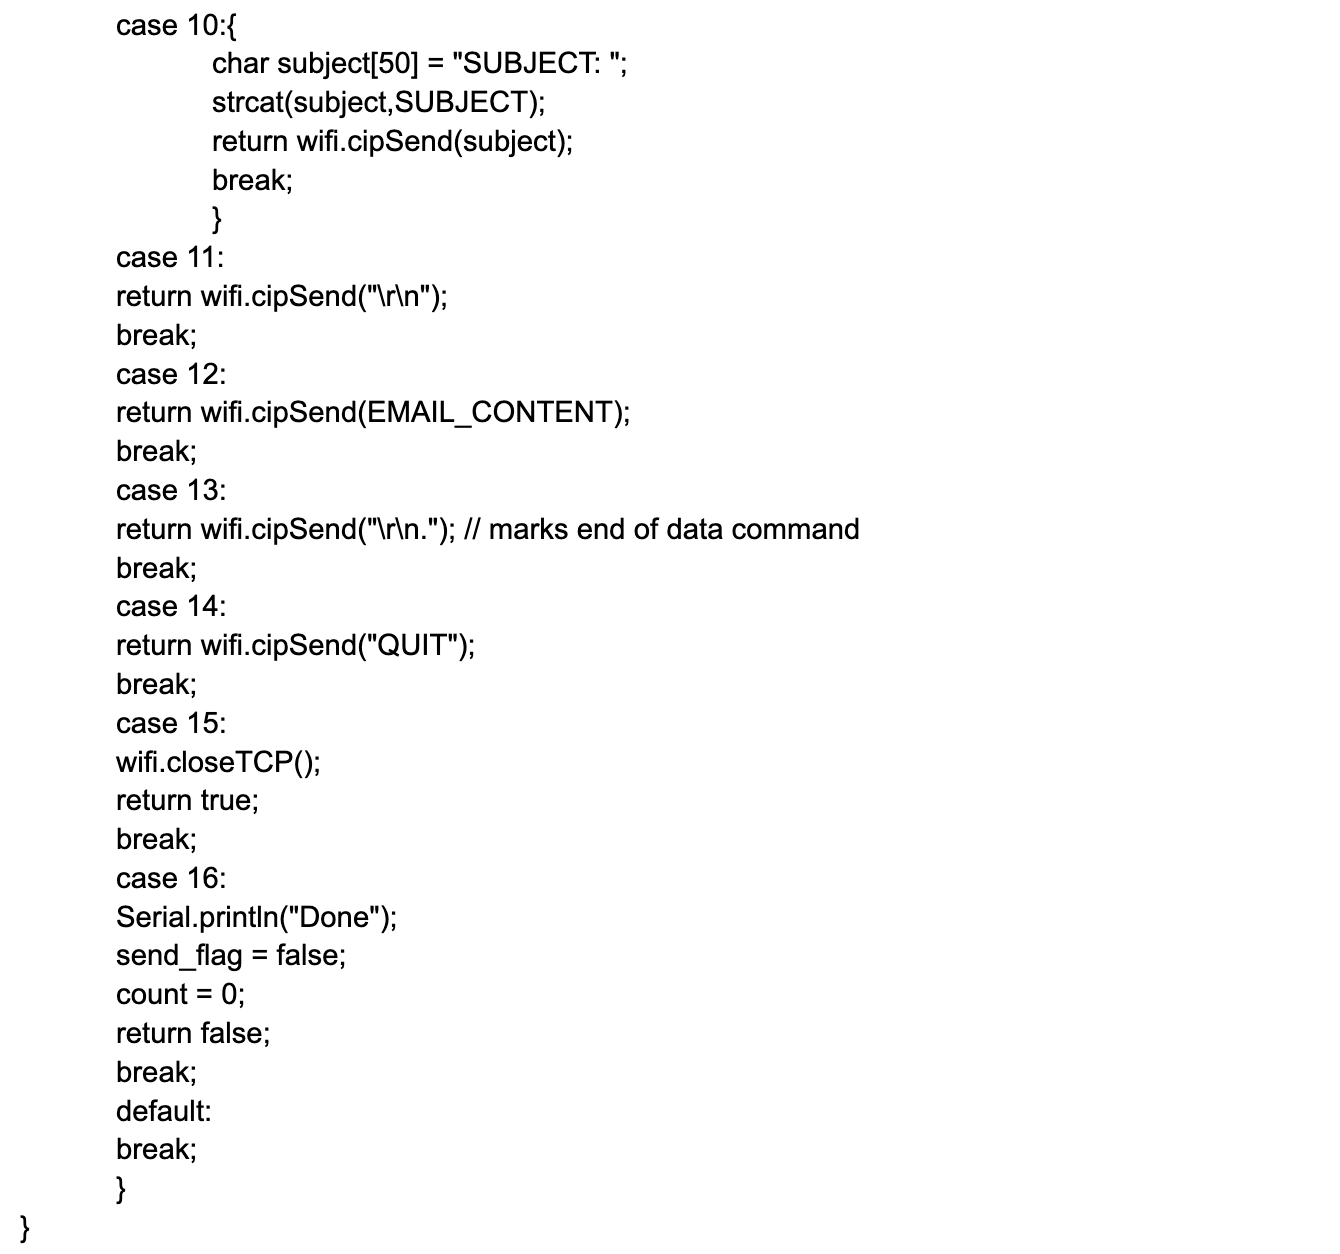
Code Explanation
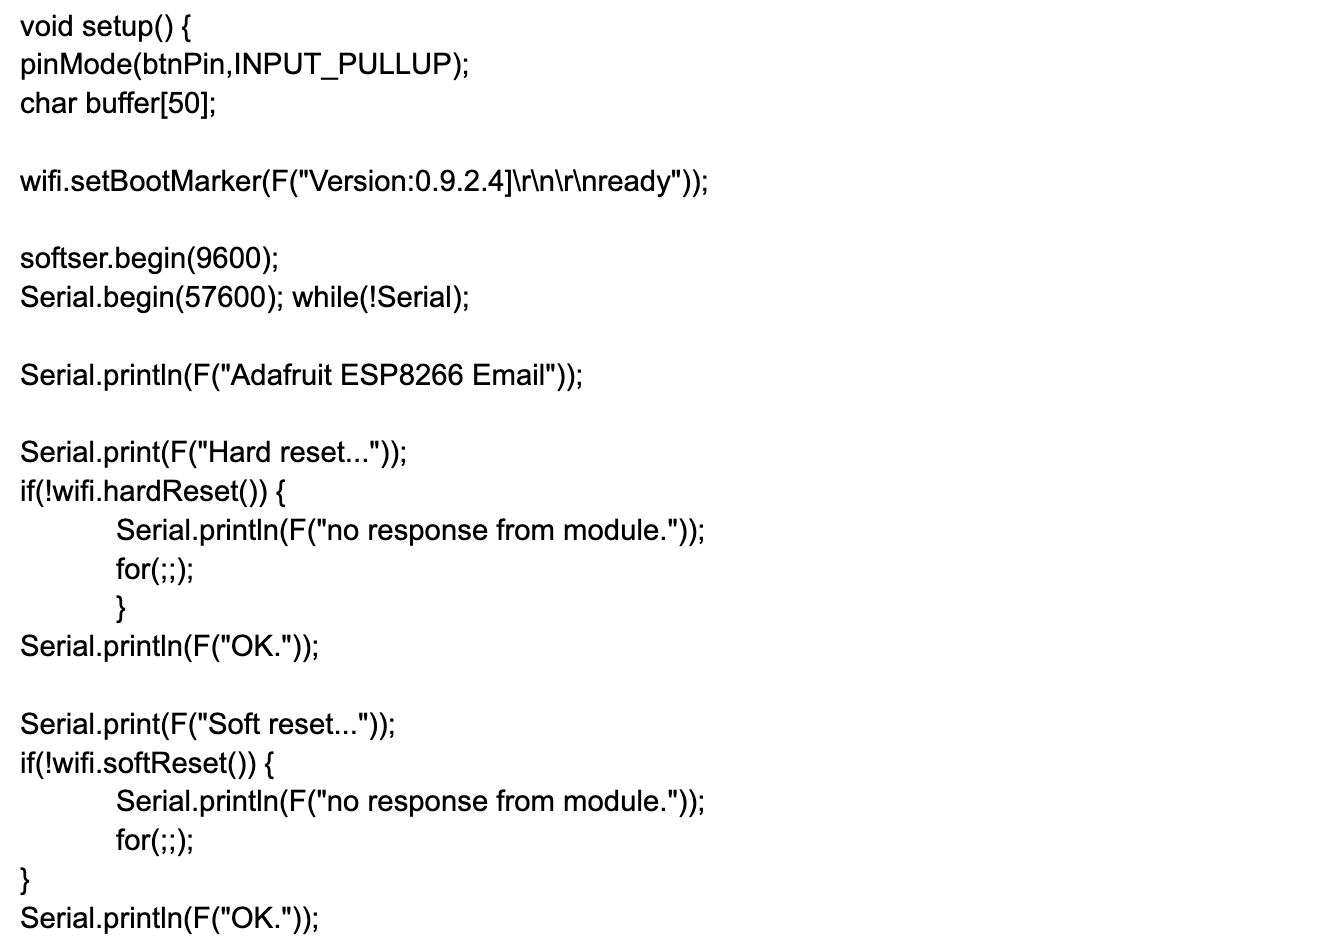
This code establishes a connection to the specified SMTP server. After that, it logs in using the provided credentials and sends the email with a predefined subject and content. The first section includes the required libraries for ESP8266 and software serial communication. Next, we define the pin configuration for the communication between the Arduino UNO and ESP8266. We must also create a software serial object for communicating with the ESP8266 module (softser). Next, the code instantiates the ESP8266 Adafruit object for this communication. After that, define the Wi-Fi network’s SSID and password, then the email details. You can edit the email address of the sender and receiver, subject, and content details. The following lines define the Base64 encoded email sender and password, then the SMTP server host and port details. Count and send-flag global variables track the email-sending process state. This code initializes the pins in the setup function, plus the wireless module and serial communication. After that, it connects the Wi-Fi module to the wireless network and checks the firmware version. It also displays debugging data (if any).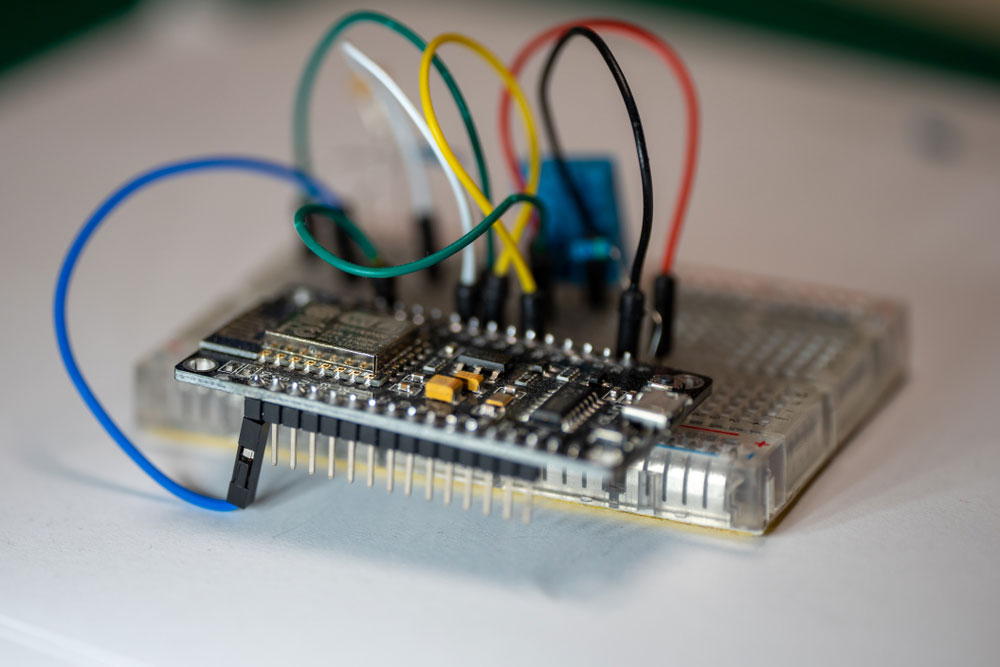
An Arduino ESP8266 project
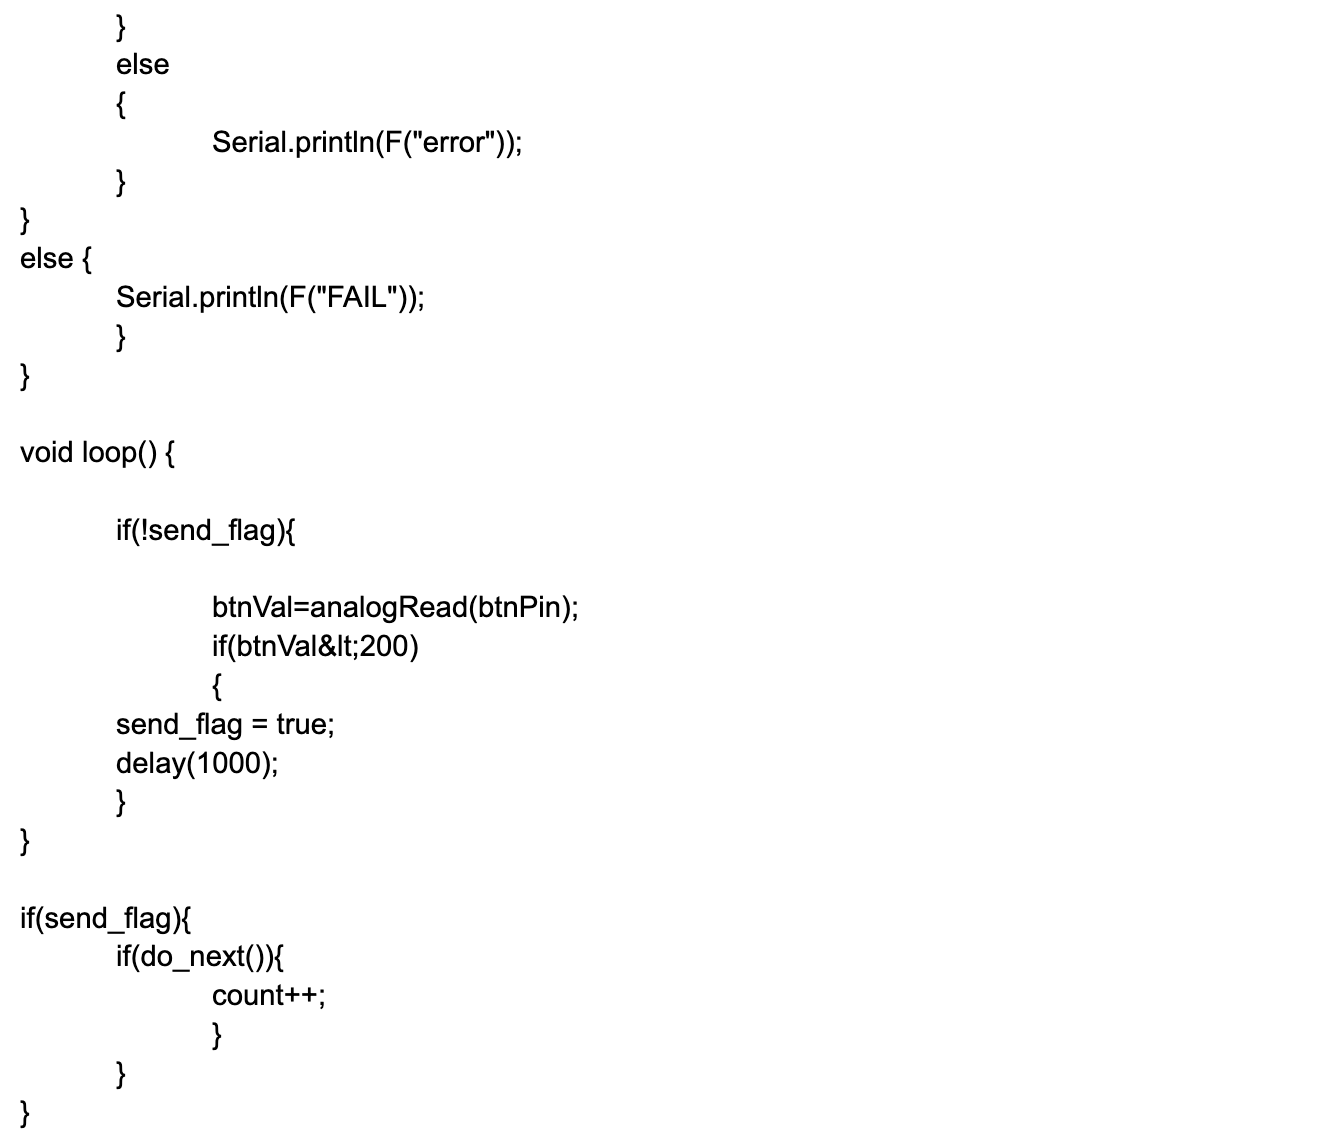
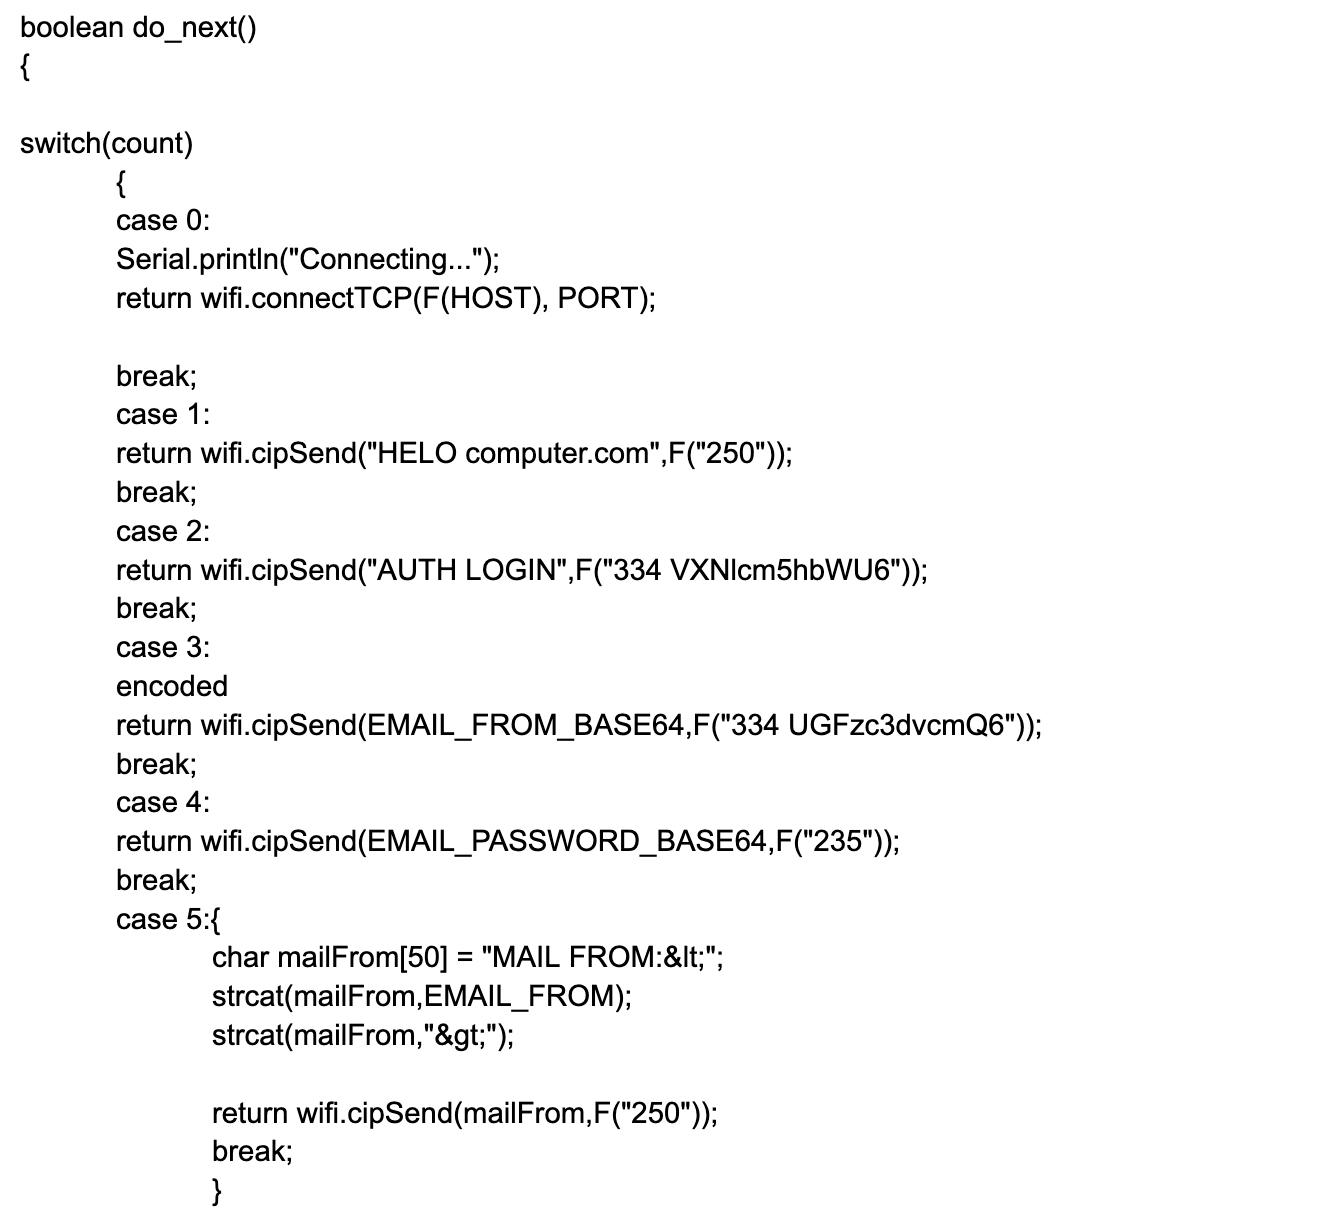
The code then moves to the loop function and listens for a button press event to send the email. Once detected, this analog input calls the do_next boolean function. This boolean function contains the SMTP commands for sending the email. These include:- Connecting to the server
- Login authentication
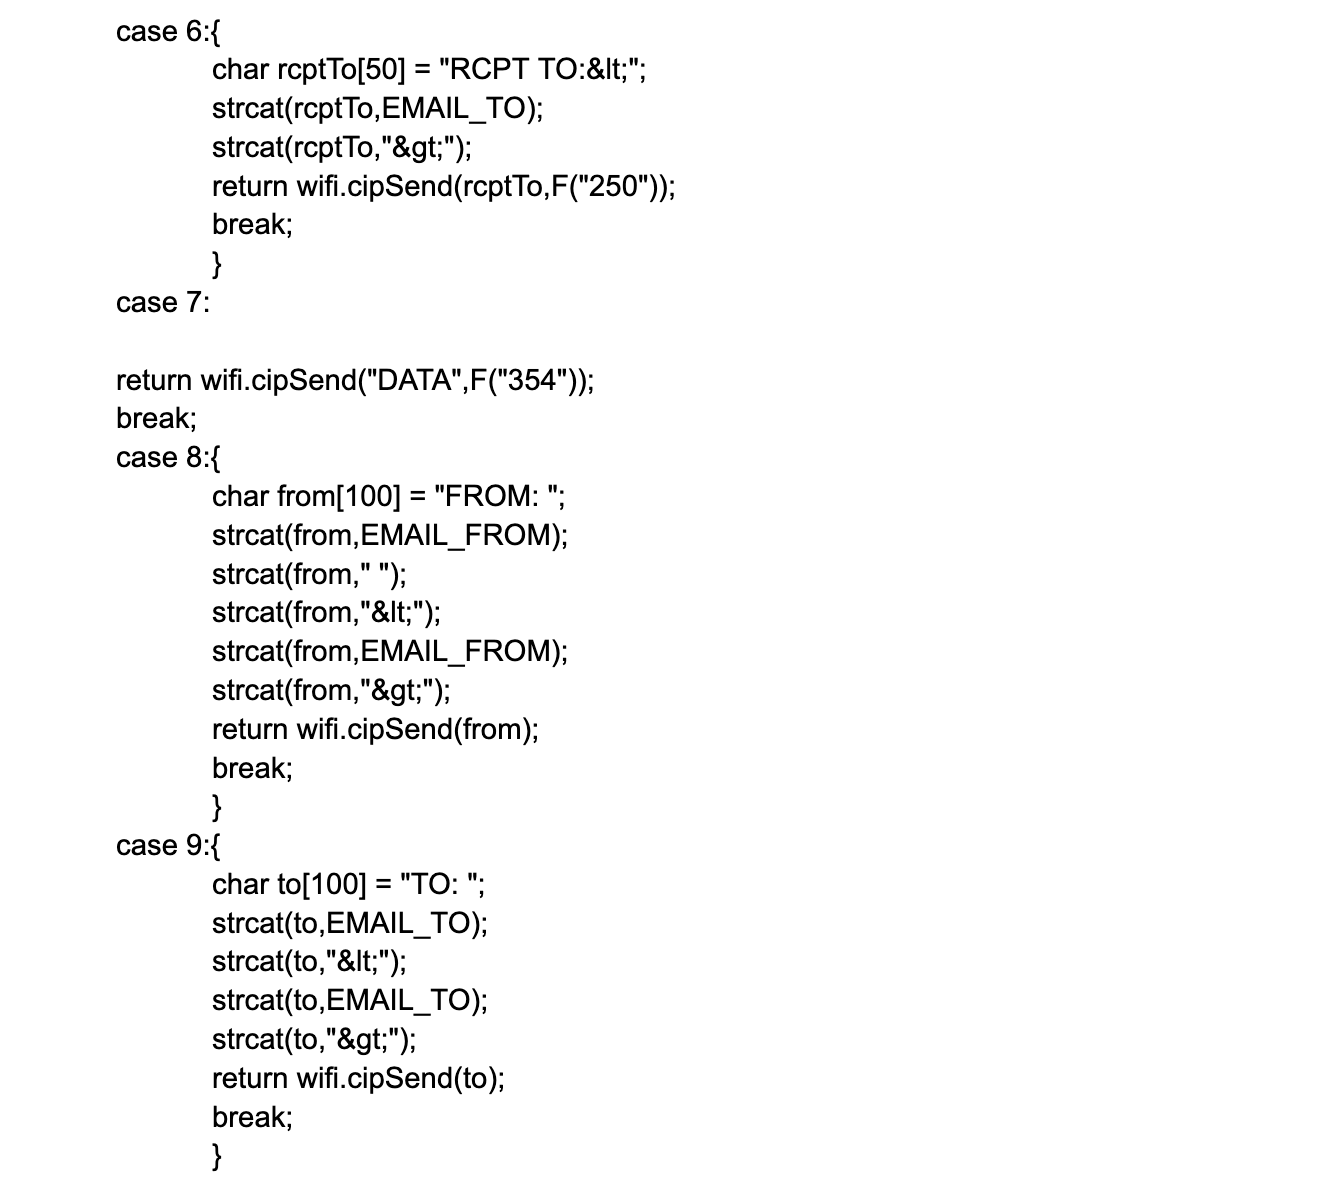
- Specification of the sender and receiver
- Sending the email content
Possible System Upgrades
You can use temperature sensors like thermistors instead of the manual button-pressing process to trigger the process. When the thermistor’s readings exceed the preset threshold, it can trigger the email sending using an IF function. This email will include the current temperature readings.Wrap Up
As you can see, sending emails via SMTP is one of the ways to implement this project using Arduino. You can try other implementations, but they might be more complex. Also, you can improve this push-button trigger example by replacing the device with a sensor. We can help you design and materialize this project by sending you these components. Contact us today or give us a call to get started.Special Offer: Get $100 off your order!
Claim your $100 discount by sending an inquiry today. Act now to save on your next project!
Please email [email protected] for details.
Please email [email protected] for details.