Contents
- Hardware Overview
- Module
- Sensing Pad
- Rain Sensor Pinout
- How Does a Rain Sensor Work?
- Interfacing Rain Sensor with Arduino
- Calibrating the Rain Sensor
- Detecting Rain – Arduino Code
- Advantages and Disadvantages of Rain Sensor
- Advantages of the Rain Sensor Module
- Disadvantages of the Rain Sensor Module
- Rain Sensor Applications
- Conclusion
Special Offer: Get $100 off your order!
Claim your $100 discount by sending an inquiry today. Act now to save on your next project!
Please email [email protected] for details.
Please email [email protected] for details.
Hardware Overview
The sensor comprises two primary parts:- Module
- Sensing Pad
Module
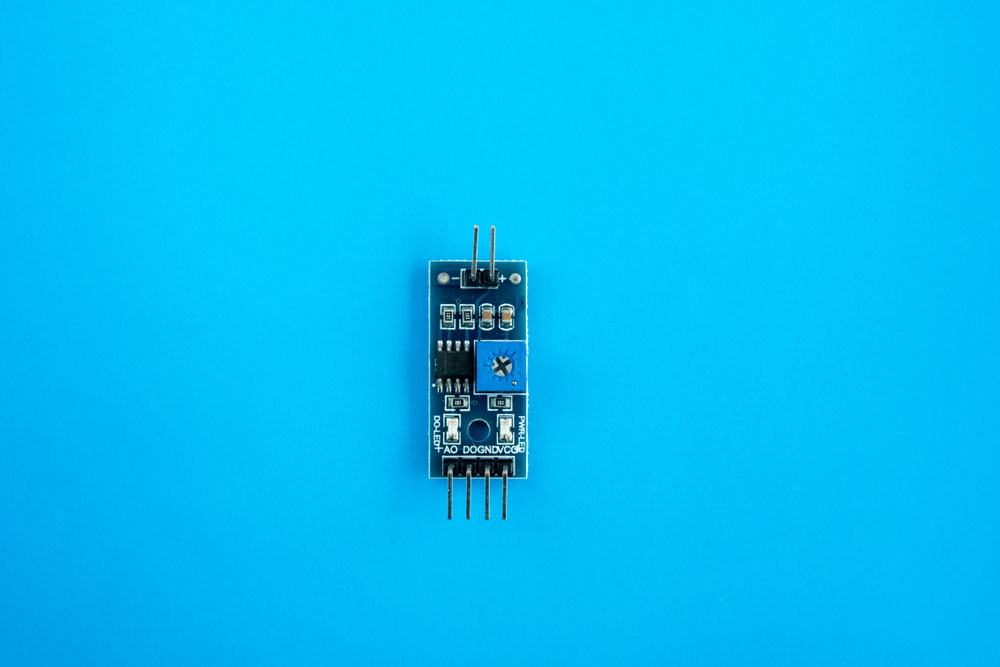
A Rain Sensor Module.
The Arduino rain sensor's electronic module links the sensing surface to the board. The module generates an output voltage proportional to the sensing pad's pad. It links to the Arduino board via the Analog Output (AO) pin. Next, the signal from the module passes onto the LM393 High Precision Comparator. The comparator is responsible for converting the analog signal to a digital one. Next, the signal passes onto the Arduino's Digital output pin as a digital output. Another critical module component is a built-in potentiometer. This potentiometer is essential in adjusting the digital output's sensitivity depending on the set threshold. Therefore, the module provides a LOW output when the falling water (rain) exceeds a set threshold value. If the water is way below the threshold, the module outputs a HIGH. Finally, it also comprises two LEDs. One is the power LED responsible for indicating when it is powered on. The other is the Status LED, which indicates whether the Digital output is high or low.Sensing Pad
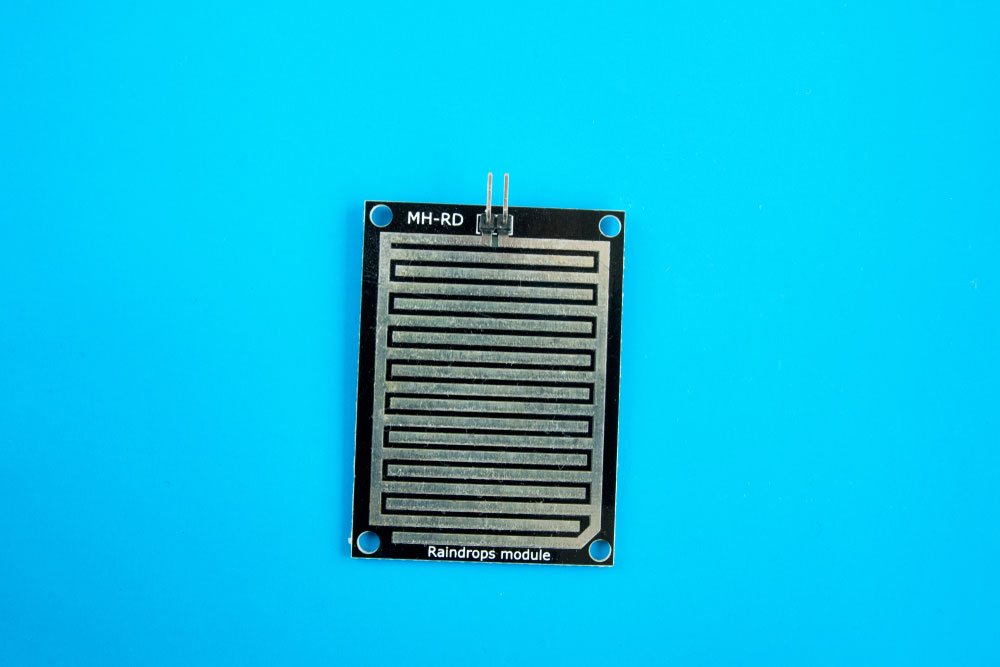
A Rain sensor module's sensing pad.
As its name suggests, this is a platform with sensors (exposed copper plates) to sense the presence of water (rain). The logic behind its operation is that the copper plates on the sensor are disconnected. However, since water is an electric conductor, the plates connect when it rains, thus completing the circuit.Rain Sensor Pinout
It features four pins that are as follows:- GND- It's the ground pin or the point where the sensor creates a ground connection.
- Analog Output pin (AO)- It creates the analog signal. Its supply value is between 0V and 5V.
- Digital Output Pin (DO) - It works with the module's internal comparator circuit to give a digital signal. This pin connects to Arduino digital pins or any 5V relay.
- VCC- It is the module's power supply pin providing the sensor with a supply voltage of between 3.3V and 5V. The module's analog output is proportional to the sensor's supply voltage.
Special Offer: Get $100 off your order!
Claim your $100 discount by sending an inquiry today. Act now to save on your next project!
Please email [email protected] for details.
Please email [email protected] for details.
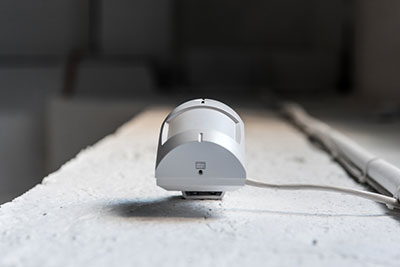
How Does a Rain Sensor Work?
A Simple Rain Sensor Module.
Here's a detailed overview of the rain sensor working principle. Earlier, we highlighted that the sensor's sensing pad comprises copper traces lined up parallel. The copper traces are a potentiometer of sorts. They output a resistance proportional to the amount of water landing on them. The resistance value is inverse to the amount of water falling on the device. Therefore, the lower the water levels, the lower the conductivity, the higher the resistance and vice versa. Next, the sensor produces an output voltage proportional to the resistance. When you measure the output voltage, you can tell the intensity of the water droplets (level of rain) falling on the sensor.Interfacing Rain Sensor with Arduino
Check out these steps on linking your rain sensor device to the Arduino Uno board.- First, ensure you have a 5V power supply (input voltage) necessary for the rain sensor module. Connect your module VCC pin to the Arduino 5V power supply pin. Beware of the harm of exposing the sensor to moisture, especially when powered on, as this causes corrosion. Therefore, you should only power the module when you're making a reading and disconnect it immediately.
- When connecting the power pin, the ideal setup is to link the Arduino's digital pin (7) to the VCC pin. Next, connect the sensor's module GND pin to Arduino's Ground pin. Finally, connect the Arduino's digital pin to the module's Digital Output (DO) pin.
Calibrating the Rain Sensor
Next, calibrate your rain sensor via the module's built-in potentiometer. Turn the variable resistor to set the threshold resistance value. The idea is to ensure you set up a value that, when attained, the module's LED lights up, showing the presence of rain. The Digital Output (DO) will indicate LOW if you hit the threshold value. After setting the threshold, pour water on the sensor and rotate the variable resistor until the Status LED indicates ‘ON.’ Next, rotate the sensor in the opposite direction until the Status LED turns off. You have successfully calibrated the rain sensor module, and it can accurately predict when rain falls on it.Detecting Rain – Arduino Code
After making the connections as indicated above and calibrating the sensor module, upload the code below onto the Arduino IDE.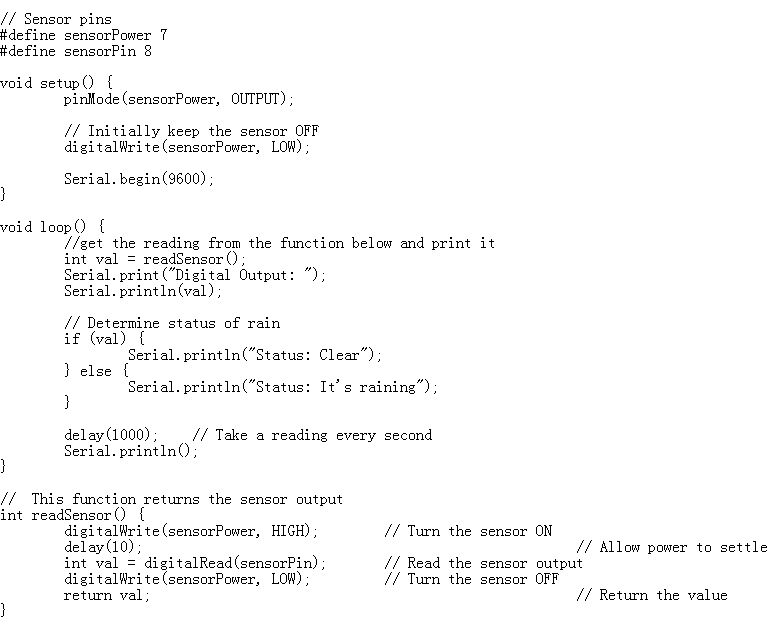
Advantages and Disadvantages of Rain Sensor
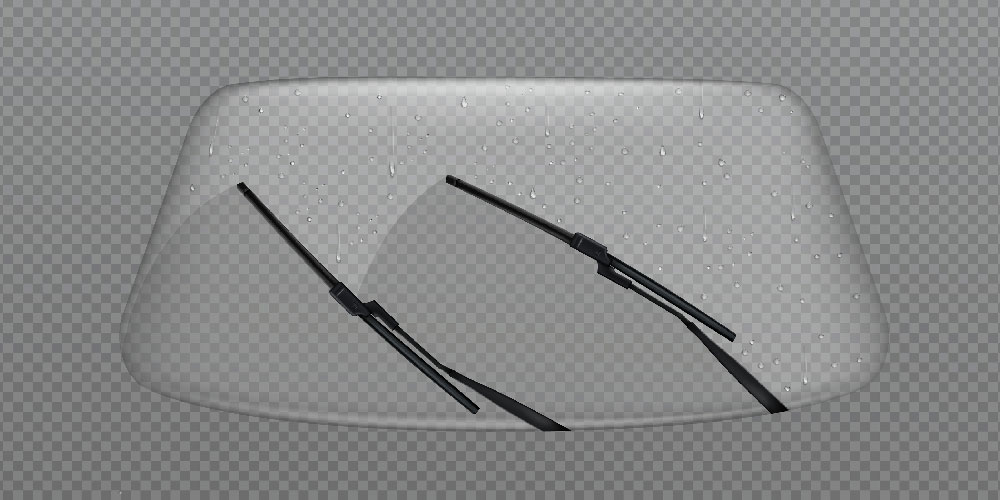
A Car Wiper relies on a rain sensor module.
Advantages of the Rain Sensor Module
- It is cheap and highly sensitive, especially when calibrated well. Also, you can always obtain a suitable sensor module depending on the scale of your project. For a simple college project, the small module is just fine.
- Also, it features mounting holes, which makes it easy to mount.
Disadvantages of the Rain Sensor Module
- The sensing plate's PCB is of low quality and thus prone to damage, especially when exposed to moisture for a long time.
- Secondly, it doesn't directly apply the applied analog value.
Rain Sensor Applications
- Creating simple DIY rain alarms, detectors, and even sophisticated weather monitoring systems.
- It is helpful in Automatic irrigation systems that shut the water supply when it rains.
- They are helpful in automatic windshield wipers.
- Its detection of water capabilities can help improve the functionality of an automatic wiper module.
- In addition to providing rain warnings, it can also be used as a humidity sensor.
Conclusion
Interfacing a rain sensor module with an Arduino board is one of the simple yet valuable projects you can create for your college project. It is easy to set up, as we've explained above. Give it a try, and always refer to this guide when you're stuck during your project. Also, don't hesitate to contact us if you need electric components and circuit boards.Special Offer: Get $100 off your order!
Claim your $100 discount by sending an inquiry today. Act now to save on your next project!
Please email [email protected] for details.
Please email [email protected] for details.