Wireless communication is a big part of the online space, and several architectures exist for this type of network. One of them is LoRa, which functions like WiFi but with long-range and low power consumption.
The platform is ideal for IoT, so if you are working on an IoT project, here's an in-depth look at LoRa and how to implement a LoRa IoT gateway using a Raspberry Pi single-board computer.
Contents
- What is LoRa & LoRaWAN?
- What are LoRaWAN Gateways & Nodes?
- How Does A LoRa Gateway Work?
- Benefits of Using LoRaWAN Gateways with End Nodes
- Set Up a LoRaWAN Gateway with Raspberry Pi
- Step 1: Flash the SD Card
- Step 2: Power Up
- Step 3: Test the WiFi
- Step 4: Add the LoRa Gateway to a LAN Ethernet
- Step 5: Configure the LoRa Concentrator for TTN
- Step 6: Obtain the Gateway EUI for TTN Registration
- Step 7: Create a TTN Account and Register the Gateway
- Step 8: Connect the TTN to the Gateway
- Step 9: Locate the Gateway in the TTN Map
- Step 10: Observe the Data Uplink from a Nearby Node
- Recommendations for LoRaWAN Gateways & End Nodes
- WM1302 LoRaWAN Gateway Modules
- Cisco Wireless LoRaWAN Gateway
- Multi-Tech Systems MultiConnect Conduit
- Lorrier LR2 IoT LoRaWAN Gateway 868MHz
- Applications and Use Cases for LoRaWAN
- Summary
Special Offer: Get $100 off your order!
Please email [email protected] for details.
What is LoRa & LoRaWAN?
LoRa stands for Long Range, and it is a proprietary low-power, long-range wireless communication system. The wireless modulation technique derives its operational design on Chirp Spread Spectrum (CSS) technology, encoding data on radio waves using chirp pulses.
LoRa runs on a license-free wireless spectrum, like WiFi, but usually in the sub-gigahertz bands. However, you can operate it in 2.4 GHz because the exact frequency used with LoRa communication depends on the physical deployment location.
Some people use LoRa and LoRaWAN interchangeably, but the two are different. LoRa is the wireless communication hardware, while LoRaWAN is a Media Access Control (MAC) layer network protocol built for LoRa modulation. In simple terms, LoRaWAN is software that dictates how to use LoRa hardware.
What are LoRaWAN Gateways & Nodes?
LoRaWAN nodes and gateways are two of the four primary components in the LoRaWAN network architecture. Nodes (end nodes) are the edge sensors or devices in the network, while gateways gather data from several end nodes to send it to the network server and vice versa. The remaining two components are the network server and application server.
How Does A LoRa Gateway Work?
LoRa hardware operates on top of the LoRaWAN network protocol software, sending small, encoded data packets over a long range using chirp pulses (with a linear frequency variation). This network communicates with the end nodes back and forth.
In the US, the ISM frequency designated for LoRa technology is 915 MHz, and it has a 10-km transmission range with a line of sight. Therefore, in urban areas, expect a 3-km range max. But the network is reliable because a frequency offset between the transmitter and receiver reduces the bandwidth by around 20% without disrupting the decoding performance. This reliability helps minimize packet loss.
The gateway consists of the hardware and application software required to link the end nodes to the cloud. Since there are several gateways in the network, the one with the most stable link with the IoT device passes the packet to the server. The rest of the gateways are for redundancy in case one fails.
Special Offer: Get $100 off your order!
Please email [email protected] for details.
Benefits of Using LoRaWAN Gateways with End Nodes
The network is similar to WiFi, and it has the following advantages.
- Optimized for low power consumption and can run on batteries for years
- End-to-end AES-128 encryption
- Can handle millions of messages from multiple gateways
- Allows remote firmware update for the connected devices
- Operates on a license-free ISM band
- Penetrates deep into multi-story buildings
- Long-range wireless coverage (2-3 kilometers in urban areas, 10+ kilometers in open, rural areas)
- 0.3 - 50 kbps data rate
As for the LoRaWAN gateways, they have the following advantages.
- They provide redundancy to minimize service disruptions.
- Affordable and scalable.
- A continuously expanding global network.
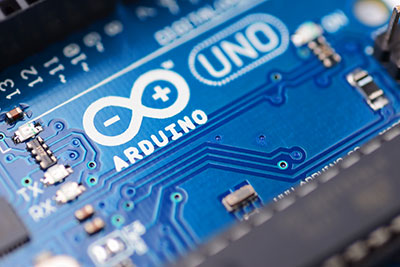
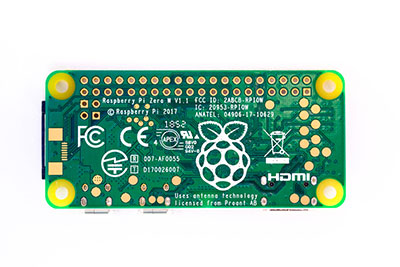
Set Up a LoRaWAN Gateway with Raspberry Pi
The goal is to set up a LoRaWAN gateway, then register it with The Things Network (TTN), and check out for a data uplink from a connected device. You will need a LoRaWAN developer gateway kit like the RAK7243, which contains a Raspberry Pi 3B+ and a RAK2245 Pi HAT with a GPS module.
Setting up requires the following steps.
Step 1: Flash the SD Card
- Download and unzip the latest Raspbian firmware image (RAK7243, not the LTE-enabled RAK7243C) to a computer with an SD card reader
- Install and run the Etcher open-source utility
- Insert the SD card included in the kit into the reader (Etcher should detect it automatically)
- Set the source image file and target in Etcher, then click the flash button (it should take 2-3 minutes to complete flashing)
- Eject the SD card
Follow the same steps if using a Linux PC.
Step 2: Power Up
Before powering up the LoRa gateway, attach both antennas for LoRa and GPS. Next, insert the SD card, connect the power supply to the micro USB port and switch it on.
Step 3: Test the WiFi
After powering the gateway, check whether it appears as a WiFi access point with the network name having the format Rakwireless_XXXX. Connect your PC to this network using the password "rakwireless." Check the gateway address in the WiFi settings for the connected PC and confirm that logging into the device is possible via ssh. The default username and password are "pi" and "raspberry," respectively.
Step 4: Add the LoRa Gateway to a LAN Ethernet
The gateway comes with a fixed ethernet IP address (192.168.10.10), and you can use this address in a correctly configured PC. However, it is better to have the device acquire its IP address from a managed network. For this:
- Log in to the device via SSH over the WiFi connection
- Create a backup copy of the configuration file (/etc/dhcpcd.conf)
- In the configuration file, comment out the lines that create the hardcoded address (these are right under warning)
- Reboot the gateway
- Connect your PC to the device again over WiFi and run "ifconfig" to check the new provided address
- Modify the router to make the new DHCP address permanent for the gateway
- Check if the ssh still works over the new DHCP address
- If everything is okay, you should be able to log in with ssh via ethernet or WiFi
Step 5: Configure the LoRa Concentrator for TTN
Next, configure the gateway for the TTN using the following steps:
- Connect to the gateway via ssh, then run the "sudo gateway-config" configuration tool
- Select "Setup RAK Gateway LoRa concentrator" then "Server is TTN" in the following pop up
- Pick the correct channel plan depending on your country (US_902_928 in our case)
Step 6: Obtain the Gateway EUI for TTN Registration
Obtain the gateway ID for registration to the TTN using the following command:
Step 7: Create a TTN Account and Register the Gateway
Create a TTN account, then log in and follow the guide for gateway registration.
Step 8: Connect the TTN to the Gateway
The TTN will attempt a gateway connection immediately after registration but will likely fail and indicate "no connection." If the "no connection" status persists, troubleshoot the network or establish a TCP connection from the gateway to the MQTT port in the server using the following command.
Step 9: Locate the Gateway in the TTN Map
Next, locate your gateway on the world map in TTN, which contains the details of all registered gateways on TTN only.
Step 10: Observe the Data Uplink from a Nearby Node
Next, place an end node a few feet away from the gateway and power it. Observe the node data logged into your TTN account (under the device's data page in the application console).
The data uplink is in real-time, and you will spot data payloads coming in from the node every 6-7 seconds.
Recommendations for LoRaWAN Gateways & End Nodes
You have to invest in reliable hardware for your LoRaWAN network, and here are a few gateway and end nodes recommendations.
WM1302 LoRaWAN Gateway Modules
This mini PCIe form-factor gateway module has the new Semtech SX1302 chip that features ultra-low power consumption with high-performance statistics. The LoRa device also features ultra-low operating temperatures, eliminating the need for thermal management.
Cisco Wireless LoRaWAN Gateway
This Cisco gateway can communicate with class A, B, and C devices and features two Semtech SX1301 baseband chips. It supports 16 uplink channels that can receive 16 LoRa packets simultaneously. Additionally, you can configure the device software to work with multi-channel diversity combinations.
Multi-Tech Systems MultiConnect Conduit
A MultiConnect Conduit's range can go up to 10 miles with a line of sight, but this reduces to 3 miles in the city due to buildings and structures. It features WiFi, Bluetooth (including BLE), two accessory card slots, and GNSS.
Lorrier LR2 IoT LoRaWAN Gateway 868MHz
This carrier-grade LoRa IoT gateway uses the Semtech SX1301 baseband processor and bases its working principle on the iC880a LoRaWAN concentrator. It features eight channels that can support thousands of endpoints.
Applications and Use Cases for LoRaWAN
- Logistics, management of transport fleets
- Environmental monitoring
- Air quality control
- Parking sensors, smart cities & lighting, waste management, etc.
- Flood management, leak detection
- Temperature monitoring in the food industry
- Water use optimization in the agriculture industry
- Health/ fitness monitoring
- Cold chain storage monitoring
Summary
There you have it! The LoRaWAN network architecture is critical for IoT projects, and setting up the gateway requires only a few steps. If you encounter any problems along the way, hit us up for further clarification.
Special Offer: Get $100 off your order!
Please email [email protected] for details.