About PiVPN: The internet is one of the greatest inventions, but it has its downsides. Key among them are data theft and privacy invasion. Some skilled programmers use their knowledge for these illegal purposes either to get money or just out of bad intentions.
Therefore, it is vital to secure your network to prevent these attacks because, as more devices go online, it will only become worse. One of the best ways to protect your online transactions is by using a VPN. We will look at the steps involved in building a VPN server using Raspberry Pi and configuring the single-circuit board computer, an essential step for any PCB design company that wants to ensure the safety and integrity of their data during the design and manufacturing processes.
Contents
What is VPN?
A VPN (Virtual Private Network) is a secure network that creates a tunnel or encrypted connection over the internet. It masks your geographical location and prevents others from seeing what you are doing online.
Since it masks your location, many users also find VPNs handy for accessing services or content restricted in their countries or geographic areas.
Special Offer: Get $100 off your order!
Email [email protected] to get started!
Why Use PiVPN?
There are many VPN services in the market, so why use PiVPN? The primary reason is to avoid monthly subscription fees. To use a secure, encrypted network, you need a VPN server, which you pay for when using the online services.
However, you can use the PiVPN program to set up an OpenVPN server or the WireGuard server (communication protocol) on a Raspberry Pi. Both are free and open-source, so you don't have to buy or pay monthly fees to use the services.
OpenVPN is the traditional VPN server software, while WireGuard is the new kid on the block. The latter delivers better performance and is more energy-efficient, making it ideal for mobile devices. However, we will focus on the OpenVPN server.
Once you set up the system, you will get the same benefits as when using the paid VPNs, which include the following:
- Safe web browsing in unsecured networks
- Data encryption
- Access to geo-blocked content
Therefore, you can work from anywhere while securely accessing the devices and services in your office. Also, you can access smart devices in your home securely from public networks outside.
How to Create A Raspberry PiVPN Server
Before getting down to the installation process, you need the following items:
- Raspberry Pi
- Micro-SD Card
- Wi-Fi or Ethernet Cable
- Power Adapter and USB Cable (Type-C)
- Raspberry Pi Case (Optional)
Setting Up Raspberry Pi for First Boot
A Raspberry Pi comes with no OS from the manufacturer. Thus, the first task is to install one.
Step 1
The hardware supports several Linux distributions, but the recommended one is the official Linux-based operating system from the Raspberry Pi Foundation. Select the "Raspberry Pi OS with desktop and recommended software" option (about 3GB).

The Raspberry Pi operating system download page
Step 2
Next, download balenaEtcher. Its purpose is to flash the Linux-based OS image to the Micro-SD card.

The balonaEtcher download page
Step 3
After downloading both programs, connect the Micro-SD card to your computer, then open balenaEtcher. Point it to the directory containing the downloaded Linux OS image, then to the Micro-SD card and click on "Flash."
Step 4
Next, set up the single-board computer to automatically connect to your wireless network for communication purposes. But with a mouse, keyboard, and HDMI display, you don't need to link the Pi to the wireless network. Skip to the setup part below.
Step 5
Go to the Raspberry Pi root folder, then create a file named "wpa_supplicant.conf" using your computer. Copy this code into that file and ensure the Wi-Fi name & password are the same as the ones used on your PC. The two must be on the same network to communicate.

Step 6
Still, in the root folder, create an empty file named ssh, remove the SD card and slip it into the Raspberry Pi.
Step 7
Power on the Raspberry Pi using the power adapter and USB cable. Download the SSH client Putty to enable communication with the Pi.
Step 8
Open Putty, set "raspberry pi. local" as the hostname and 22 as the port, then click "Open."
Setting Up PiVPN on Raspberry Pi
After clicking "Open" in Putty above, it will open a terminal.
Step 1
Run this install script on the terminal:
curl -L https://install.pivpn.io | bash
After downloading PiVPN, it will search for updates in the system and begin installing all the necessary packages. If the process indicates pending updates are available, consider updating the system after completing installation.
Once the following dialog box pops up, you can proceed with the configuration.

PiVPN automated installer start screen
Click "OK" to continue.
Step 2
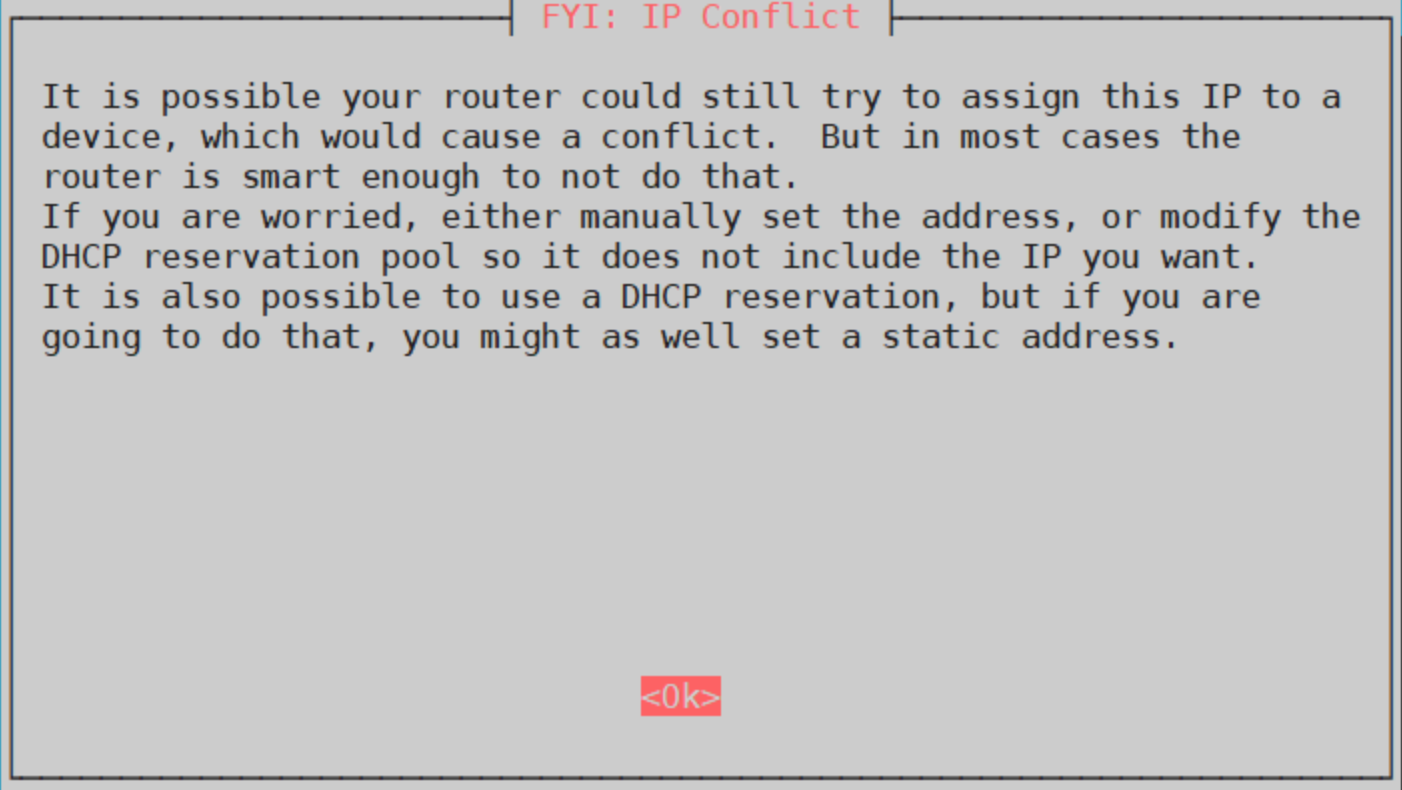
Next, give the VPN server a static IP address. Routers assign IP addresses dynamically to the connected devices in any network. Therefore, locating the VPN server will be challenging when it has a dynamic IP address, but a static one makes it easy for the VPN clients to know where to find it.
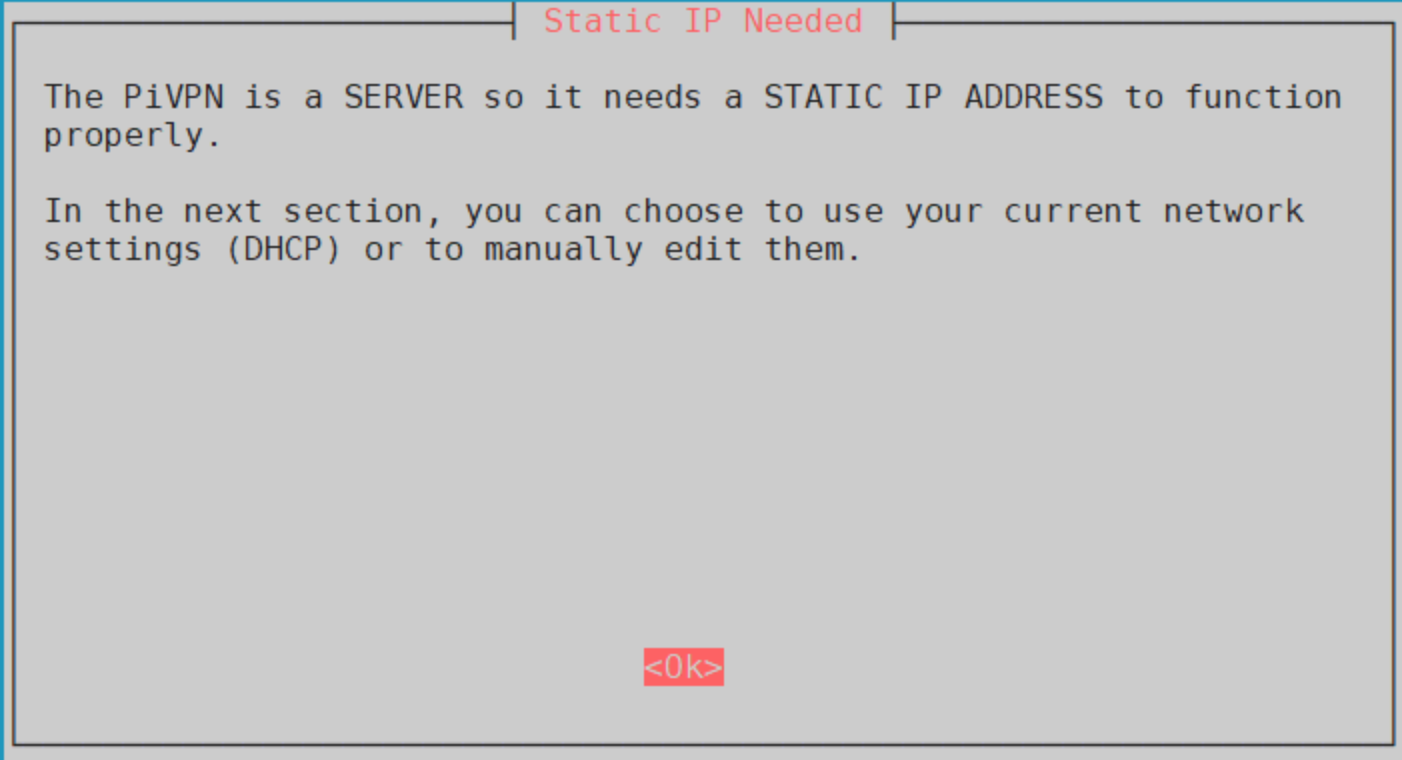
Use the currently assigned IP address as the static IP or set one manually. If you use the second option, you will have to enter the default gateway manually. The choice is yours.
Click OK to proceed to the next step.
Step 3
Pick the local user who will hold the OVPN configurations.

Click "OK," and you will get a list of users. Pick the user you prefer, and you should have log-in details for that user. The default user is "pi."

Step 4
Next, pick OpenVPN as the Raspberry Pi VPN server to install.

Step 5
For the communication protocols (UDP and TCP) dialog box, select "No" to proceed with the default settings.

Step 6
Choose the OpenVPN port to wait for the external connections. Retain the default port or pick any value above 1024.
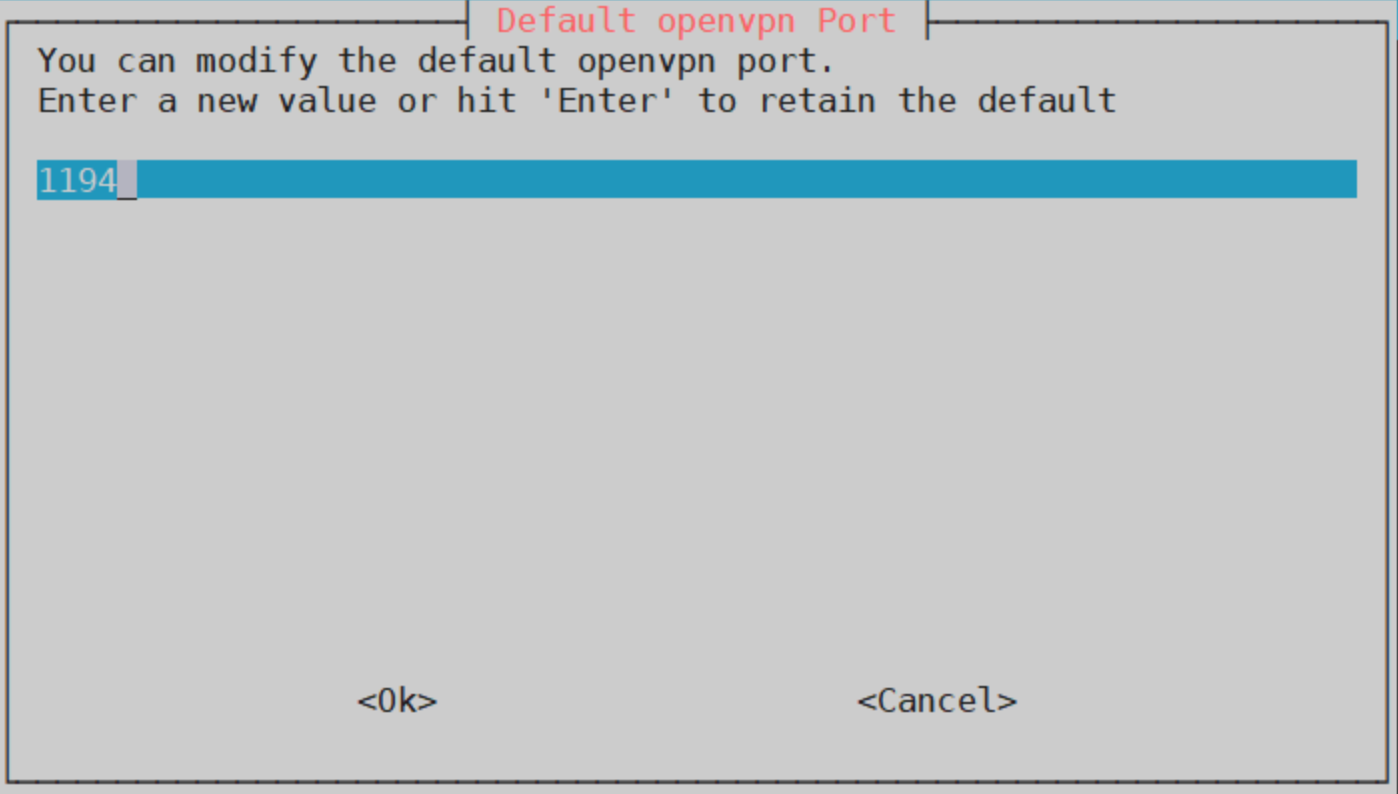
Confirm the port number by clicking "Yes."

Step 7
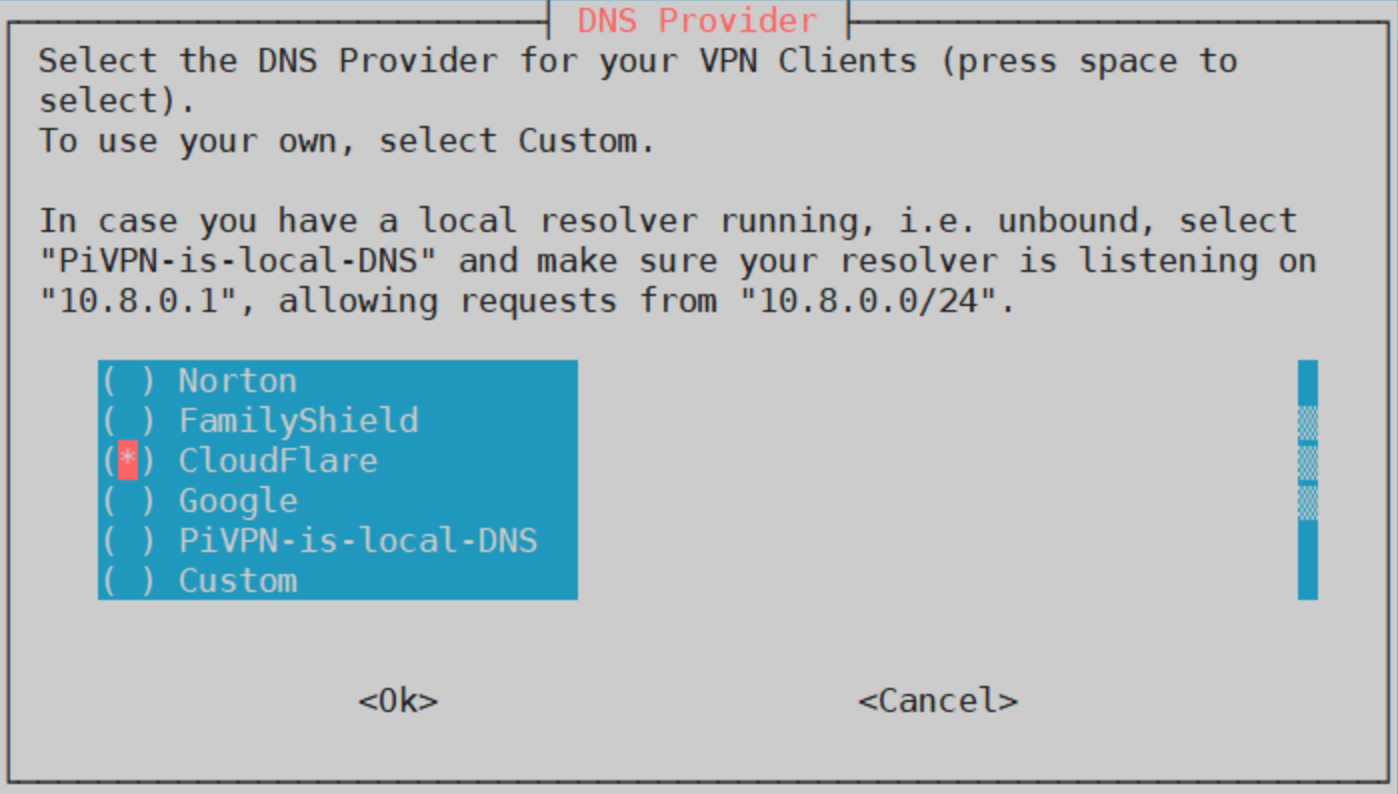
Next, pick your preferred DNS provider to handle the requests. It is important to note that the DNS provider you choose will see all your requests, so pick the one you are comfortable with from the list.
Step 8
Pick a public IP address.
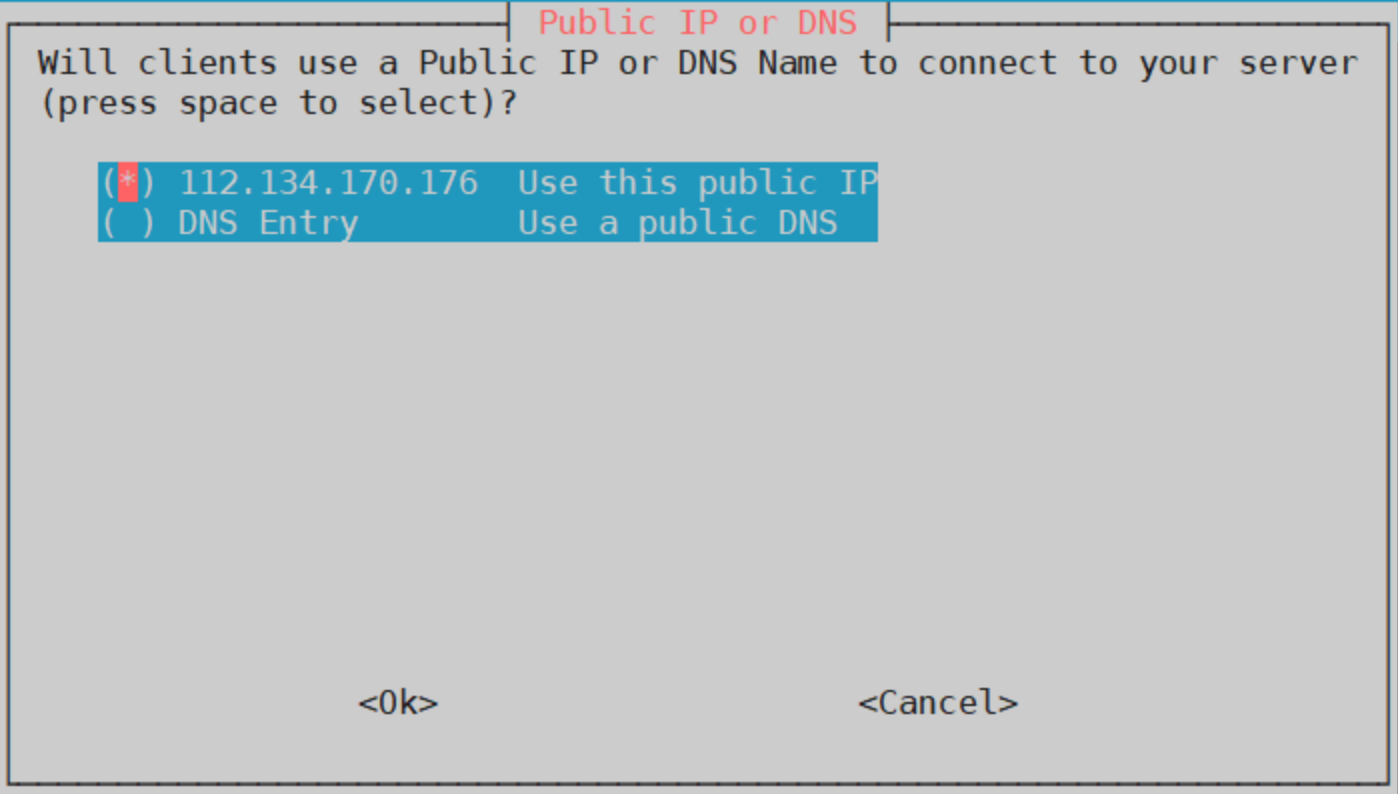
Step 9
Generate the HMAC and server keys, then proceed with the following step. Enable unattended upgrades of security patches to the VPN server, and complete installation.

Step 10
Reboot Raspberry Pi

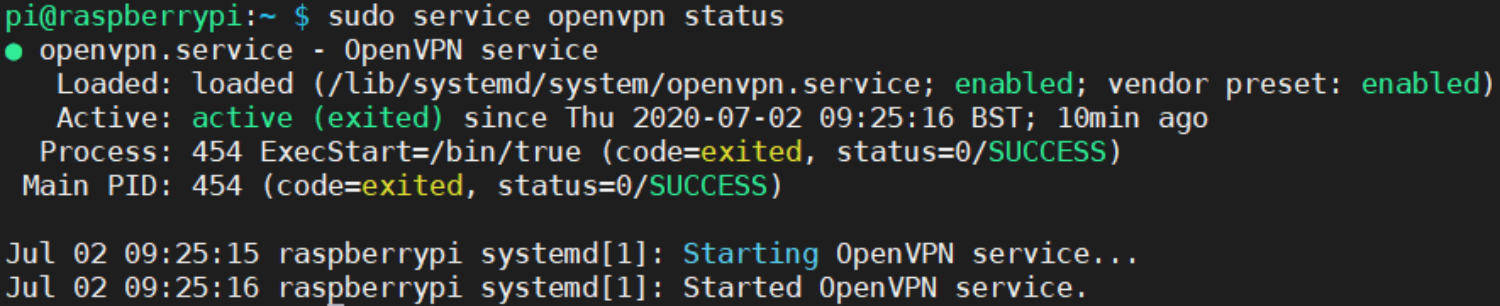
After rebooting, enter the following command to check whether the installation was successful.
sudo service OpenVPN status
This response means it was a success.
Port Forwarding
A few more steps to go, and your private network will be ready. It will be unreachable after completing the server configuration because the configured port is inaccessible to external networks. To change this, do port forwarding.
The process involves opening a port in your router, which creates a channel to the server from the public network. But each router has a different port forwarding setup process, so check the manufacturer's instructions for your specific router model.
Creating an OpenVPN Client Profile
Once you have sorted out the accessibility issue, create a client OVPN profile for every client device you want to access the remote server. Run this command on the terminal to input a client device.
pivpn add
Some data will appear on the terminal, and you will have to enter the client name, the certificate's duration of existence (number of days), and the password.
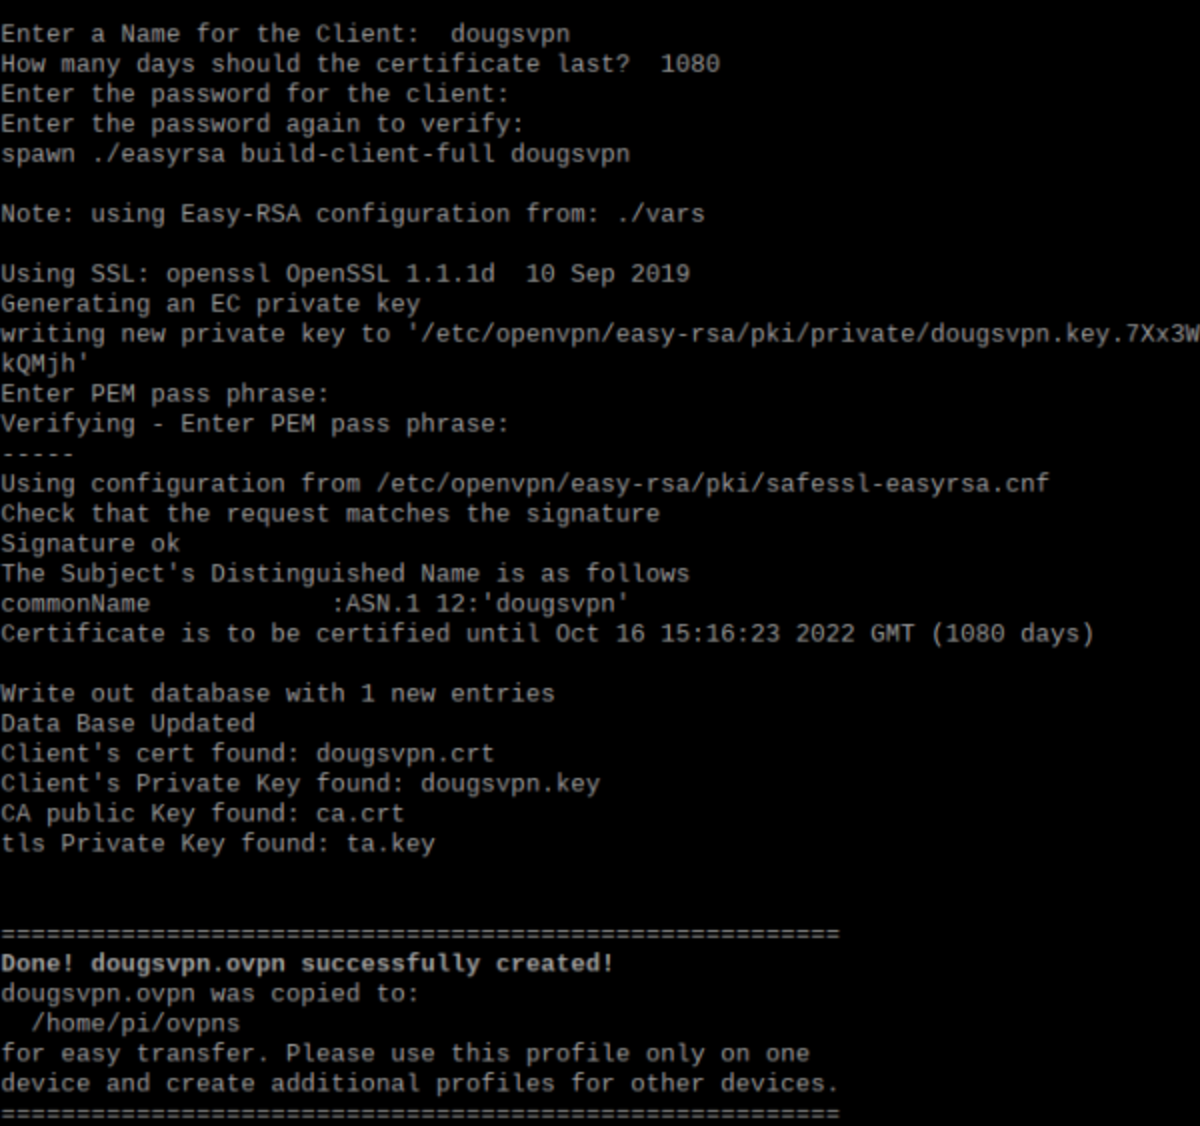
The OpenVPN client profile creation process
Make the password strong because it will secure the encryption key. Once you enter, Easy-RSA will generate a 2048-bit encryption private key and save it in the "/home/pi/ovens" directory. You will have to access the Ovpns folder to copy the generated files to your device. Keep these 2048-bit keys safe because they are the only way to access the VPN.
However, if you don't want to input a password, type this command:
pivpn add nopass
To revoke an Ovpn client profile, use:
given revoke
To list all revoked and valid certificates, type this command:
pivpn list
Connecting Clients
The last step is to connect clients to the Raspberry Pi OpenVPN server. First, access and copy the encryption key file (.ovpn), then paste it into the device you want to use as the client. You can view all the client profiles by typing these commands in the terminal:
cd home/pi.ovpns/
ls
Step 1
Use an SFTP such as FileZilla to copy the files within the same network. Launch the software on your laptop, enter the Raspberry Pi's IP address, username, and password, then click "Quickconnect." If unsure about the IP address, type the following command on the terminal:
hostname -I

Step 2
After logging in, look for the ovpns folder and double-click it to get to the .ovpn file.

Step 3
Drag and drop this file to a safe location on your computer.

The file has all the details required to create the VPN tunnel except the password. You will have to input this password whenever you want to launch the connection.
Step 4
Also, you need the OpenVPN Connect client to launch the private network using the encryption key file.

The OpenVPN Connect client software downloads files for different Windows Architectures
Download, install and run the software. It will minimize on the taskbar, so right-click it and select "import file." A file explorer window will pop up. Locate the .ovpn file and double-click to import it.
Step 5
After successful importation, right-click on the OpenVPN Connect icon on the taskbar and select "connect." The software will read the .ovpn file and ask you for the password. Key it in and click "OK."
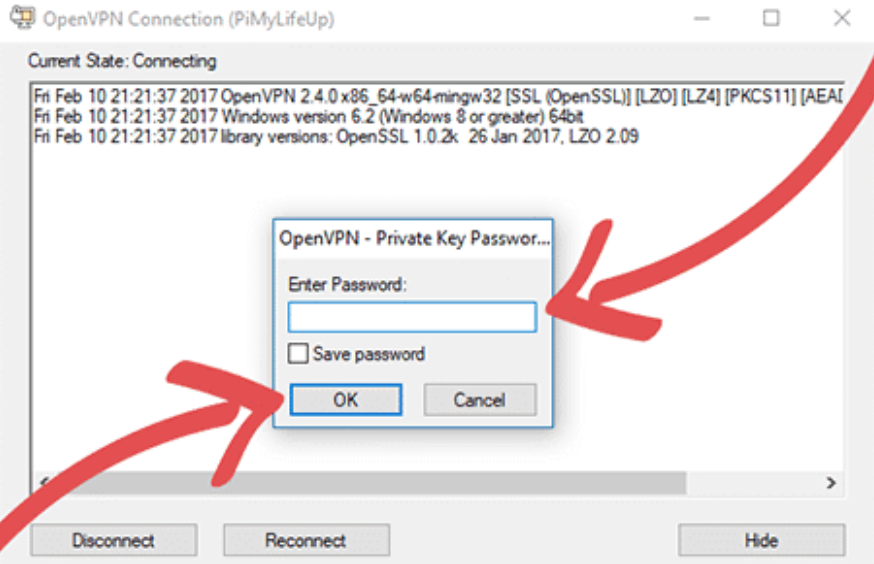
The password pop-up box
The client will try to connect to the OpenVPN server in the Raspberry Pi, and if the icon turns green, you are good to go. But if it turns yellow, the connection was not successful. In most cases, the issue is with port forwarding. Google your router's model number to find the correct way to solve the problem.
Some ISPs also block some ports, so try to find out if the issue comes from your service provider.
If using a dynamic DNS service, ensure it has your most recent IP address. The connection will fail once you change the IP address and the DNS settings do not.
Summary
There you have it! Creating a VPN using Raspberry Pi might seem arduous, but it is worth it once you complete the project. If you need further clarification on any part of this task, contact us for more details.
Special Offer: Get $100 off your order!
Email [email protected] to get started!